What: Sourdough Bread
Purpose: To reconstruct the recipes in BnF. Ms. Fr. 640 (known as 640 going forward) for moulding objects in bread. From our preliminary research on early modern bread we realized that most bread recipes (sourdough) were quite simple. Flour, water, salt and yeast, the main components of bread, would have been readily available.
We have looked at Hannah Glasse's 1747 recipe for French sourdough for guidance, but since we want our experiment to focus on the “molding” rather than the “baking” we have not tried to follow it directly and have also consulted contemporary recipes for sourdough bread. In addition, from the recipes we looked at, both modern and past, the ingredients and recipe steps haven’t changed drastically over the centuries; therefore we are focusing our experiment more on the techniques of molding explicated in 640.
We found three recipes in 640 that mention molding in bread:
Bread Molding Recipes From BnF. Ms. Fr. 640
1. p140v_1: To cast in sulfur
To cast neatly in sulfur, arrange the pith of bread under the brazier, as you know. Mold whatever you want into it & let it dry & you will have very neat work.
Notes- Is "neatly" a specific way of casting or does it just imply that the cast will be as detailed as the original? ; does the bread need to be cut in half? ; "as you know" implies that the audience already has knowledge of this procedure ; "let it dry"- under heat? sitting out in room temp.?
2. p140v_2: Molding and shrinking a large shape
Mold it with the pith of bread just out of the oven, or like that aforementioned, & in drying out it will shrink & consequently so will the medal that you will cast. By these means - lengthening out or enlarging the imprinted bread - you can vary the shape & from one face make several different ones. The bread straight from the oven is best. And the one which has been heated twice contracts more. You can cast sulfur without letting the imprint on the bread dry, if you want to cast it as large as it is. But, if you want to let it shrink, let it dry to a greater or lesser extent.
Notes- Pith must be hot, either right out of the oven or heated by placement under a brazier (heat source) ; it seems that as the bread shrinks the mold will too ;
this recipe also includes comments on manipulating the mold in the bread- this seems to be the same as above except for a matter of degree; if you let the bread dry for longer the mold will get smaller, so you can make variations of it
3. p156r_1:
Quickly molding and reducing a relief[a] to a hollow [mold] Make an impression in colored wax of the relief of your medal. And you will get a hollow mold, in which you can throw en noyau[b] a relief in sand. In this, you will cast your hollow in lead or tin. In this, you you will cast your wax relief. And then on this wax, you will make your hollow moule en noyau, in order to throw in it the relief in gold or silver or any other metal you would like. But to make this process go faster, if you are in a hurry, make the first impression and the first hollow out of the inside portion of the bread loaf[c], prepared as you know, and which will cast neatly. And inside this, throw in the melted wax which will give you a nice relief on which you can make your noyau.
Notes- In this case the bread mold functions as a shortcut - the bread is an improvement. This is the same bread process as the other two, but contextualized within a different set of instructions.
Questions after preliminary research:
Why would he be making these molds? What is the function of the sulphur mold? What will the molded sulfur be used for?
Session #1 - Baking
Name: Ana Matisse Donefer-Hickie and Caitlyn Sellar
Date and Time: Sept. 22, 2016 ; 2:00PM
Location: 2211 Broadway, Apt. 8K
Subject: Sourdough Bread for Moulding Trial #4
Conditions: Outside Temp. 86F
Method
We only made one loaf of bread during this first trial. Our focus on this day was to determine the bread recipe we would use, as well as to make a plan for molding with our bread loaves. We also wanted to practise reading historical bread recipes against modern bread recipes to map differences and determine how close they were. Though ultimately we read Hannah Glasse (1747) the closest, we also looked at recipes from John Evelyn (1620-1706), Robert Mays (1685), and Hannah Woolley (1672).
Glasse recipe:
"Receipt for making Bread without Barm, by the Help of a Leaven.”
Take a Lump of Dough, about two Pounds (that’s a lot) of your last making, which has been raised by Bar, keep it by you in a wooden Vesse, and cover it well with Flor. This is your Leaven; then the Night before you intend to bake put the said Leaven to a Peck of Four and work them well together with warm Water. Let is lye in a dry wooden Vessel, well covered with a Linnen Cloth and a Blanket, and keep it in a warm Place. This Dough kept warm will rise against next Moring and will be sufficent to mix with two or three Bushels of Flour, being worked up with warm Water and a little Salt. When it is well worked up, and thoroughly mixed with all the Flour, let it be well covered with the Linen and Blanket, until you find it rise; then knead it well, and work it up into Bricks, or Loaves, making the Loaves broad, and not so thick and high as is frequently done, but which means the bread will be better bakaed: Then bake your bread. Always keep by you two or more Pounds of the Dough of your last baking well cover'd with Flour to make Leaven to serve from one baking Day to another; the more Leaven is put to the Flour the lighter and spongier the Bread will be, the fresher the Leaven, the Bread will be less sour. Fromm the Dublin Society."
---The Art of Cookery Made Plain & Easy, Hannah Glasse, facsimile 1747 edition [Prospect Books: Devon] 1995 (p. 151) (http://www.foodtimeline.org/foodbreads.html#sourdough)
Modern recipe:
2 cups bread flour
1 1/2 cups sourdough starter, recipe follows
3/4 teaspoon salt
- In an electric mixer with the dough hook, combine the flour, starter and salt, and knead until it no longer sticks to the sides or bottom of the mixing bowl.
- Place a lightly oiled bowl, turning to coat. Cover with plastic wrap and let dough rise in a warm, draft-free place until doubled in size, 1 to 1 1/2 hours. Turn out onto a lightly floured surface. Sprinkle lightly with flour and knead gently, removing any large air bubbles. Knead into a small circle, then shape into a tight ball, pinching the seams together underneath. Place on a well-floured board or baking peel, seam-side down. Cover with a kitchen towels and let rest until doubled in size, about 1 hour.
- Preheat a baking stone, if available, on the bottom rack of an oven at 400 degrees F. With a sharp, serrated knife, cut a large "X" or cross-hatch pattern into the top of the dough.
- Spray lightly with a mister and transfer to the baking stone (or place on a heavy baking sheet lightly dusted with cornmeal) and bake until golden brown and the bread sounds hollow when thumped on the bottom, about 60 minutes. (Sourdough should have a darker crust than other breads, so leave in the oven 5 minutes after you think it is done.)
- Remove the loaf from the oven and let cool on a wire rack for at least 30 minutes before serving.
http://www.foodnetwork.com/recipes/emeril-lagasse/basic-sourdough-bread-recipe.html. — we compared this recipe against the Glasse recipe and found they were extremely similar. For the second trials we baked bread using a combination of the Glasse and another modern recipe.
Materials/Ingredients/Equipment:
Water - NYC tap water - PH unknown.
Starter - supplied by Pamela Smith and kept out of the fridge, fed daily.
Salt - non-iodized sea salt - fine grain.
Flour - Hecker’s Unbleached All Purpose Flour - there were several different kinds of flour available during the period.
Oven - would likely have been ‘beehive-like’ - hottest in the morning when you bake bread, but temperature decreases over time; we used a regular confectioner’s oven set at 400 degrees since breads using such an oven would have been baked in the morning when the oven was at its hottest
Metal Bowls
Plastic Measuring Cups
Brazier - Used the broiler of the oven to approximate the heat given off the bottom of a brazier.
Plastic Wrap
Kitchen Towels
Procedure
2:35 - We found that the starter was dough-like, glutenous, and made long strands as it is poured into the bowl; for the first trial we used Ana-Matisse’s starter, which she had fed the night before
Sea salt was ground in a bowl with a metal spoon to make salt crystal smaller and more fine
2:45 - We kneaded the ingredients together and put into oiled bowl, covered with damp towel. We finished this part of the process at 2:58, set a timer for 4:00.
4:00 - Bread kneaded and formed into a tight ball. Set on a baking sheet lined with parchment paper and left to rise again for 1 hour. Timer set for 5:00.
5:00 - Bread left to prove from 4:00 to 6:30.
6:30 - Bread put in 400F oven until 7:43. Bread has been left on kitchen counter until trial #2 (below).
Conclusions/Reflections
After this trial and some additional research (The Food Timeline mentions that it was French "pain de compaigne," (also called "French sourdough") that was made with a leaven system like the one Glasse describes [AM - which is partially why we chose it in the first place as it actually called for a starter, which we had]), we have decided to look for a different modern recipe for "pain de campaigne," as it might be slightly closer to what the author-practitioner was working with (though how close is hard to say since our ingredients are probably very different). In addition, we are going to make more loaves so that we can test four different methods for making molds using the recipes found in Ms. Fr. 640. The loaf produced during this first trial will be reheated during the second trial on Sept. 25, 2016 to test out any differences in molds produced using reheated bread.
Session #2: Preparation for baking
Name: Ana Matisse Donefer-Hickie and Caitlyn Sellar
Date and Time: Sept. 24, 2016 ; 8:00PM
Location: 2211 Broadway, Apt. 8K
Subject: Sourdough Bread for Moulding Trials #1-3
Conditions: Outside Temp. 64F, Inside Temp. 65F
Method
In the baking preparation in Session #2 and continued in Session #3, we are using a hybrid recipe of the Hannah Glasse 1747 recipe and a contemporary recipe for pain de compaigne, a french sourdough, which are very similar. Because of the similarities in process and the limits of my kitchen, we thought it would be simpler to use the contemporary recipe alongside a close reading of the 1747 recipe, instead of halving the amounts called for in the 1747 recipe (which would make a LOT more bread than we would be able to handle in my NYC kitchen). The modern recipe we referred to was from the "Foppish Baker" blog for pain de campagne au levain, which we have doubled to make four loaves.
New modern recipe
http://foppish-baker.blogspot.com/2006/01/pain-de-campagne-au-levain.html
Ingredients/Equipment
Water - NYC tap water - PH unknown.
Starter - supplied by Pamela Smith and kept out of the fridge, fed daily.
Salt - non-iodized sea salt - fine grain.
Flour - Hecker’s Unbleached All Purpose Flour - there were several different kinds of flour available during the period.
Oven - would likely have been ‘beehive-like’ - hottest in the morning when you bake bread, but temperature decreases over time; we used a regular confectioner’s oven set at 450 degrees since breads using such an oven would have been baked in the morning when the oven was at its hottest
Metal Bowls
Plastic Measuring Cups
Brazier - Used the broiler of the oven to approximate the heat given off the bottom of a brazier.
Plastic Wrap
Kitchen Towels

Procedure
- Glasse: Take a Lump of Dough, about two Pounds of your last making, which has been raised by Bar, keep it by you in a wooden Vesse, and cover it well with Flor. This is your Leaven; then the Night before you intend to bake put the said Leaven to a Peck of Flour and work them well together with warm Water.
Foppish Baker: Stir together 2 cups sourdough starter, 2 cups unbleached bread flour, and 12 tablespoons water to form a ball of dough
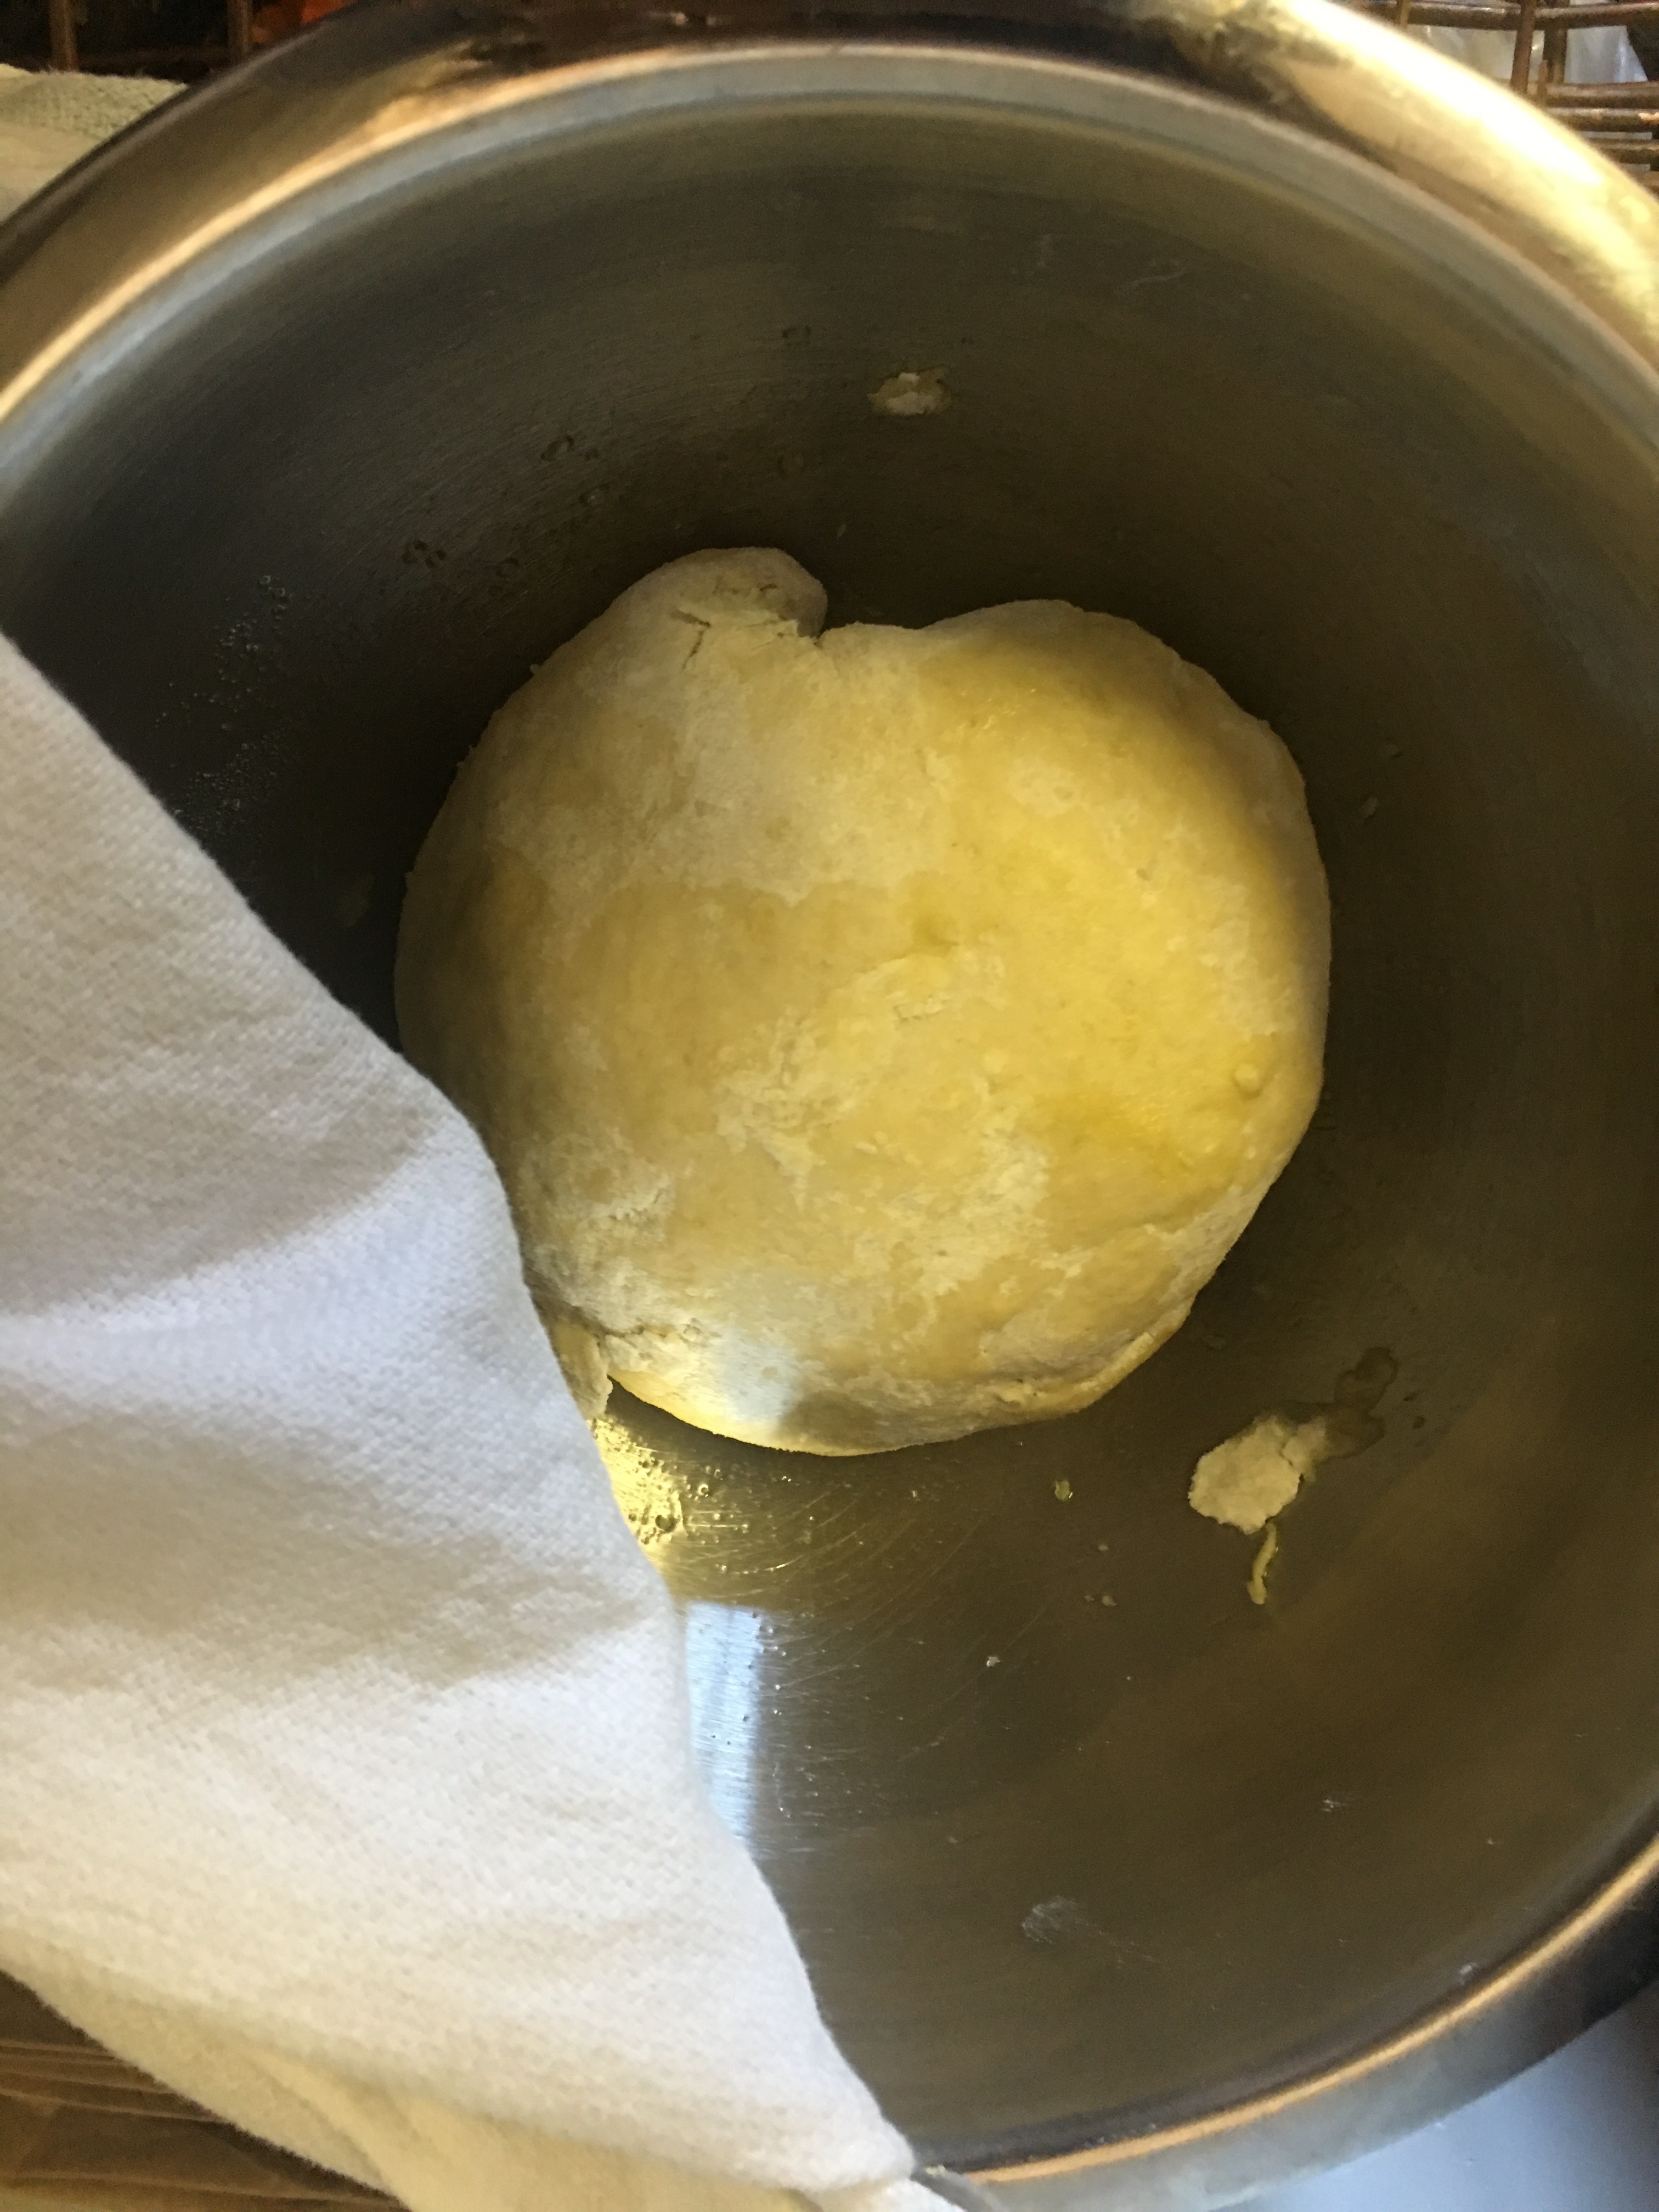
[Notes - At this point the actions instructed by both recipes are pretty much the same. Where they differ is in the amounts of ingredients used.]- - 8:21PM: Sourdough starter had bubbled nicely since the last feeding. There was a slight brown film on top, indicating that it was hungry. Mixed two cups of it with two cups of bread flour and 12 tbs of water and formed a small dough ball. Fed the rest and set it aside.

- Glasse: Let is lye in a dry wooden Vessel, well covered with a Linnen Cloth and a Blanket, and keep it in a warm Place.
Foppish Baker: Knead into a smooth ball, place in a clean bowl, cover with plastic wrap, and let rise at room temperature for four hours, then refrigerate overnight.- - 8:30PM: Kneaded it a little bit but it was very very sticky and difficult to form into a ball. Did not remove it from it’s bowl. Left to rise in kitchen under a towel
- - 12:30AM: Put in the fridge
Session #3: Baking and Molding
Name: Ana Matisse Donefer-Hickie and Caitlyn Sellar
Date and Time: Sept. 24, 2016 ; 6:30PM and 2:00PM
Location: 2211 Broadway, Apt. 8K
Subject: Sourdough Bread for Moulding Trials #1-3
Conditions: Outside Temp. 64F, Inside Temp. 65F
Methods
We will be baking the bread by continuing to use the hybrid recipe from Session #2. After the breads are removed from the oven we will cut them in half. One mold trial will be done with each half loaf (leaving two and a half for consumption). The mold will be taken, measured immediately, dried for 10 minutes (if applicable), and then measured again to assess shrinkage.
Ingredients/Materials/Equipment
Serrated knife
Plastic cutting board
Oven (set to 450F or at broil)
Clear plastic skull
Metal baking pans
Parchment paper
Procedure
Baking
- Glasse: This Dough kept warm will rise against next Moring and will be sufficent to mix with two or three Bushels of Flour, being worked up with warm Water and a little Salt.
Foppish Baker: Cut the dough into six pieces and mix with 101/2 cups unbleached bread flour, 4 cups cool water, 5 teaspoons salt.- - 6:30AM: The dough was very bubbly and sticky when it was cut up. I cut it into about eight pieces, not six, which was difficult because it was so sticky. I did not remove it from the bowl, just cut pieces out of the mixture and transferred them to a larger bowl. I added the other ingredients and then mixed them together with a spoon until they began to stick, at which point I switched to my hands.
- Glasse: When it is well worked up, and thoroughly mixed with all the Flour, let it be well covered with the Linen and Blanket, until you find it rise
Foppish Baker: Mix and knead until smooth (the dough should pass the windowpane test). Put the dough in a clean bowl, cover with plastic wrap and let rise at room temperature for three hours, or until it has just begun to rise.
[Notes- Both Glasse and the Foppish Baker place the rise at two different points, Glasse before kneading and the Foppish Baker afterwards. For Glasse, the dough is “mixed,” “risen” and then “kneaded well.” The Foppish Baker conflates “mixing” and “kneading” into one step, so that the dough is “mixed and kneaded” and then left to rise. We followed the Foppish Baker recipe in this, though it would be really interesting to do a trial of each recipe and record the differences between the two products. If we were to do this experiment again, we might start with that. We didn’t notice this discrepancy when we were making our plan or when I started baking this morning. If we had, we might have followed Glasse instead, or set out to make loaves according to the different rising instructions to see what the differences might be.- - 6:38AM: Kneaded the bread. [AM- Note that the “windowpane test” is something that I knew about because of my experience baking, but not everyone would.]
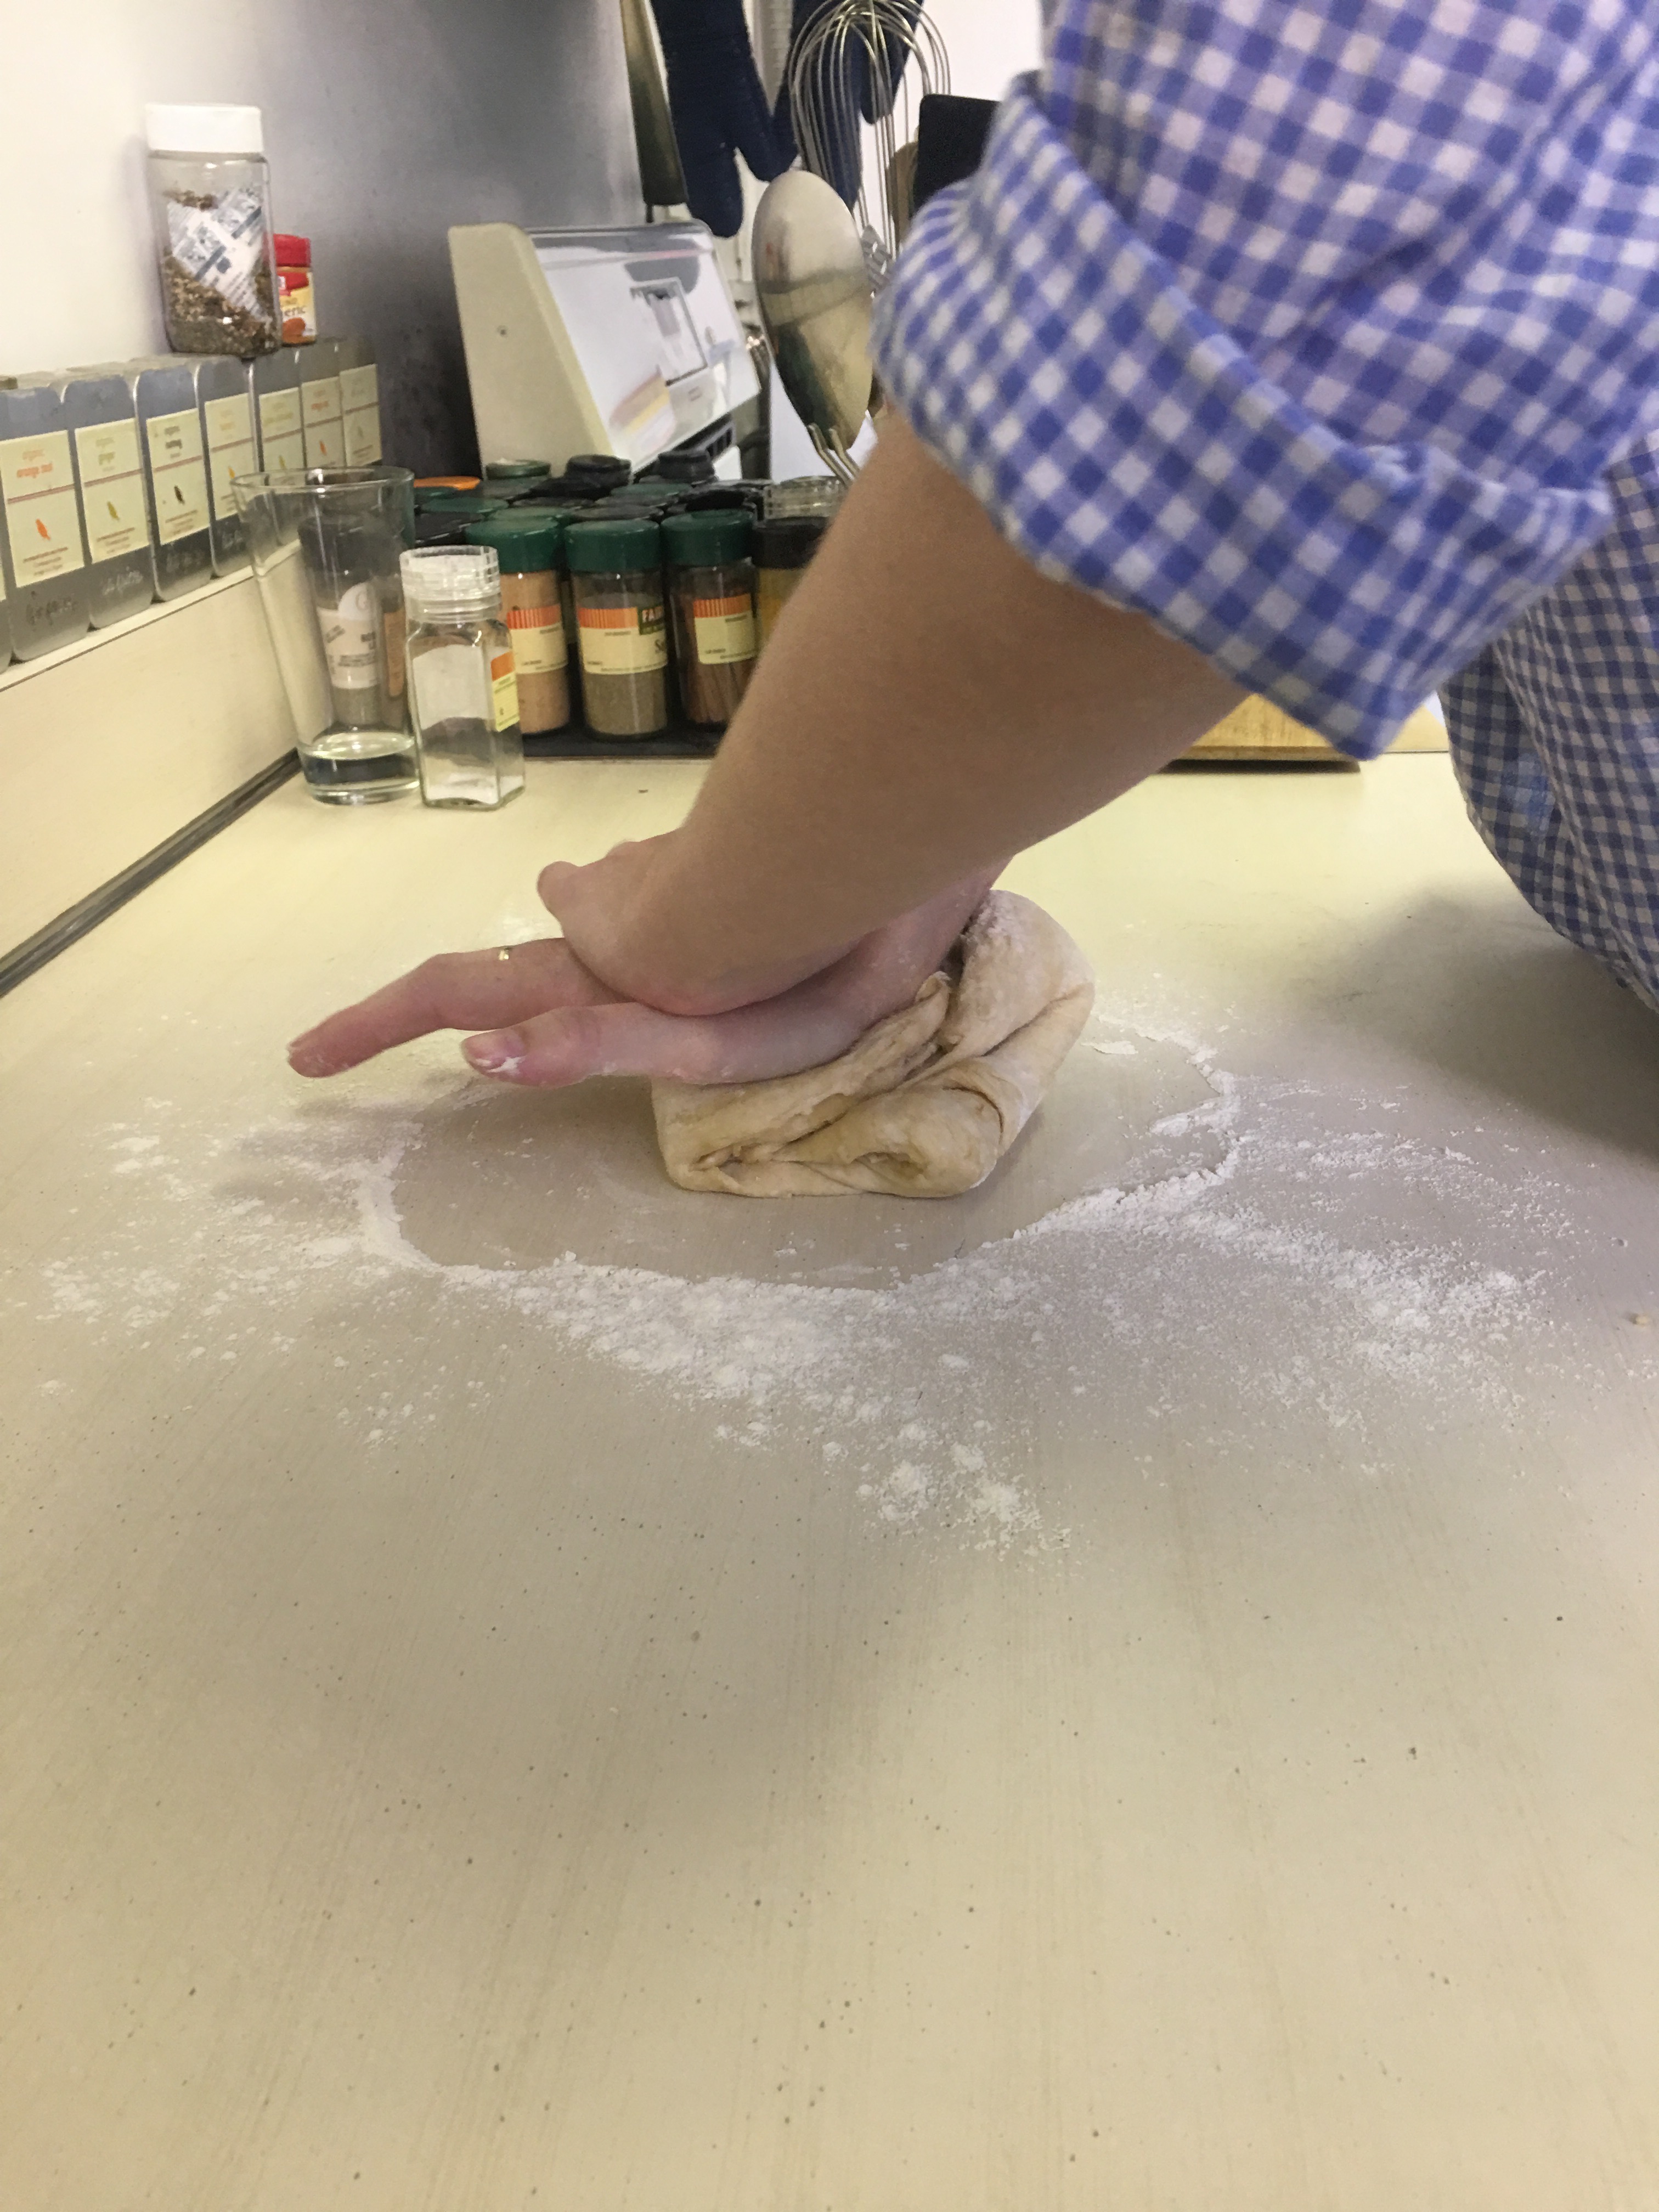
- - 7:48AM: After windowpane test (it was close to passing but didn’t have time to knead it further; thought that the denser texture of an underkneaded loaf might take a mold better anyway), put the dough in a clean bowl and covered it with both cling film and a towel, leaving it to rise in kitchen (which is quite warm)
- Glasse: then knead it well, and work it up into Bricks, or Loaves, making the Loaves broad, and nnot so thick and high as is frequently done, bu which means the bread will be better bakaed
Foppish Baker: Divide the dough into four pieces (to make four loaves) and form boules. Place them on cooking sheets lined with baking parchment, sprinkled with semolina flour. Spray dough with oil and cover with plastic wrap. Let rise at room temperature for four hours, then refrigerate overnight.
[Notes - Glasse requires only one rise, between the mixing and the kneading, while the Foppish Baker requires two. We kept the two rises (sticking with the Foppish Baker recipe), but omitted the second overnight refrigeration because of time constraints.]- - 11:00AM: Dough was very sticky when divided - it did not want to come apart. But the cuts held and were able to pull the stretchy dough out into four pieces, which we then formed into balls and placed onto two baking trays lined with parchment paper (two boules per tray) and left to rise.
- Glasse: Then bake your bread.
Foppish Baker: Remove the dough from the refrigerator one hour prior to baking and preheat the oven to 475*F with a steam pan on the bottom rack, and a baking stone on top. Once the oven is hot, either slide the baking parchment onto the baking stone, or put the pan into the oven. Pour a cup of boiling water into the steam pan, mist the oven walls with water and close the oven door. Mist again after about a minute, then again in another minute, then lower the temperature to 450*F. Bake for 30 minutes (rotating loaves halfway through if necessary), or until the crust is dark reddish-brown. Let cool on the baking pan for about five minutes, then transfer to a wire rack and let cool one hour before slicing and eating.
[Notes - Note the wealth of detail that the Foppish Baker puts into this part of the recipe vs Glasse’s instruction to simply “bake your bread”. This suggests that early modern bakers had more knowledge of baking processes and probably that their oven temperatures would be more variable and they would be expected to know their own equipment better than the recipes author.]- - 2:16PM: All four boules go into a 450F oven to bake. For this step, we are going to accord more with Glasse’s simple instructions, using the Foppish Baker’s 450F oven as a reference point, and forego the Foppish Baker’s elaborate instructions (AM- from what I know of baking, the misting and steaming is to get a delicious crust, and we are more concerned with the “pith” or interior of the bread than with a delicious crust).
- - 2:48PM: Checked on the loaves in the oven and saw that they need to be baked for some minutes longer-- we set the timer for 8 minutes. We did not rotate the loaves
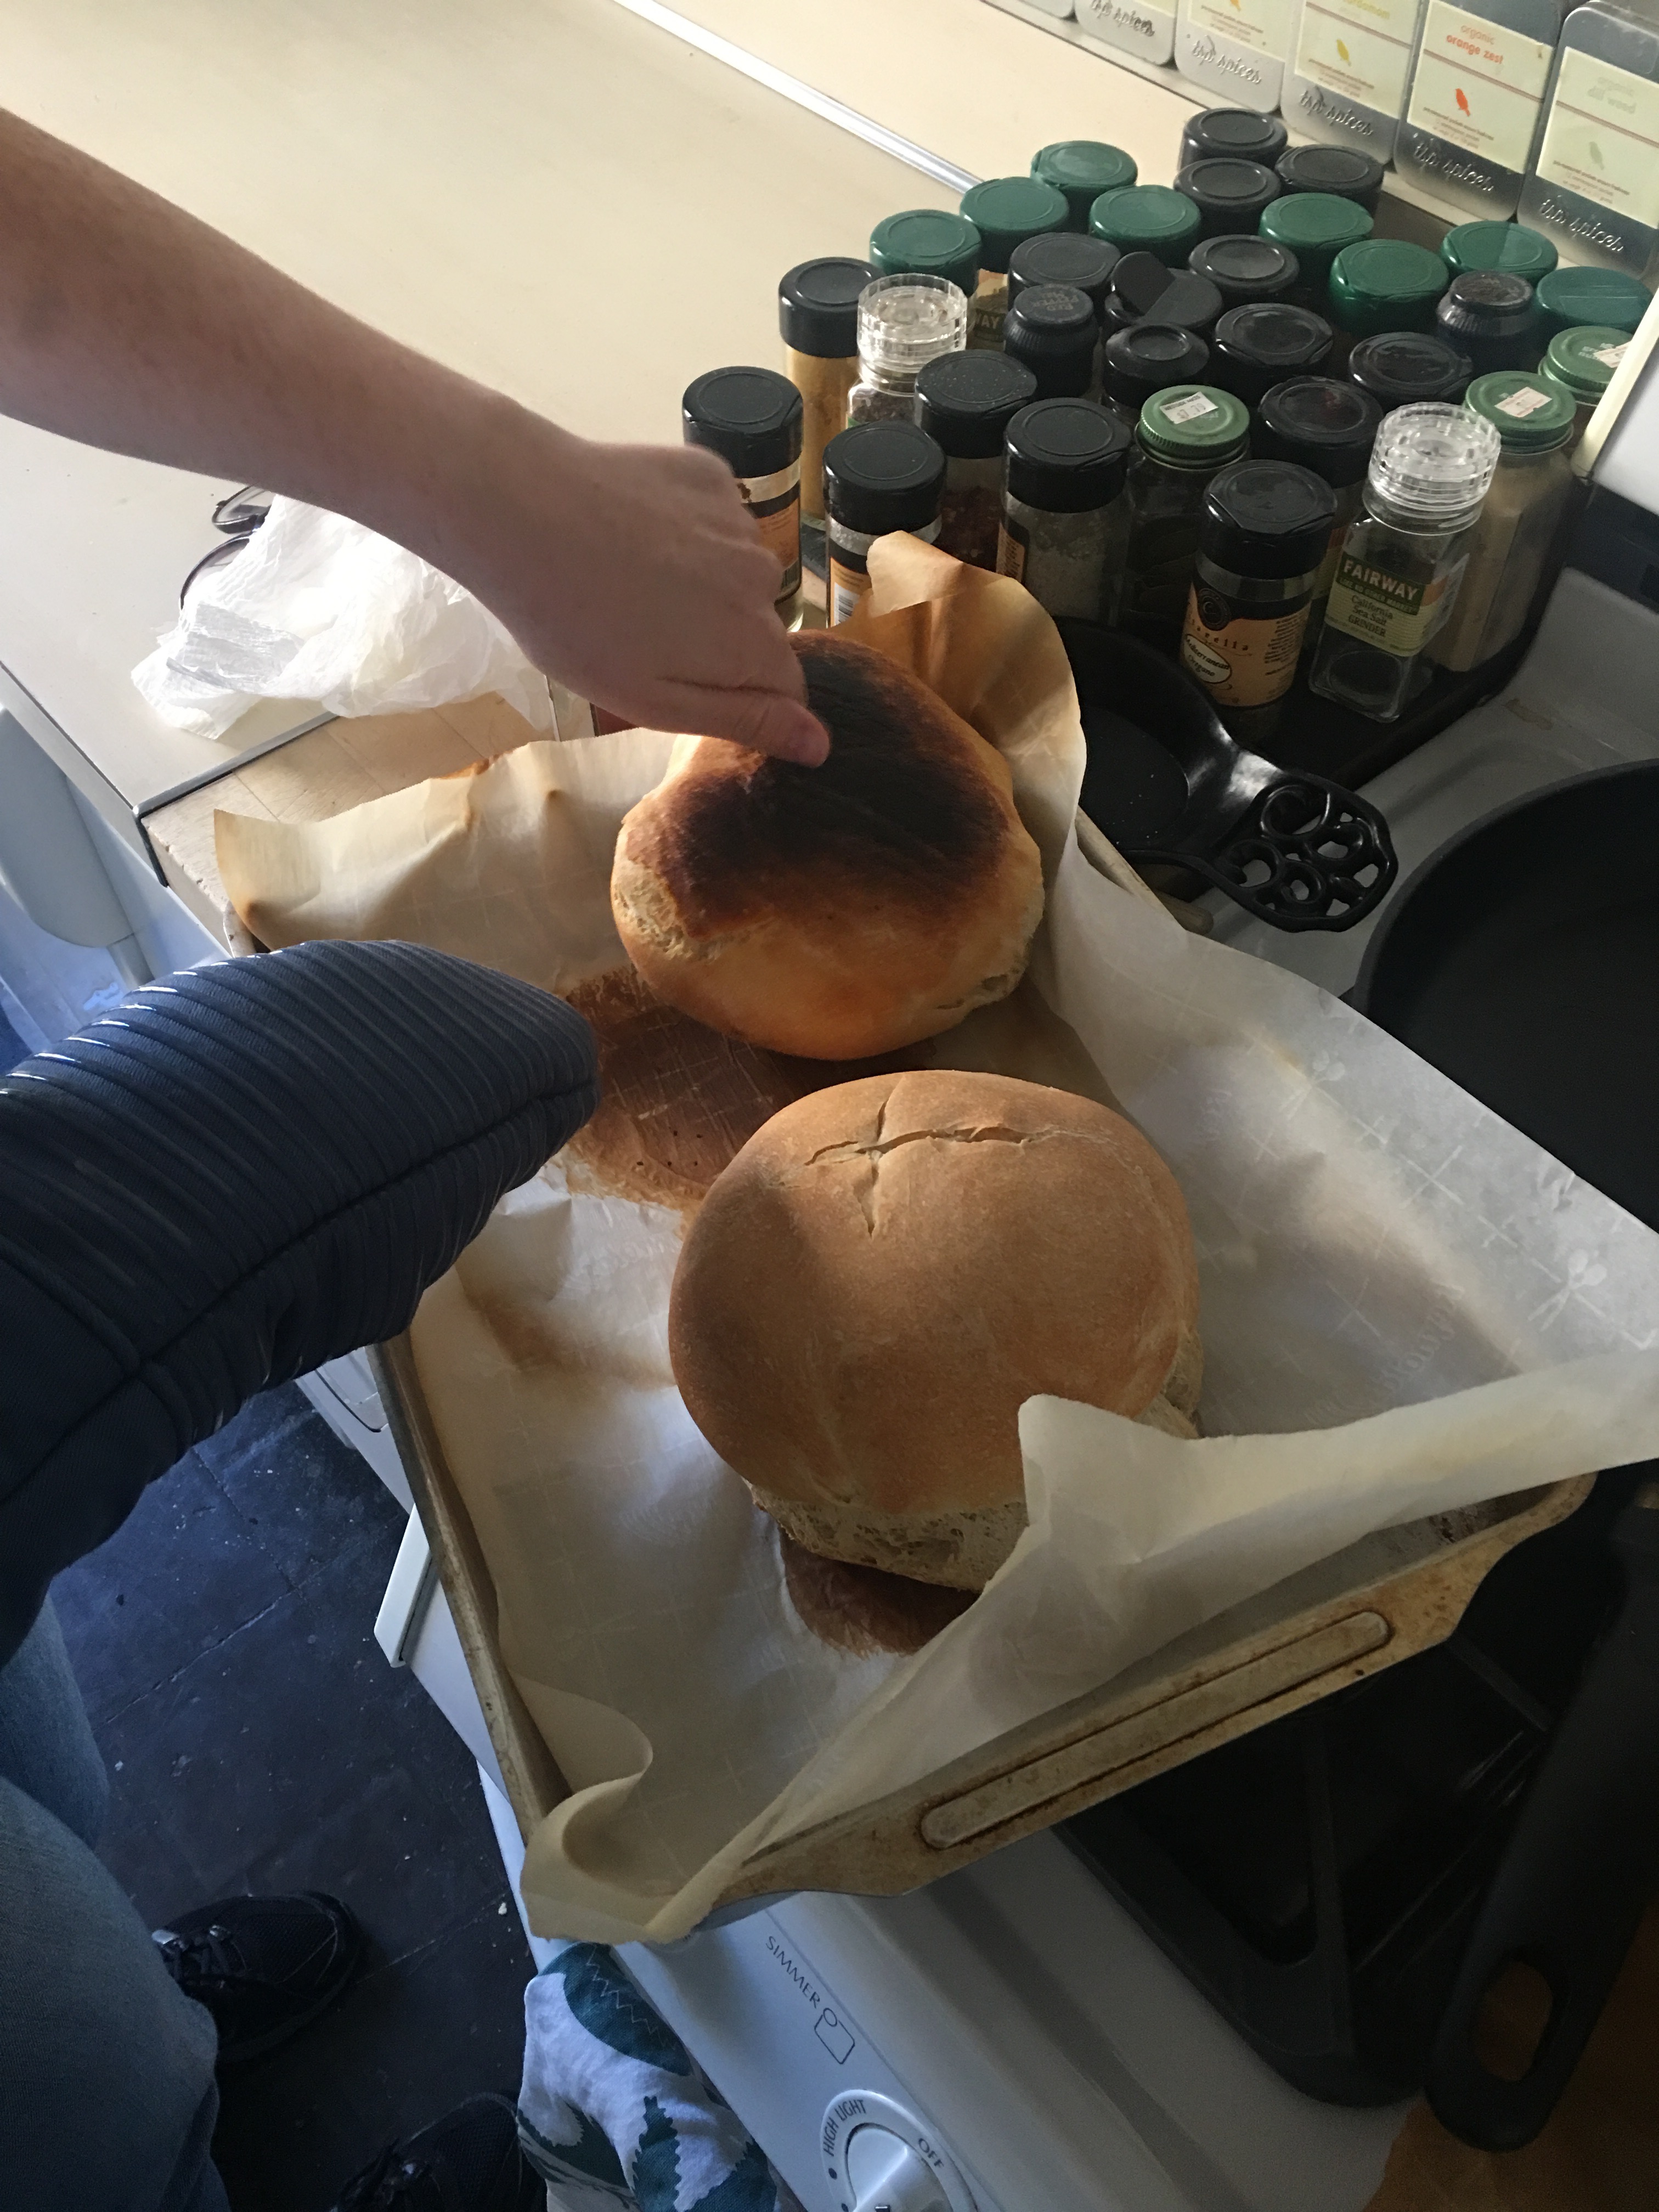
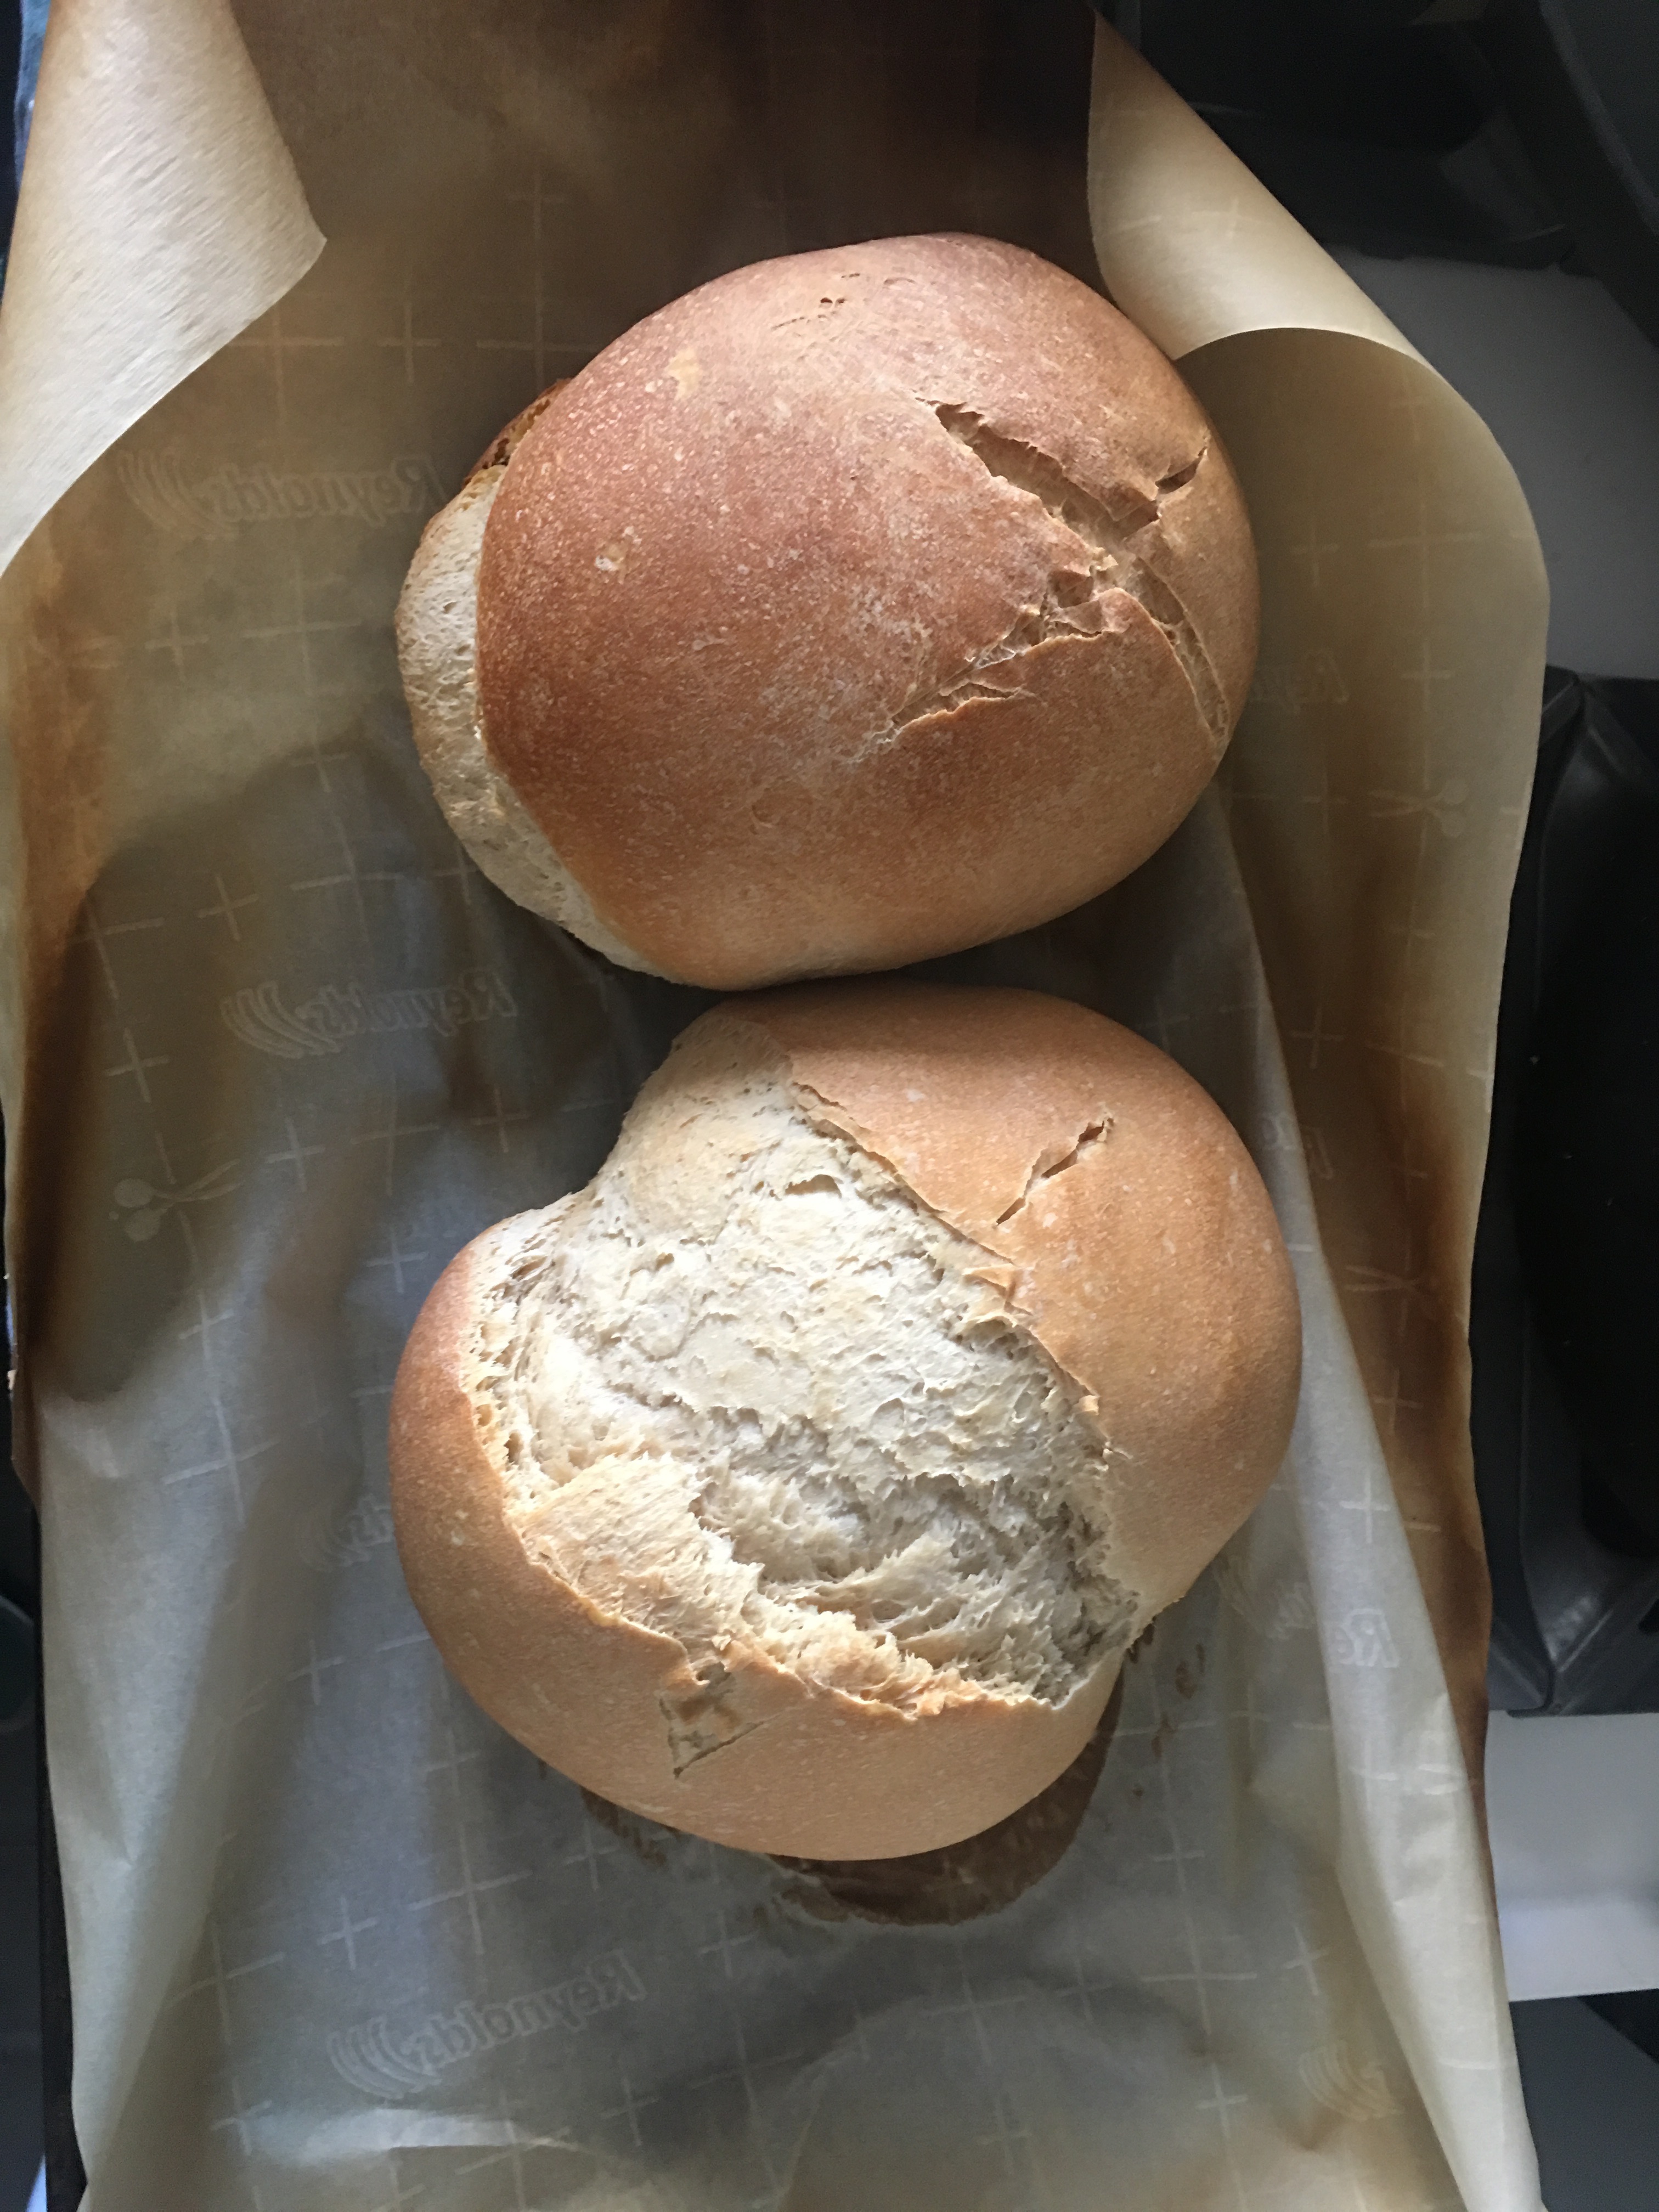
- - 2:56PM: Took the loaves out of the oven and knocked on them to ensure that they were finished. We noticed that the crust was very hard.
- Glasse: Always keep by you two or more Pounds of the Dough of your last baking well cover'd with Flour to make Leaven to serve from one baking Day to another; the more Leaven is put to the Flour the lighter and spongier the Bread will be, the fresher the Leaven, the Bread will be less sour. Fromm the Dublin Society."
1. Trial 1: Molding using fresh bread, using recipe 1 and 2 above from Ms. Fr. 640 "Mold it with the pith of bread just out of the oven. Let dry. As a control we are letting this one dry in the open air."
- 3:03PM: We took the one of the fresh loaves and cut it in half using a serrated knife. We noticed that the pith was very springy and it was also very hot (there was steam coming from the bread). We placed the clear plastic skull into one side of the bread [we were unsure of how long to leave the object in for, but decided on 2 minutes because that is when it felt like the object became difficult to remove, indicating that the bread had absorbed its shape]
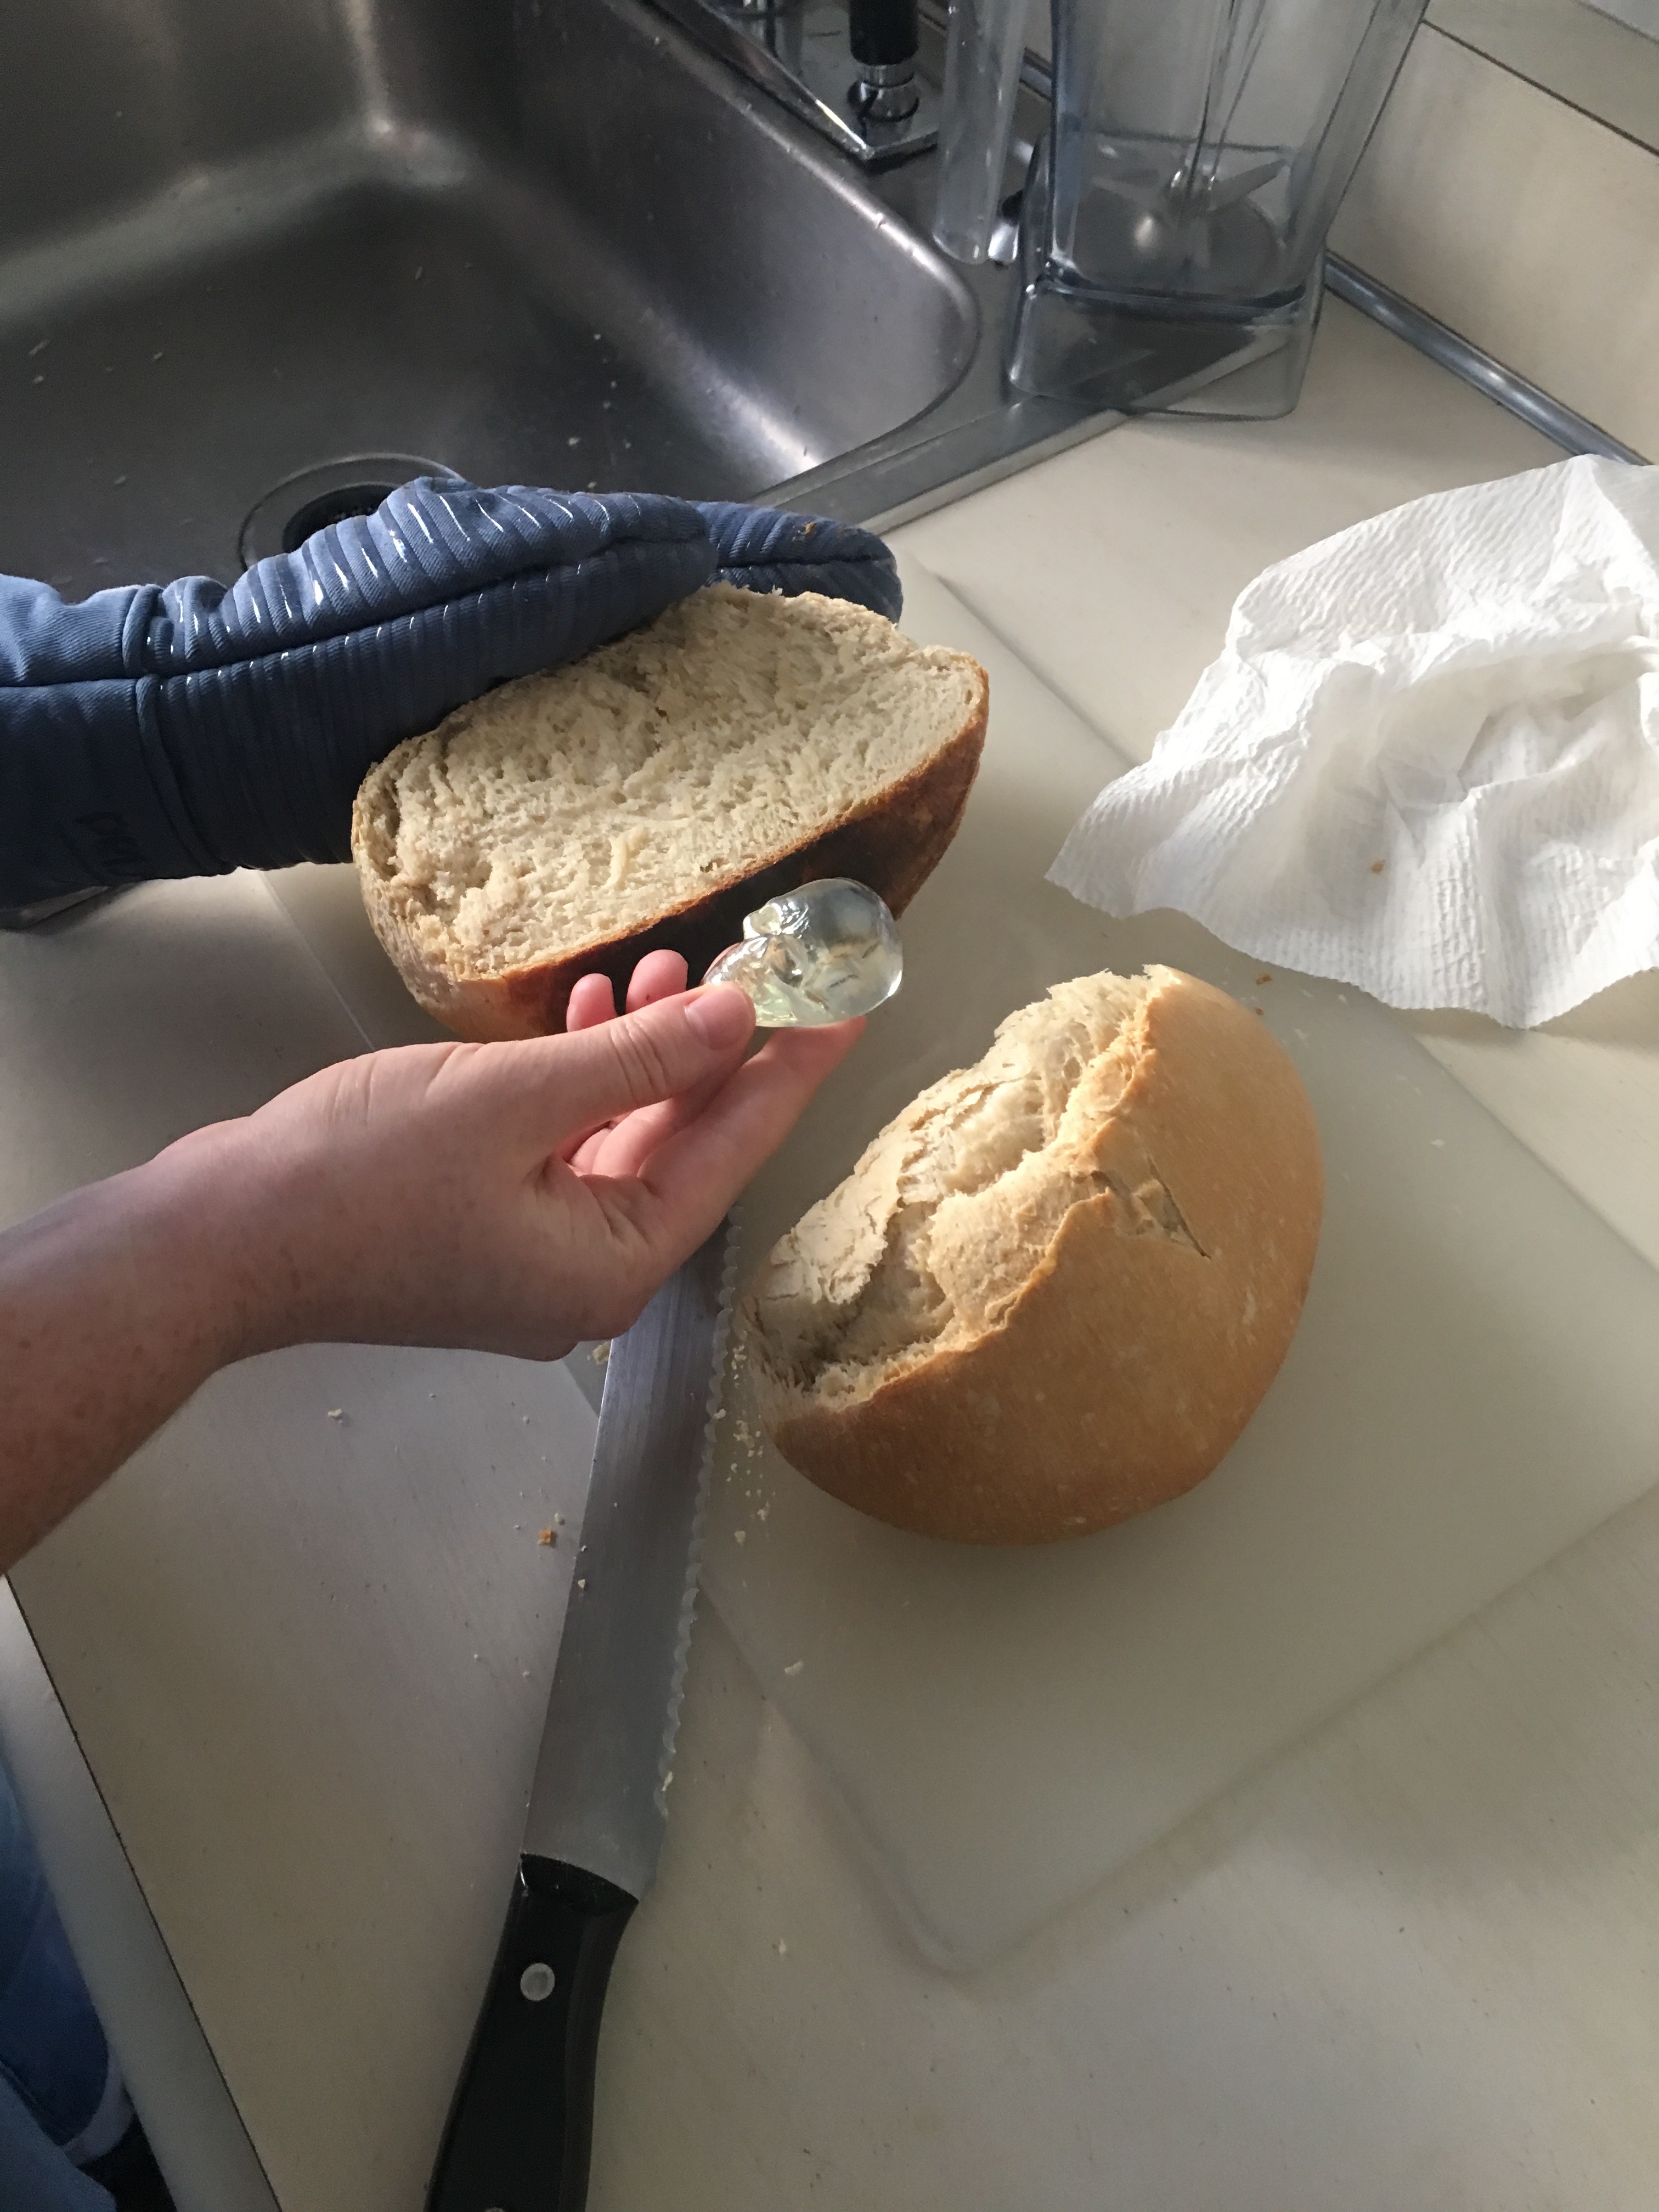
- 3:05PM: Took object out of bread. We noted that the impression in the bread was mostly of a skeleton, but lacking fine detail (could only make out shape of skull and eyes). It measured 6cm x 4cm.
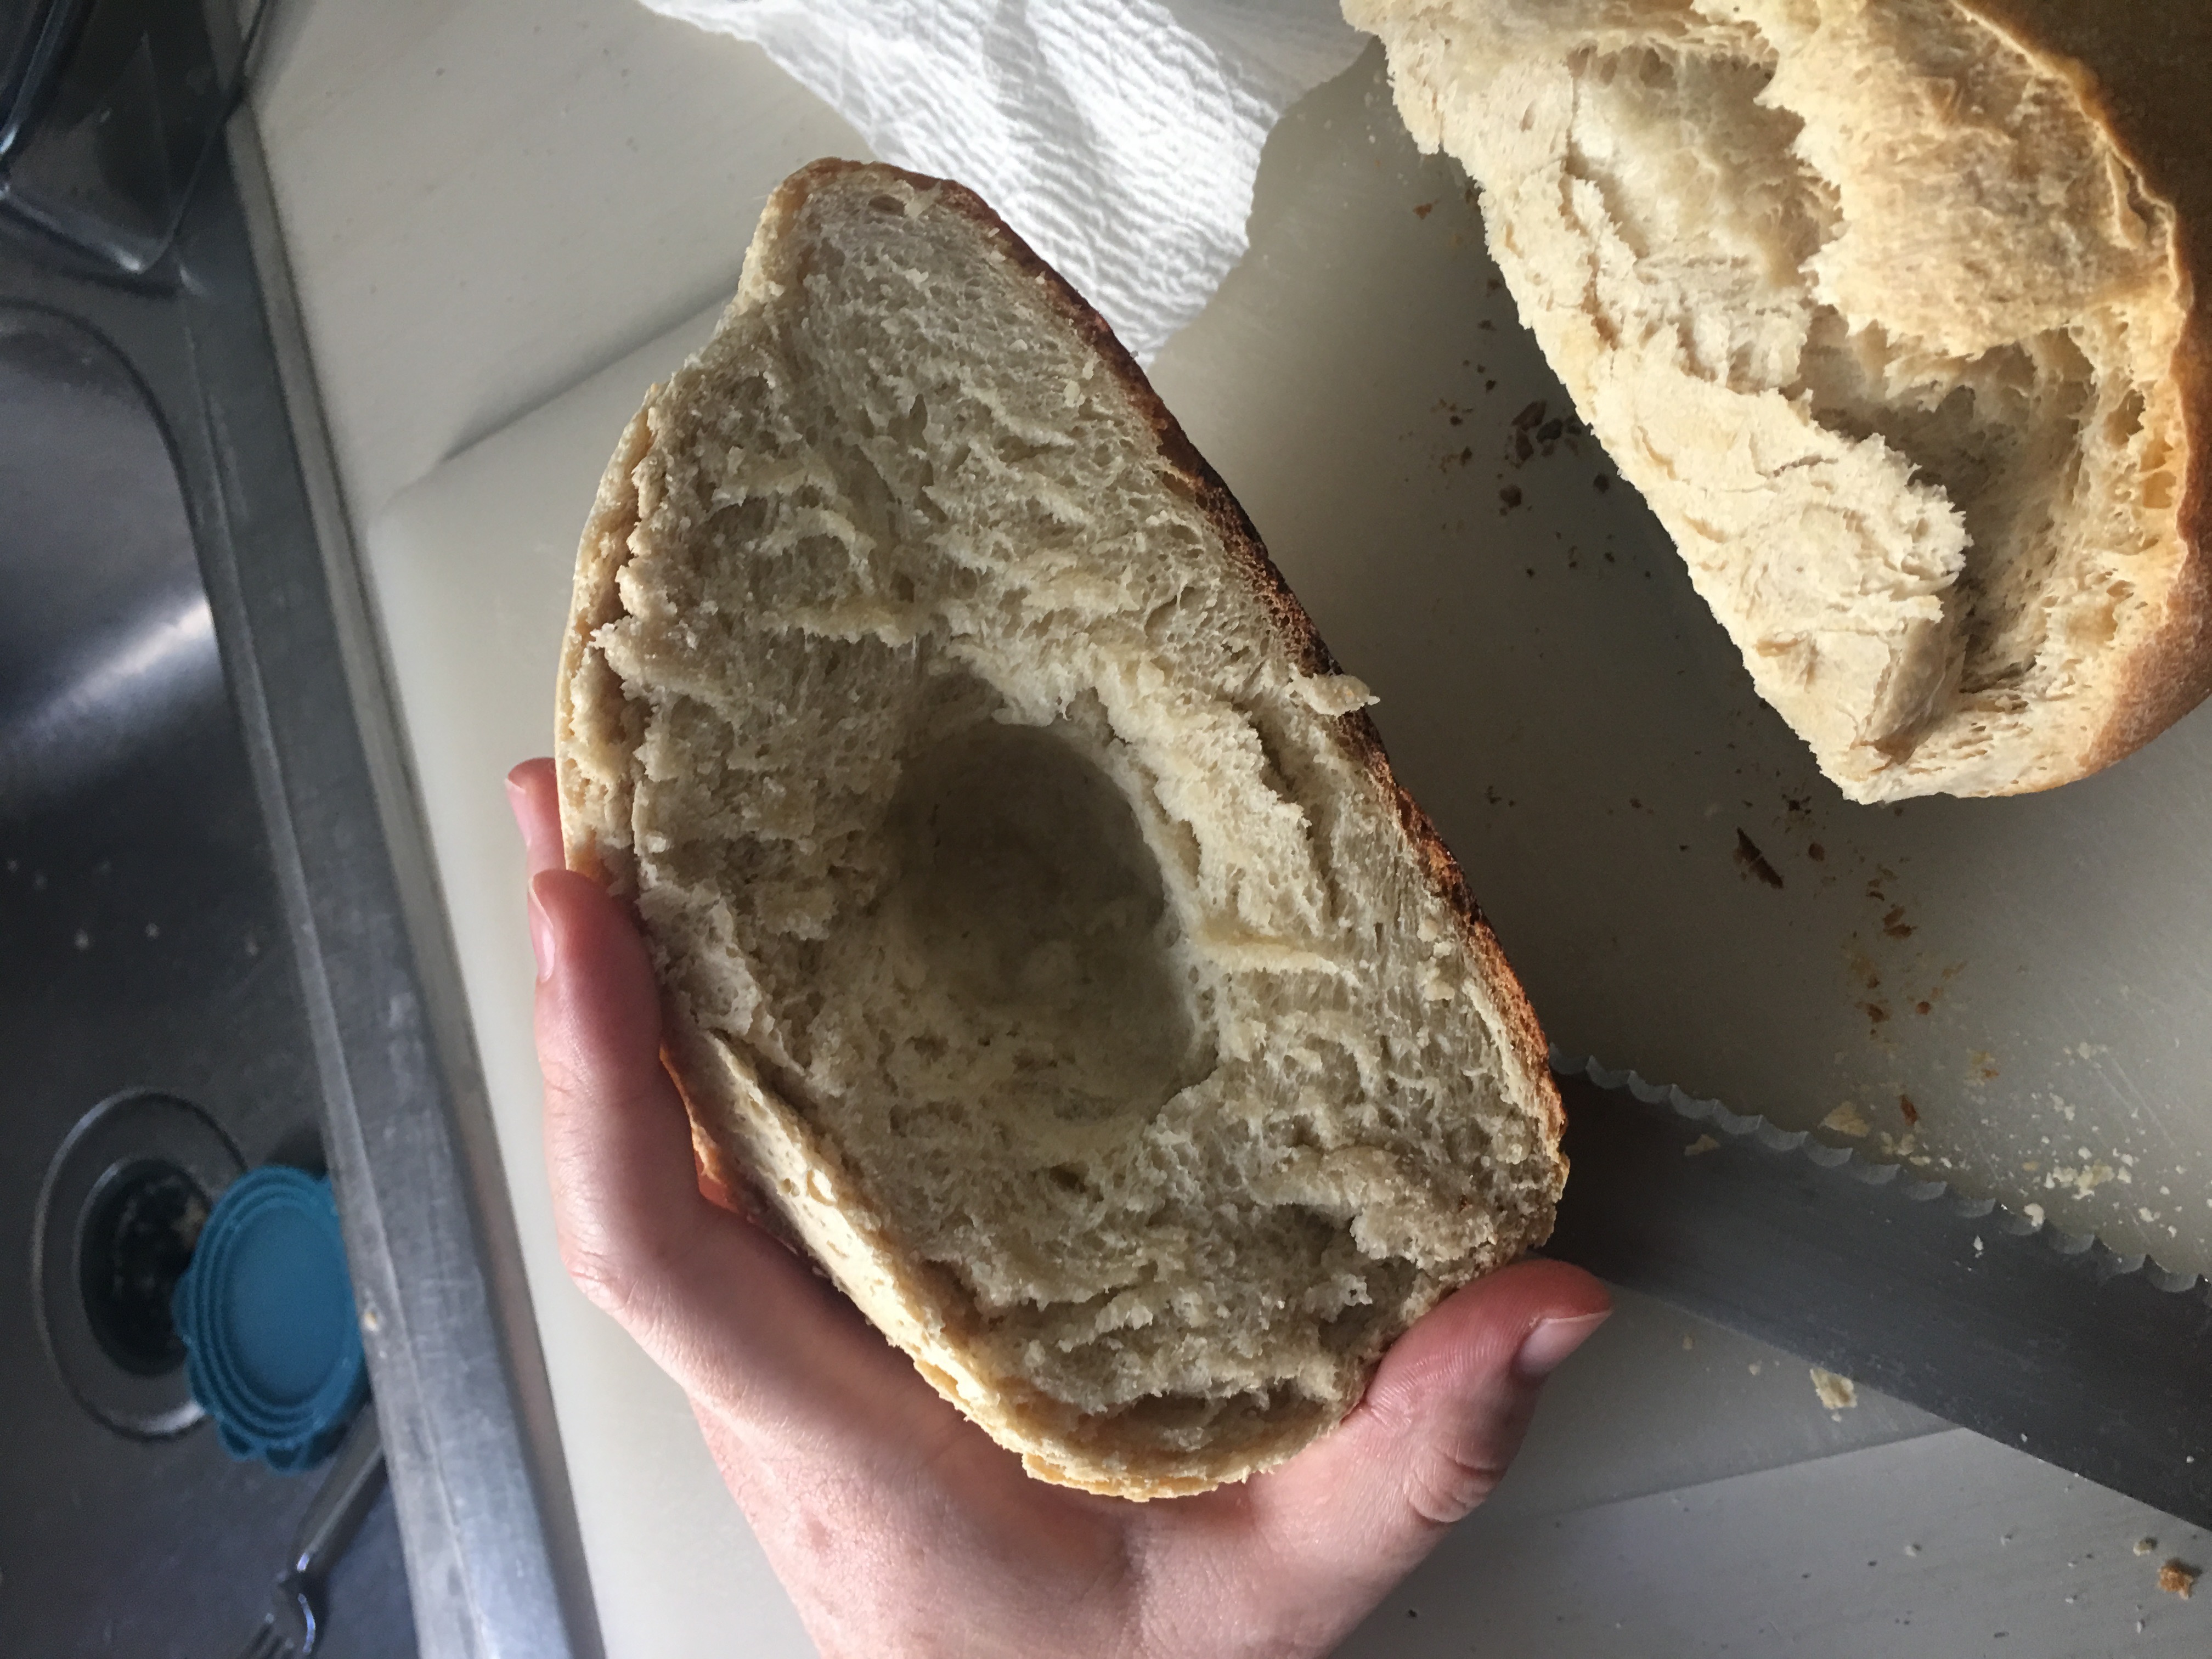
- 3:38PM: Measured again; still 6cm x 4cm - no change in width.
2. Trial 2: Molding using fresh bread and letting it dry to shrink it, using recipe 2 above [Inspired by Ana-Matisse's previous HCR , we are taking this one to mean drying “before a fire,” since something else has to be added to shrink the mold] "Mold it with the pith of bread just out of the oven. Let dry. In drying out it will shrink & consequently so will the medal that you will cast and the one which has been heated twice contracts more. [This may mean that the more it is heated, the more it shrinks] You can cast sulfur without letting the imprint on the bread dry, if you want to cast it as large as it is. But, if you want to let it shrink, let it dry to a greater or lesser extent.
- 3:08PM: We noted that the inside of this loaf is much springier and more evenly aerated, tiny bubbles more evenly spaced.
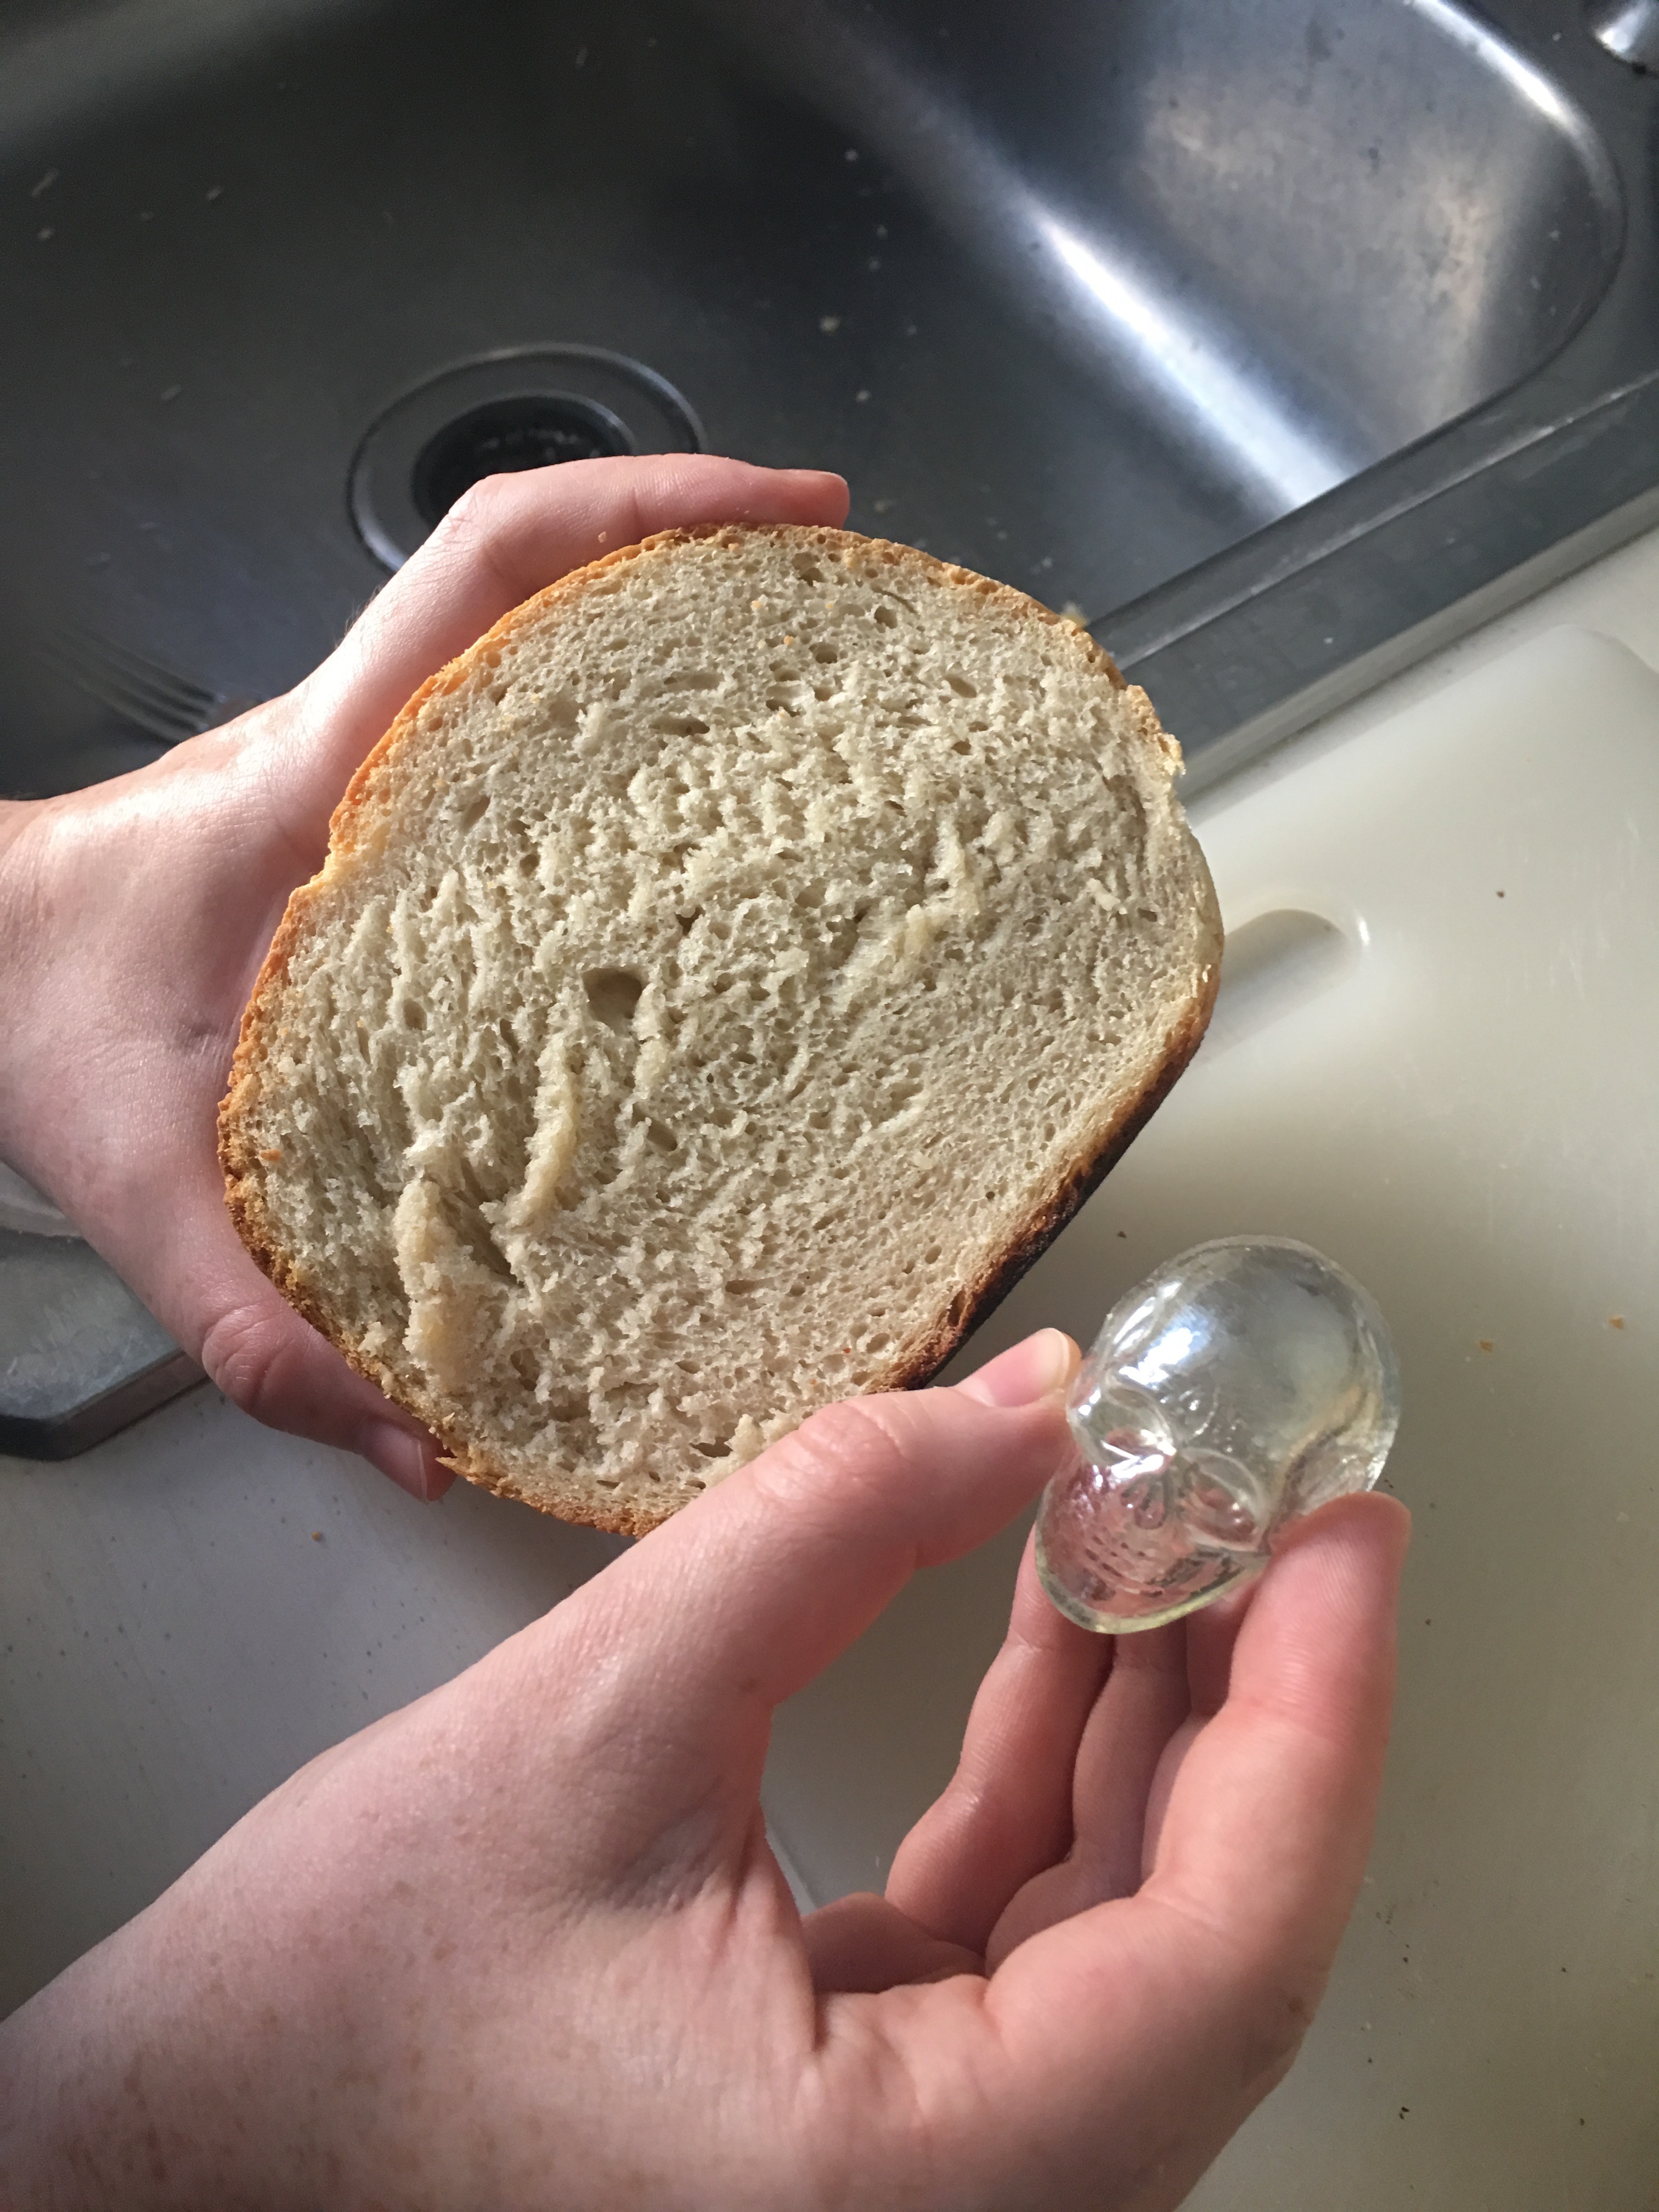
- 3:10PM We put the object into the bread. We questioned whether the bread was almost too springy, since the object needed to be pushed in to stay in bread
- 3:13PM: We took object out of bread. We noted that the object harder to remove than last attempt, but that there was much better detail (teeth can be seen). One possibility for difference is that the skull was already warm when placed into bread. The impression measured- 6cm x 4cm.
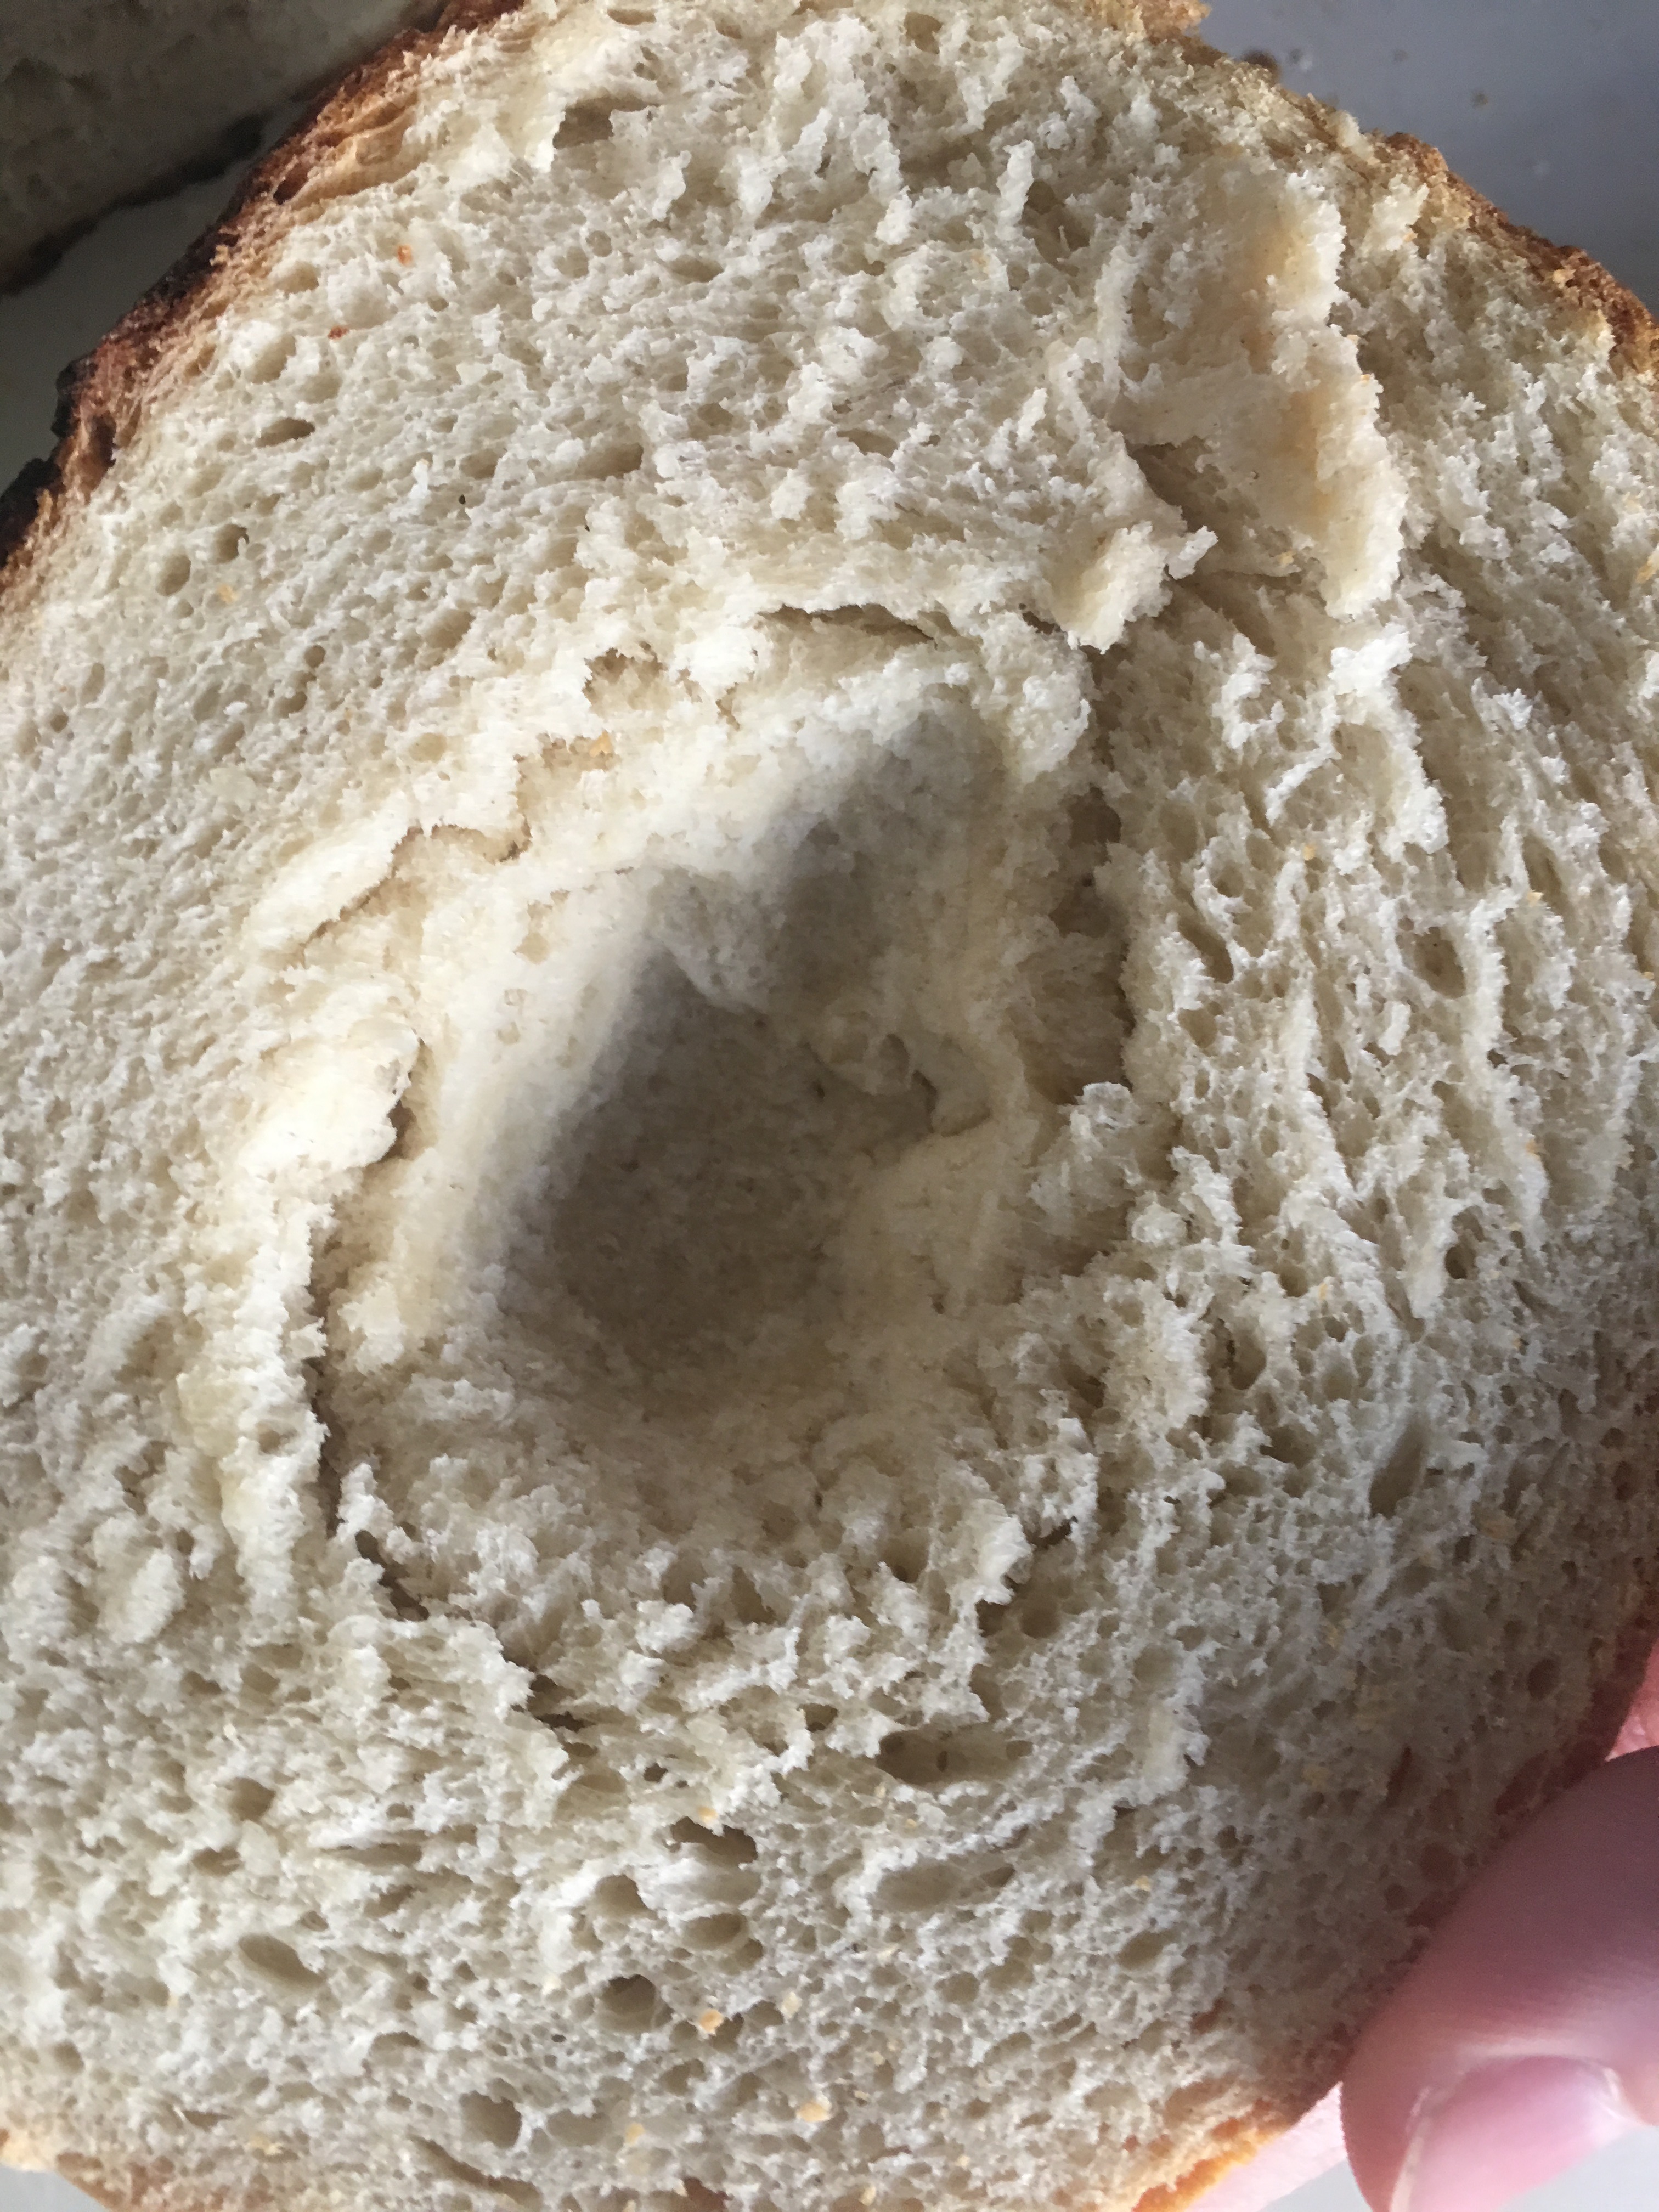
- 3:15PM: To approximate placing the bread under a brazier to dry, we placed the bread loaf next to the heated oven (oven was turned off, but had been heated to 400F prior). We set the timer for 3:25 to check on drying. We noted that the skull has bits of bread left on the exterior surface from molding. Skull was washed with water and soap in between attempt 2 and attempt 3.
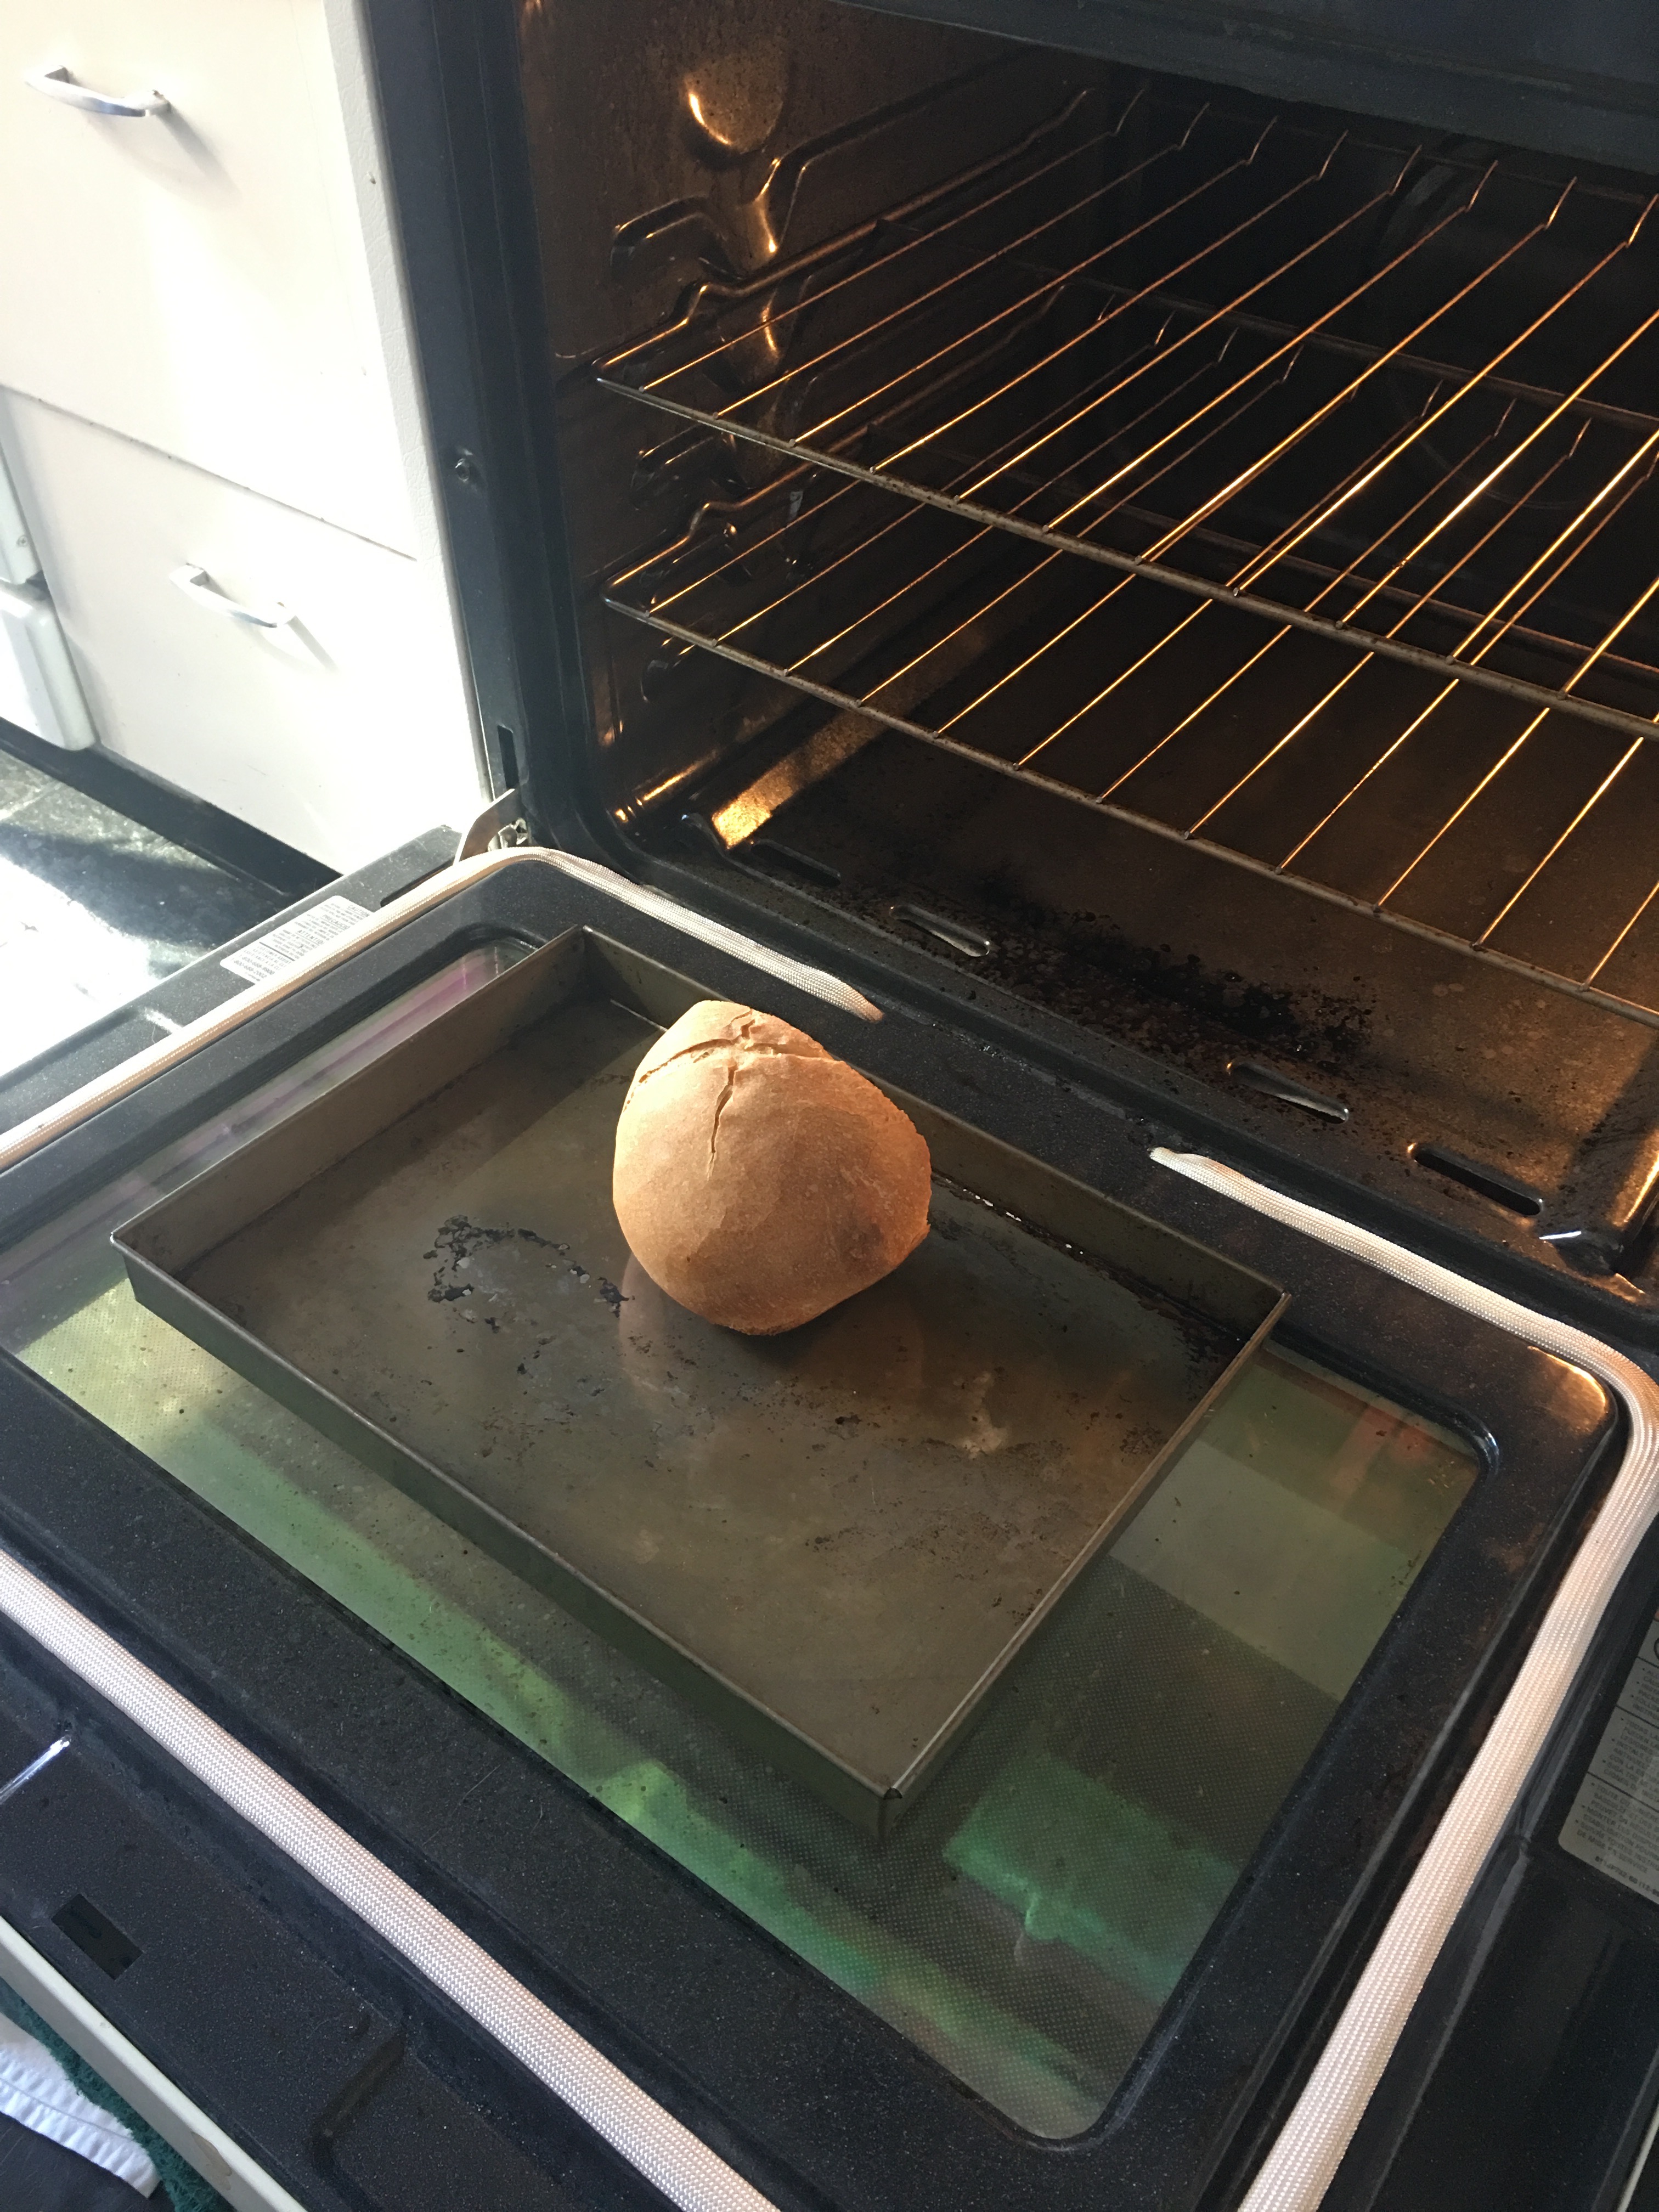
- 3:27PM: Bread taken away from oven, impression measured 5cm x 3 3/5.
- 3:27PM: Measured - 5 1/5 l by 3 4/5 w cm - keeps getting smaller bit by bit. We are going to stop measuring it now (3:38) and put it to dry by the open air and measure it again in 10 minutes.
- 3:38 - Measured 5 ⅕ by 3 3 ⅘ cm - no change. It seems as though drying with heat is needed to shrink the mold by any appreciable amount.
3. Trial 3: Molding using fresh bread and ‘lengthening’ the bread, using recipe 2 "Mold it with the pith of bread just out of the oven. ... By these means - lengthening out or enlarging the imprinted bread - you can vary the shape & from one face make several different ones." [We interpreted this to possibly mean that while the bread is still hot, one could manipulate the pith to make different shapes]
- 3:16PM: Bread is cut with serrated knife. We noticed that this loaf was springy, with very even and tiny air pockets.
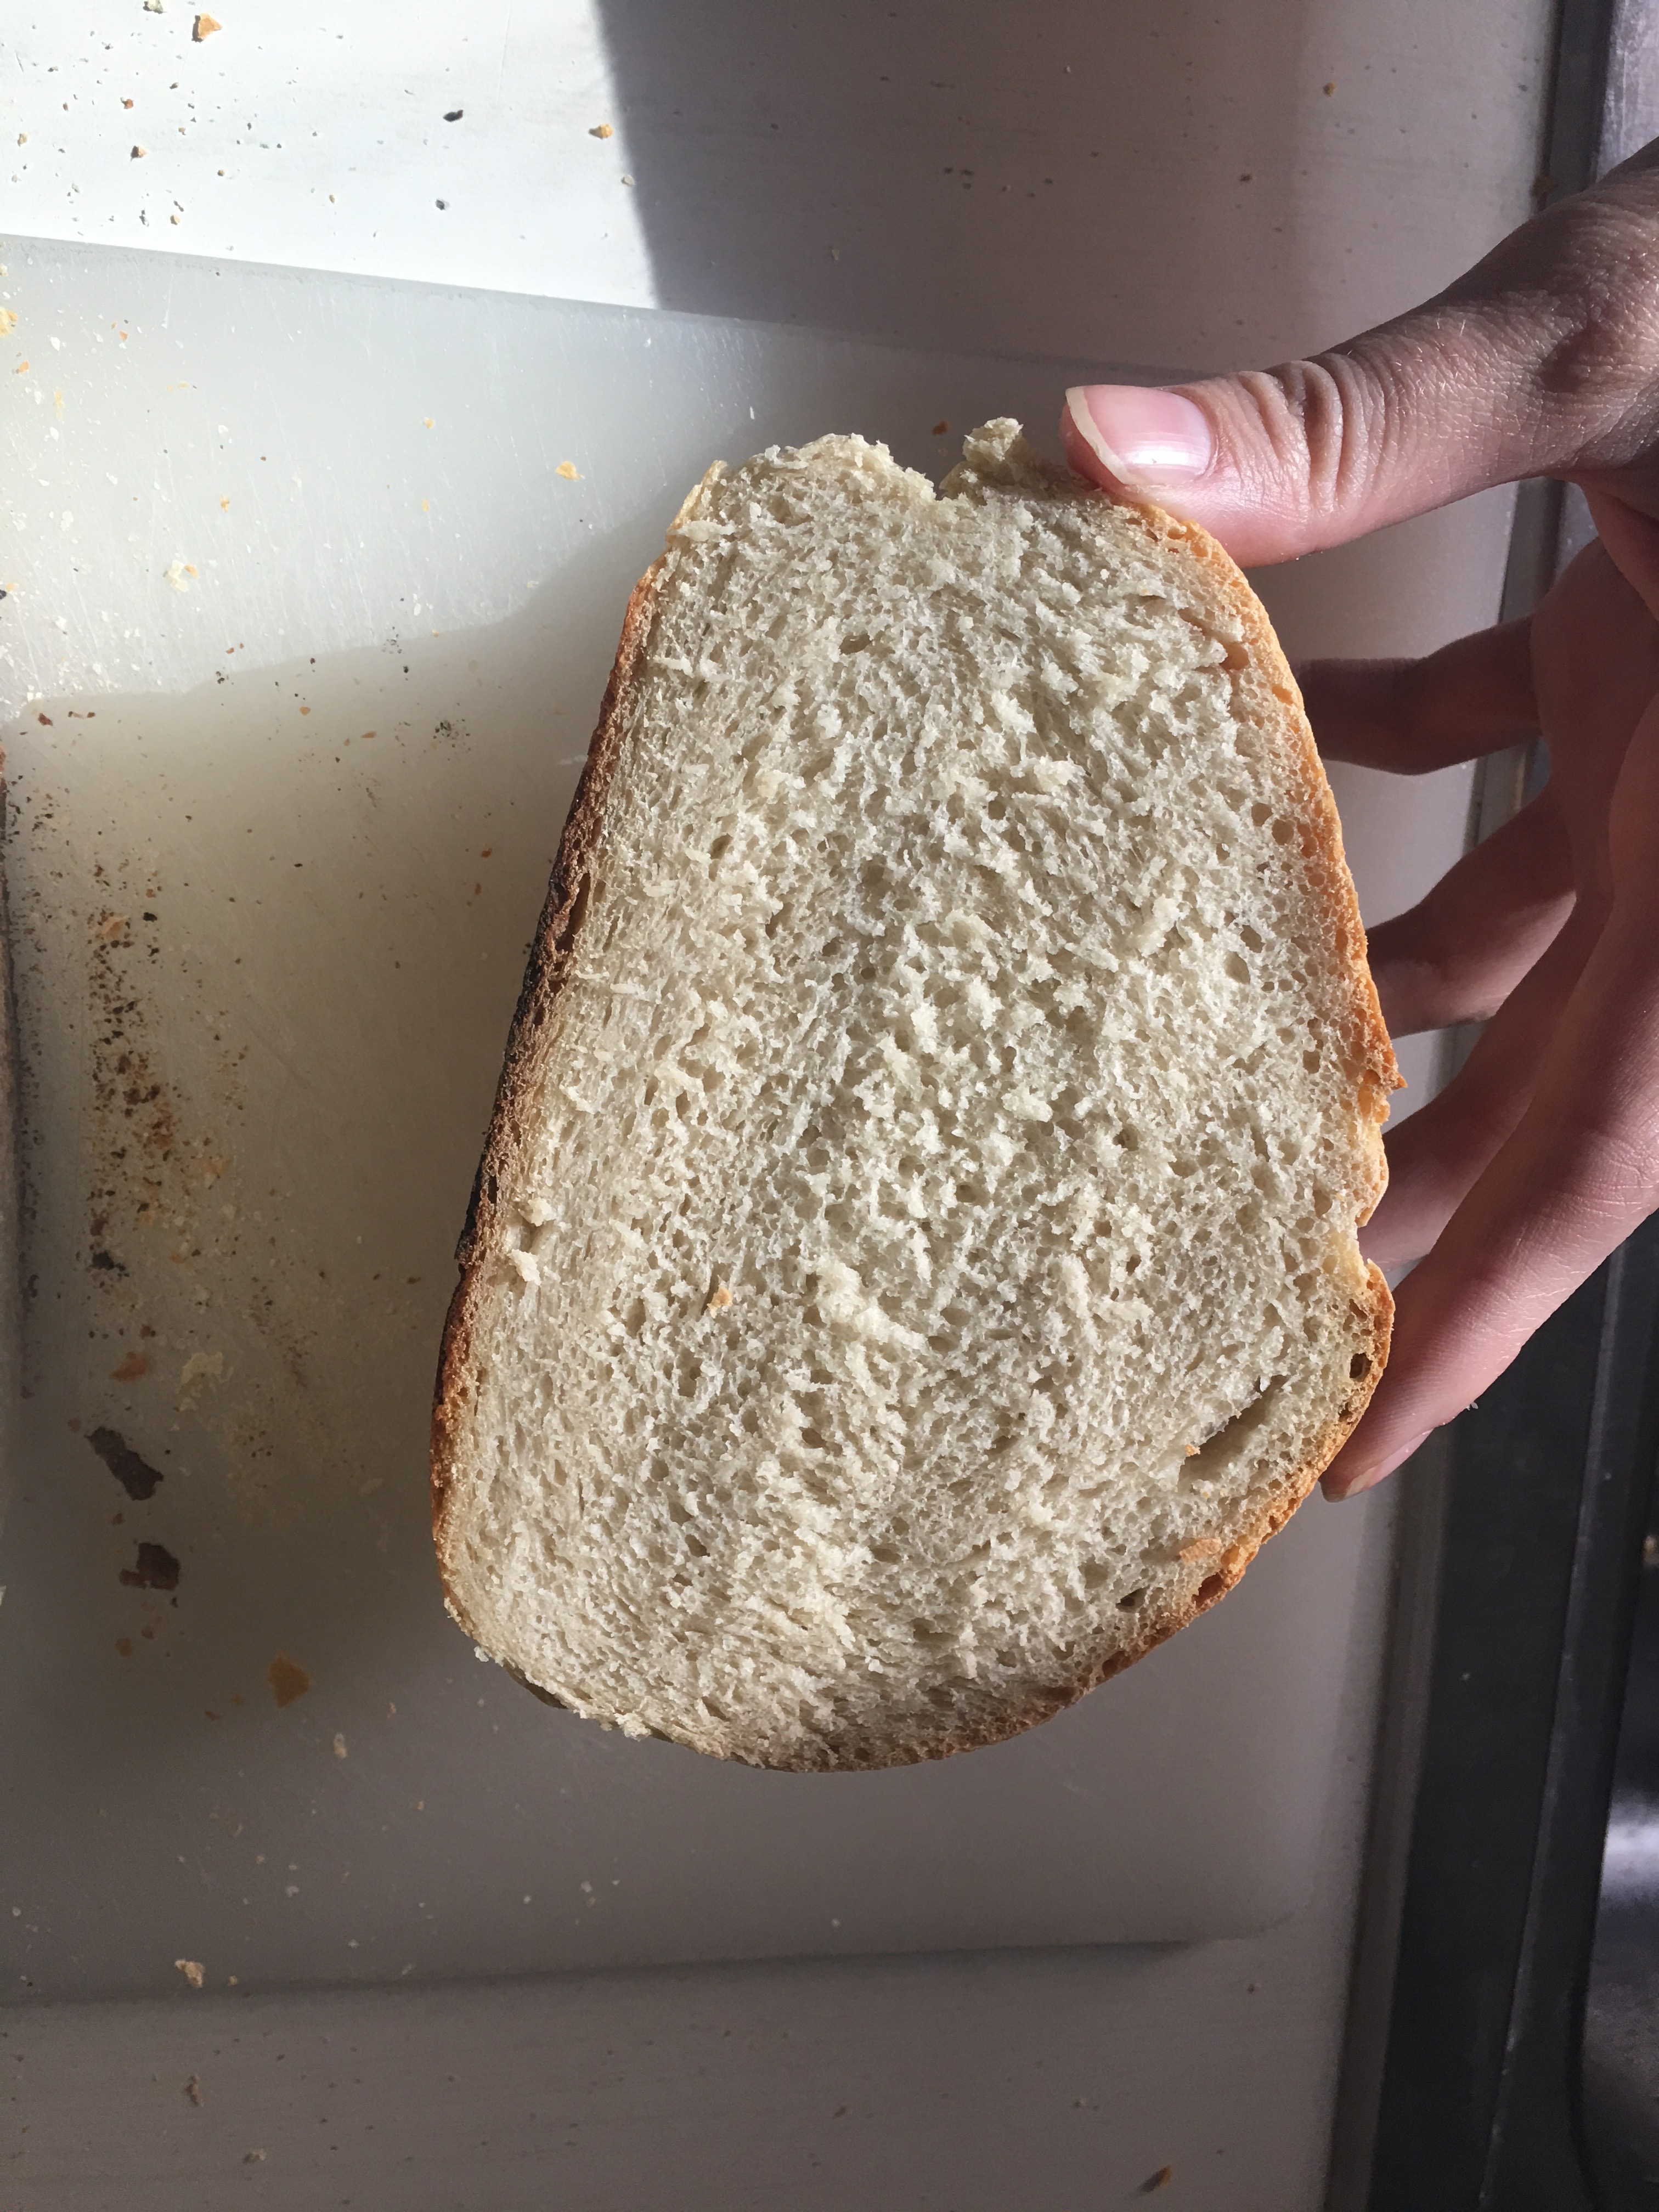
- 3:18PM: Mold is pressed in. It was difficult to push in mold; it had to be held down.
- 3:20PM: Mold is taken out. Was sort of sticky when pulled out. Less detail but you can still see the eyes and the general shape is still there. We measured it to be 5 1/2cm x3 3/4cm.
- 3:21PM: To make the skull wider, the bread is pulled apart. When it is pulled it is not easy to manipulate. The interior isn’t really changing. Partially the crust, especially along the bottom. When pushed, seams are created. The pith is breaking a little bit. Instead of manipulating the edges we pushed the bottom up. CS is now holding the bread in its manipulated shape.
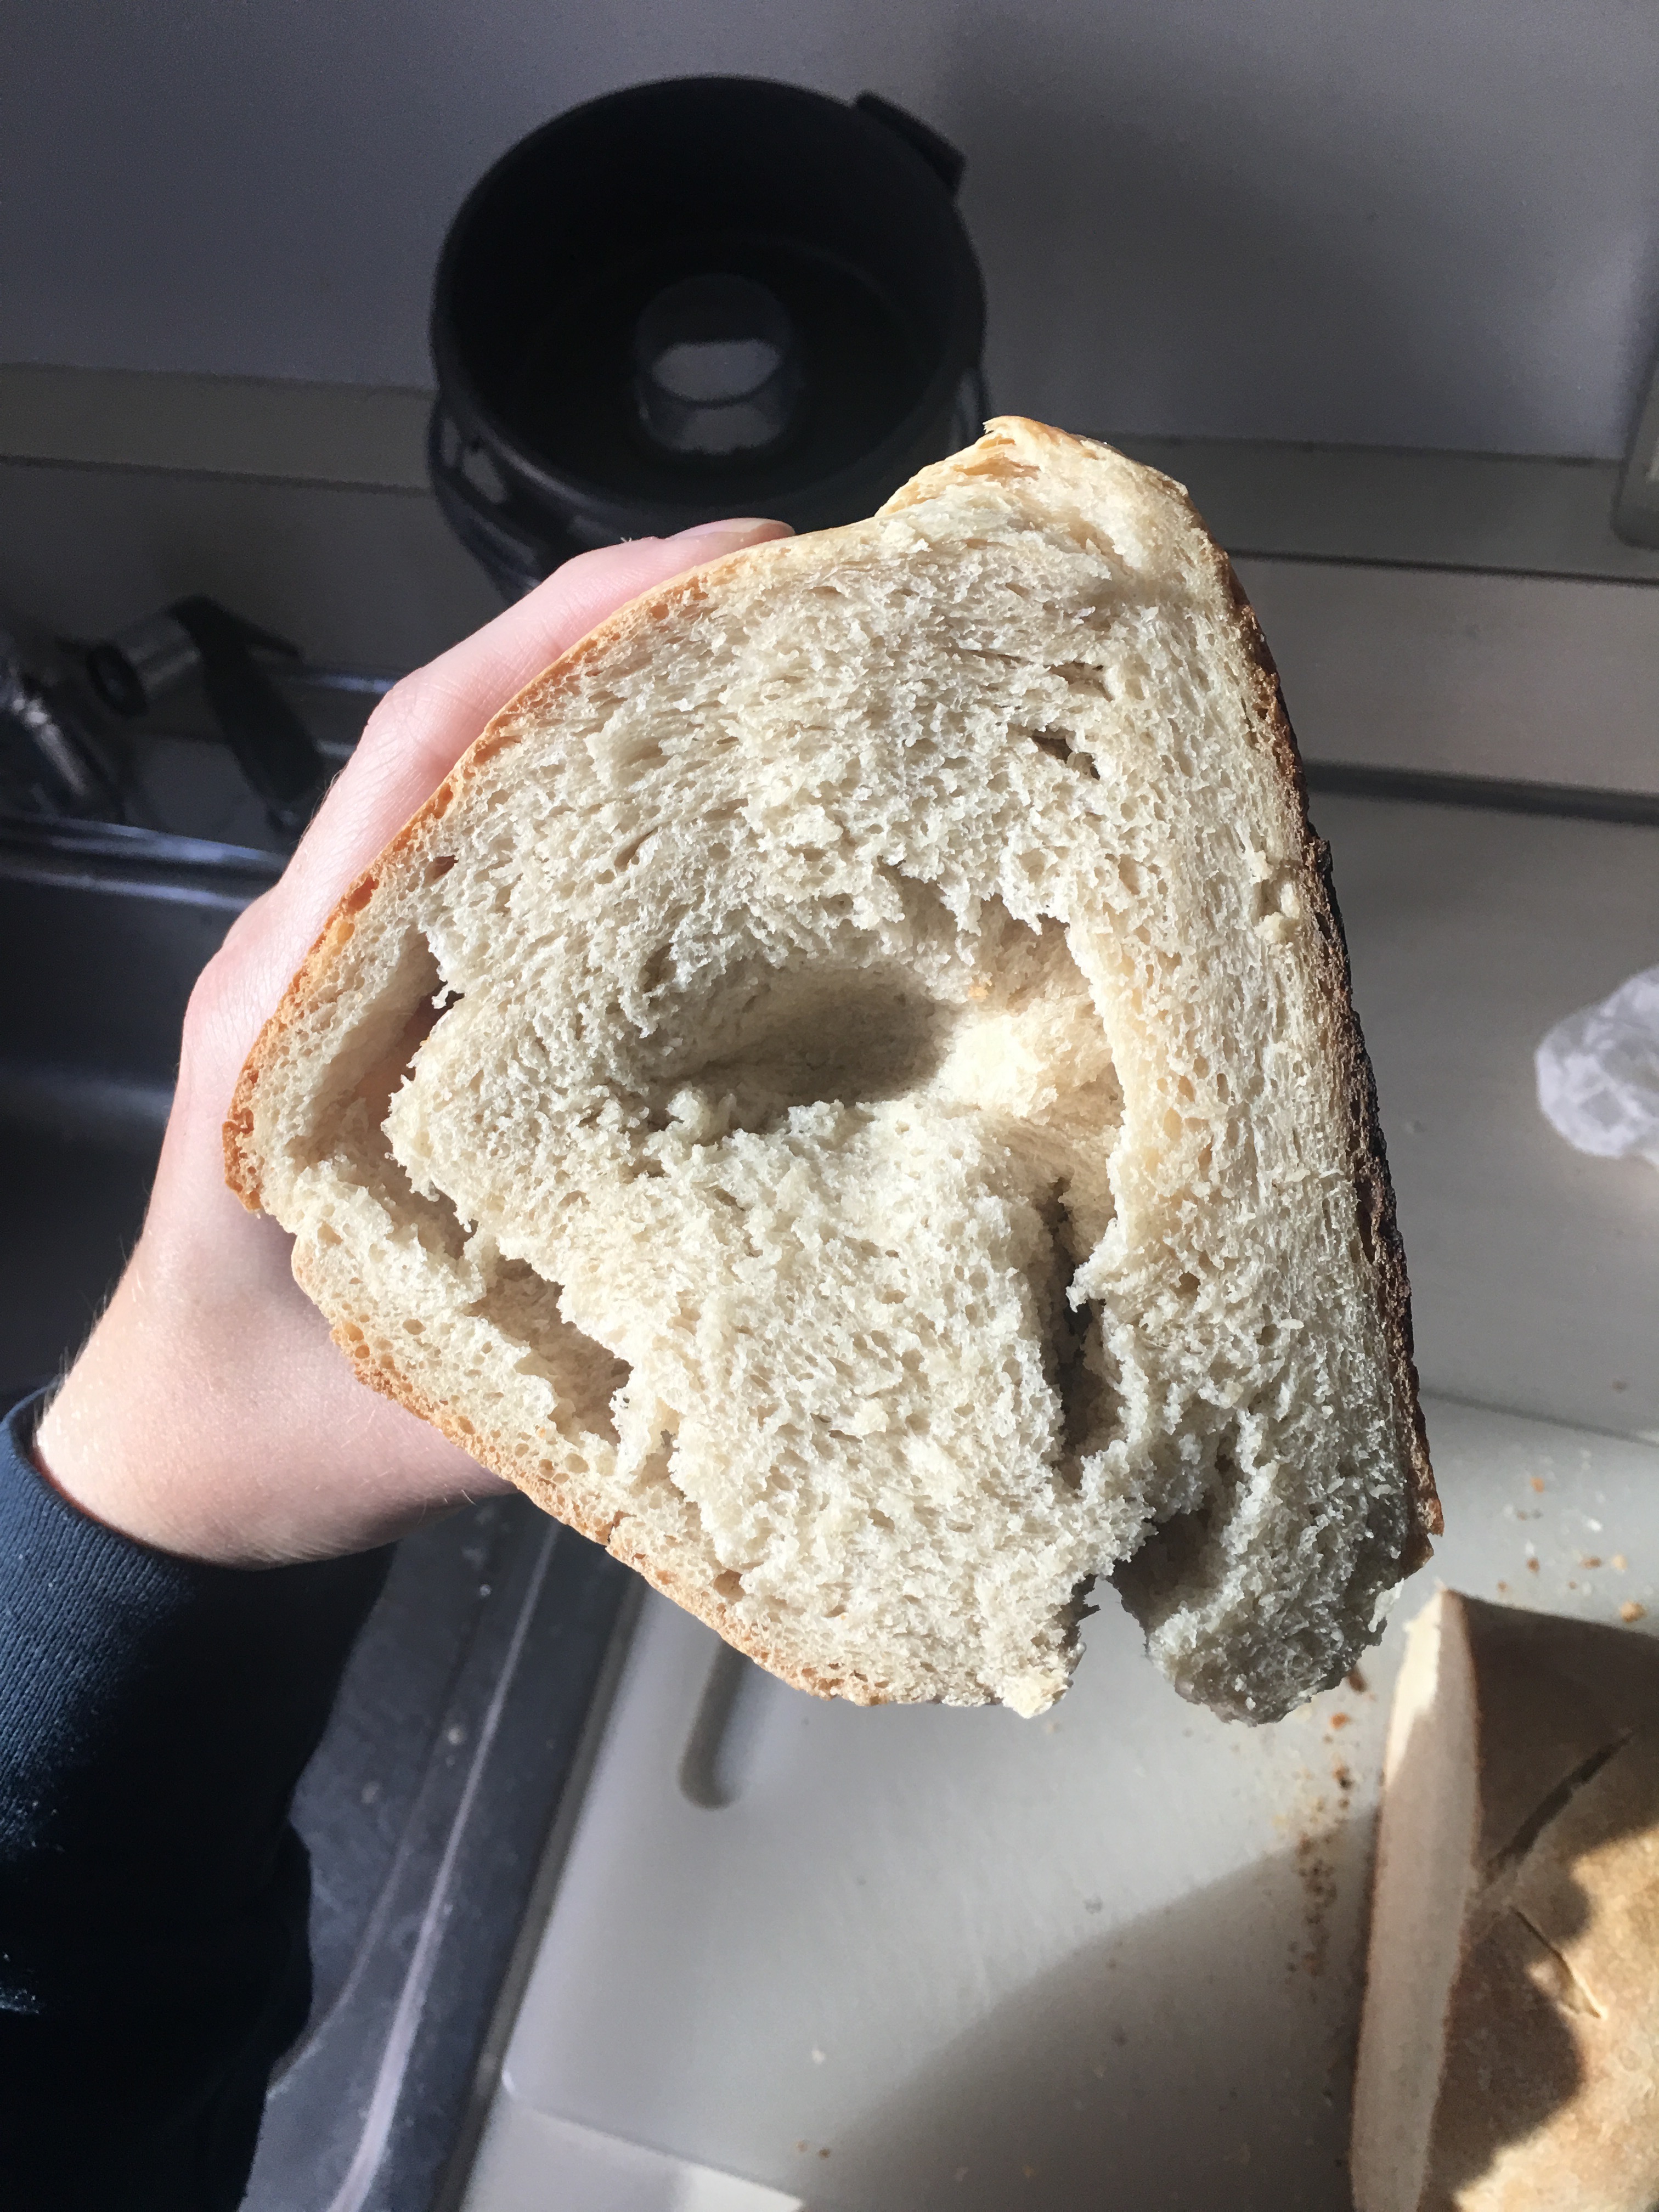
- 3:22PM: The bread is held in it’s widened shape.
- 3:24PM: We release the bread. We noticed that the impression has gotten a bit wider, but some detail (eyes) has been obscured. It measured at measured 4 3/4cm x 4 3/4 cm. This mold is also left to cool in the open air, as the object of this was not to shrink the mold but to see how it responded to manipulation.
- 3:34PM: Measured - 4 1/2cm by 4 1/4cm - it has gotten a little bit smaller.
4. Trial 4: Molding using “reheated” bread, using recipe 1 above. "Arrange the pith of bread under the brazier. Mold whatever you want into it and let it dry."
- 3:50PM: We cut the bread in half before reheating -- notice that was very stale, and probably not well-kneaded, very dense. We are also seeing air pockets along the lines of where the dough was layered on top of each other.
- 3:56PM: We placed the bread in the oven on broil, we will check in 10 minutes.
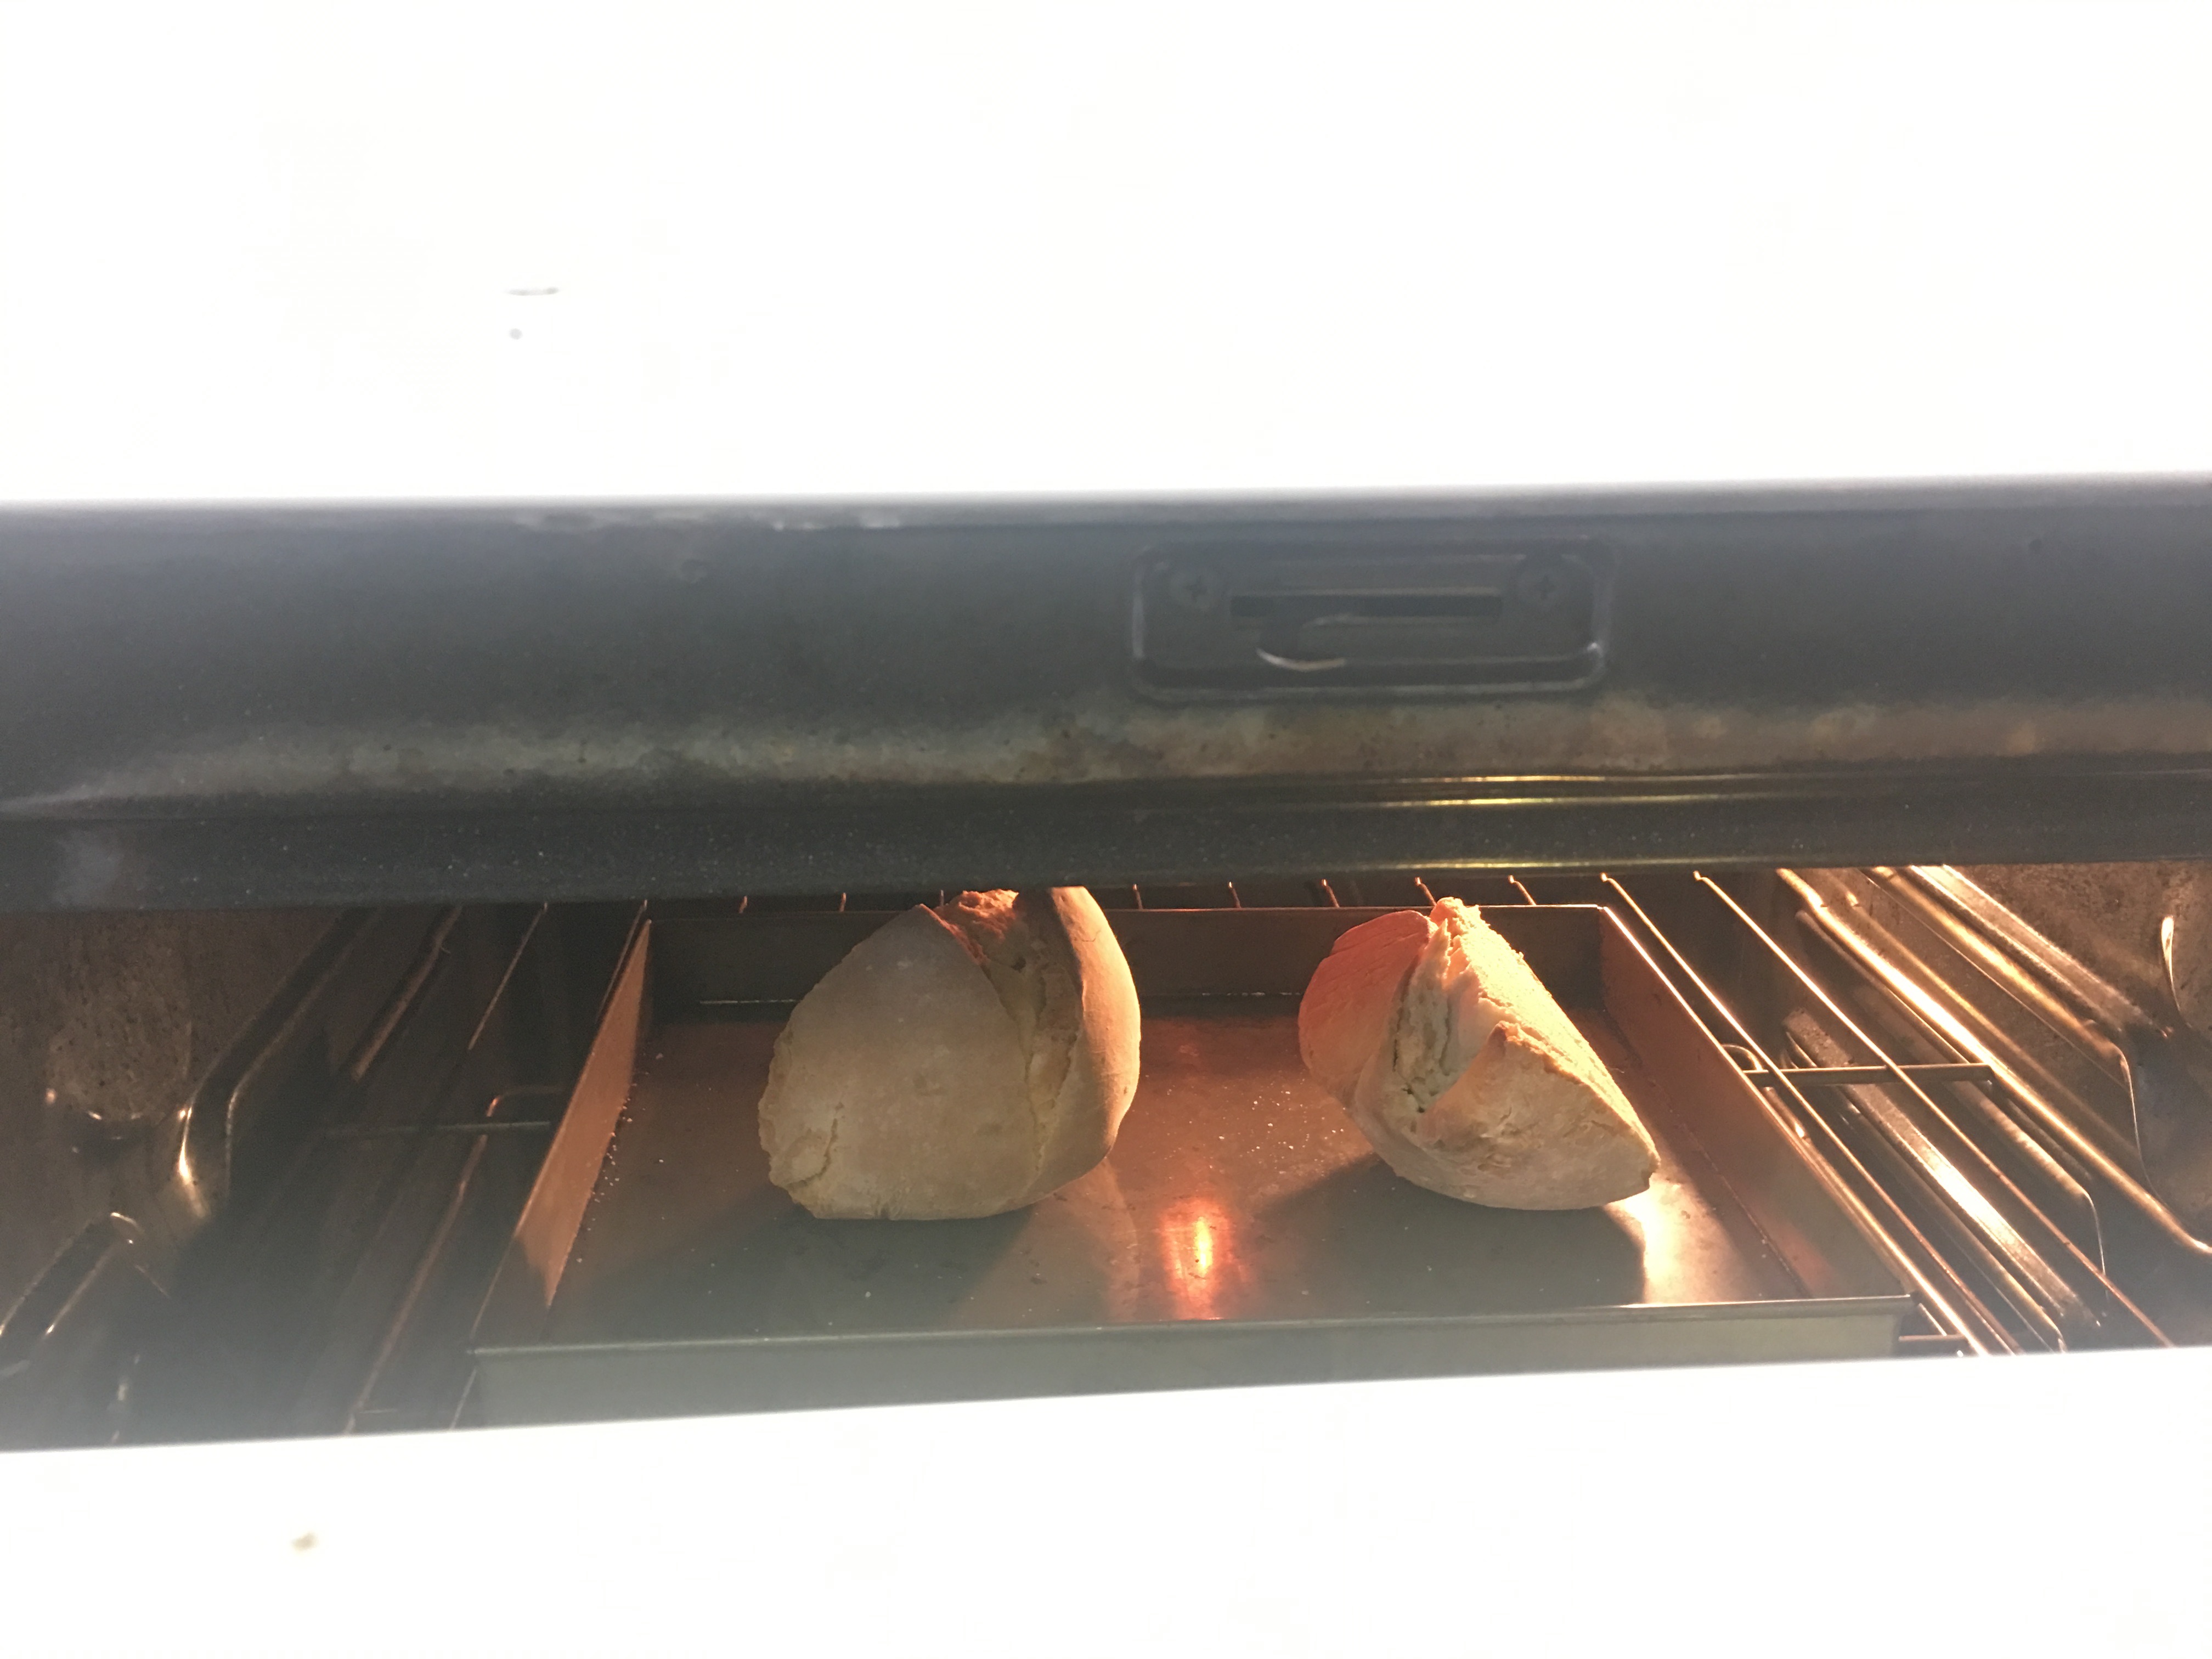
- 4:00PM: We smelled burning, noticed the bread was toasting, and placed the bread on a lower shelf since the pith was not warm and squishy
- 4:06PM: We took the bread out of the oven. Quite hot, thin crust has formed on cut side, springier than it was before we put in the oven but still not as springy as the fresh loaves.
- 4:07PM: We placed object into bread, bread was very difficult and coming apart along the fault lines and Ana-Matisse held the object in the bread -- had to push in quite deep to make an impression, but also could be just to get through the crusty top layer.
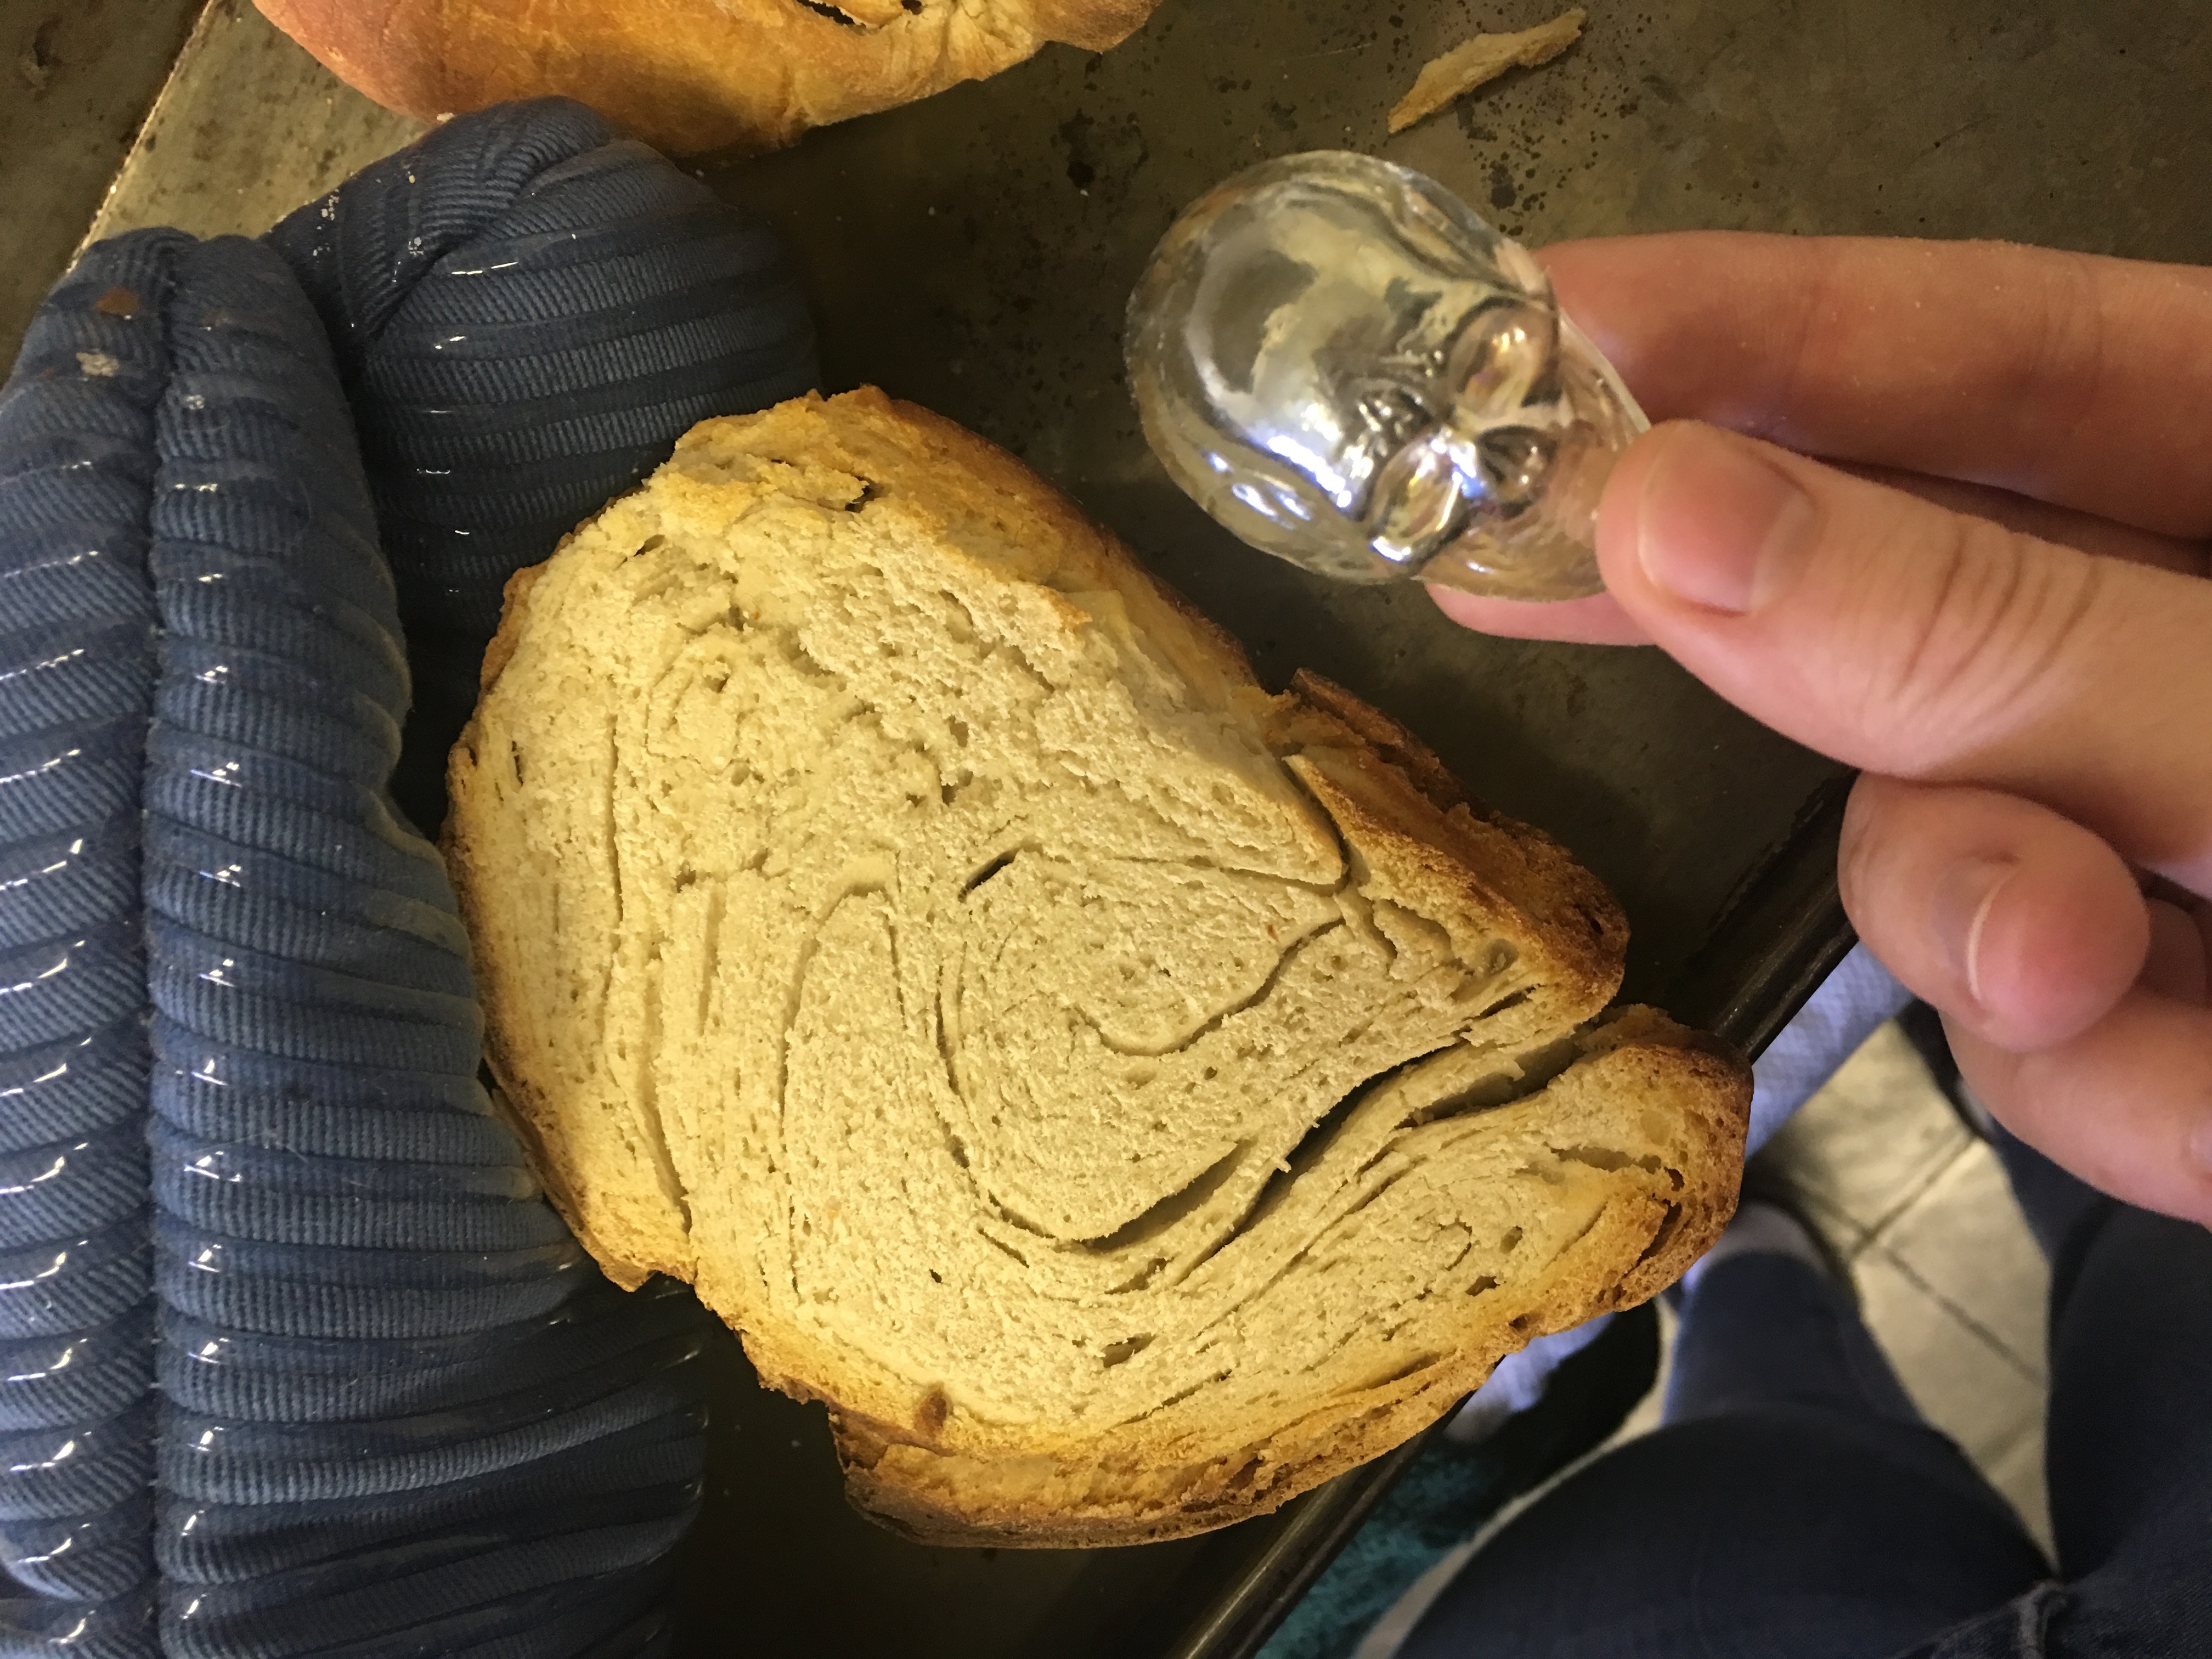
- 4:09PM: Took object out and noticed that it stuck to bread like other ones. It made a rough outline of the skull and the eyes were visible. It measured at 5cm x 3.3cm. The bottom of the impression was most likely messed up because of hole in bread loaf. We speculated that if bread had been made from the same recipe and kneaded better, it likely would have been of same quality as the first trial.

[We also made a loaf of the bread for eating-- it was delicious and very sourdough-y]
Questions that arose during experiment:
Why the difference in rising between the two recipes? I wonder what the difference in rising time means for the final product?
Though on first glance we thought they were really similar, Glasse’s recipe is much simpler than the Foppish Baker. Could we use this as an indication of what kinds of knowledge Glasse assumes her audience has?
Why is the impression left behind slightly larger the object used to make it?
Conclusions/reflections:
It was easy to see how the texture of the bread would change the quality of the mold -- based on air pockets, springiness, and heat of bread.
The process of running through the recipe made us think more deeply about the many variables involved in making the molds -- only through the experience of making the bread and making impressions for the molds did we think consider how long we had to keep the object in the bread, how much detail the object would make in the bread based on texture, the differences on bread texture, etc. We felt that we could have run multiple new trials just to account for bread ingredients, appropriate recipes, when to let the bread rise, the temperature of the oven, material of the object used for molding, size of the object, etc. Now that we have done the experiments, it would be easier to construct methodologies for testing these variables, but it was more difficult to set up a plan prior to the actual experiments.
Reading so many different bread recipes and reading them closely helped us to think more deeply about the baking process.
From this experience, we feel that we can now speculate that the author-practitioner was likely an experienced baker (see the recipe for rye paste for wall moldings in fol. 29r). This means that we can also assume with relative certainty that he has a concrete set of skills related to baking bread. We can therefore use this knowledge to understand some of his methods or action techniques better. If, for example, we encounter a recipe where he is using materials or ingredients that behave in similar ways to bread we could assume that he might treat them in similar ways to bread, i.e. if he is “pushing” something dough-like, we might assume that by this he means a kind of “kneading” motion like pushing the dough backwards with the heel of one’s hand. We also acknowledge that we do not know if he acquired a set of ‘craftsman’ skills prior to learning how to bake, or vice versa, or at the same time. However, the knowledge that he does have these skills opens up other avenues for experimentation.
We a different bread recipe for the loaf we used in trial 4 than the ones we used for trials 1-3; it is possible that this might have affected the outcome (detail of the mold, ease of use of pith) of our reheating trial against the rest of them.
If we were to do this experiment again, we would do more research into ingredients (and recipes, since we decided to look at an 18th century English recipe which wouldn’t have used French ingredients anyway) and tried to acquire ones more similar to those of 16th century France.
Works cited/referenced:
John Evelyn: https://drive.google.com/file/d/0B29s4y6G-cwiekhobV8yOU0yZjA/view.
Hannah Woolley's 1672 The Exact Cook
The Art of Cookery Made Plain & Easy, Hannah Glasse, facsimile 1747 edition [Prospect Books:Devon] 1995 (p. 151)
Manuscript at Cambridge University Library (CUL MS Ee.1.13, f. 141r) from The Recipes Project, http://recipes.hypotheses.org/2859
Terence Scully, The Art of Cookery in the Middle Ages
Robert Applebaum, Aguecheek's beef, belch's hiccup, and other gastronomic interjections
Robert May's 1685 The Accomplisht cook, or the Art & Mystery of Cookery from Project Gutenberg http://www.gutenberg.org/files/22790/22790-h/main.html
The bread mold pouring field notes are located in Ana-Matisse's page here.
Session #5: Taking out the molds
Name: Ana Matisse Donefer-Hickie and Caitlyn Sellar
Date and Time: October 17, 2016 9:00AM
Location: Making and Knowing Lab
Subject: Removal of sulfur and wax mold from the bread
Conditions: Outside temp- warm
Method
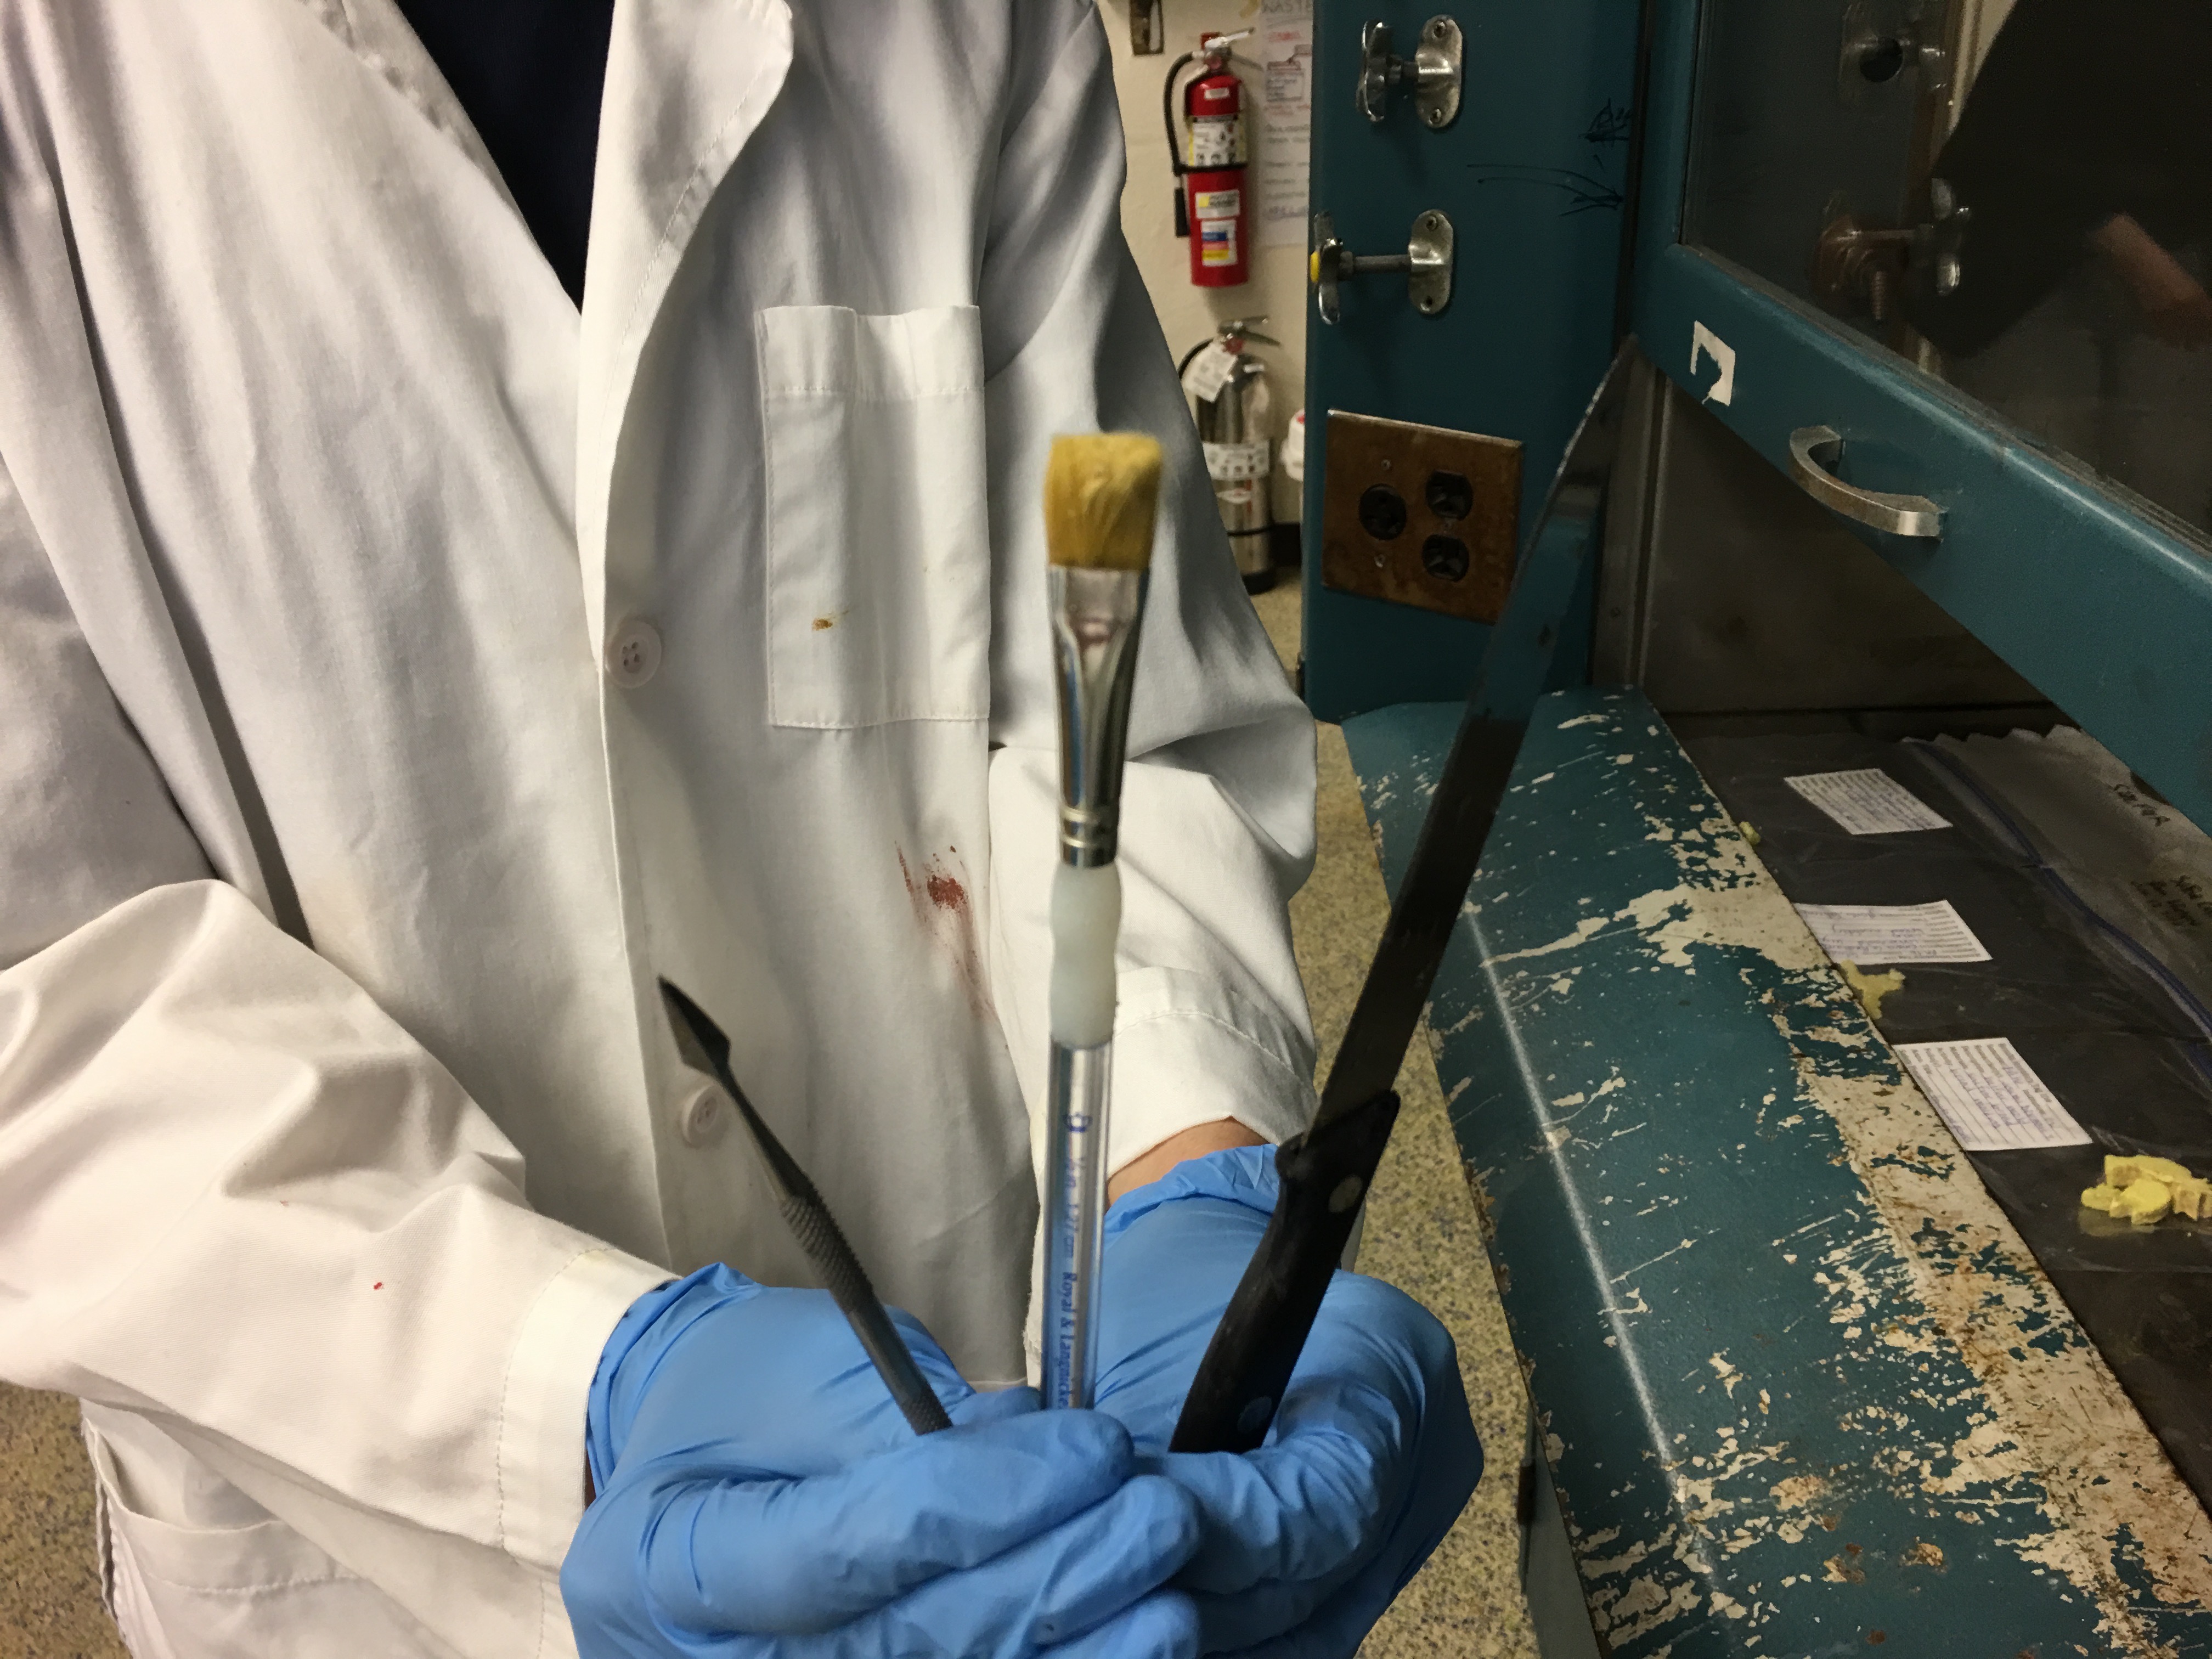
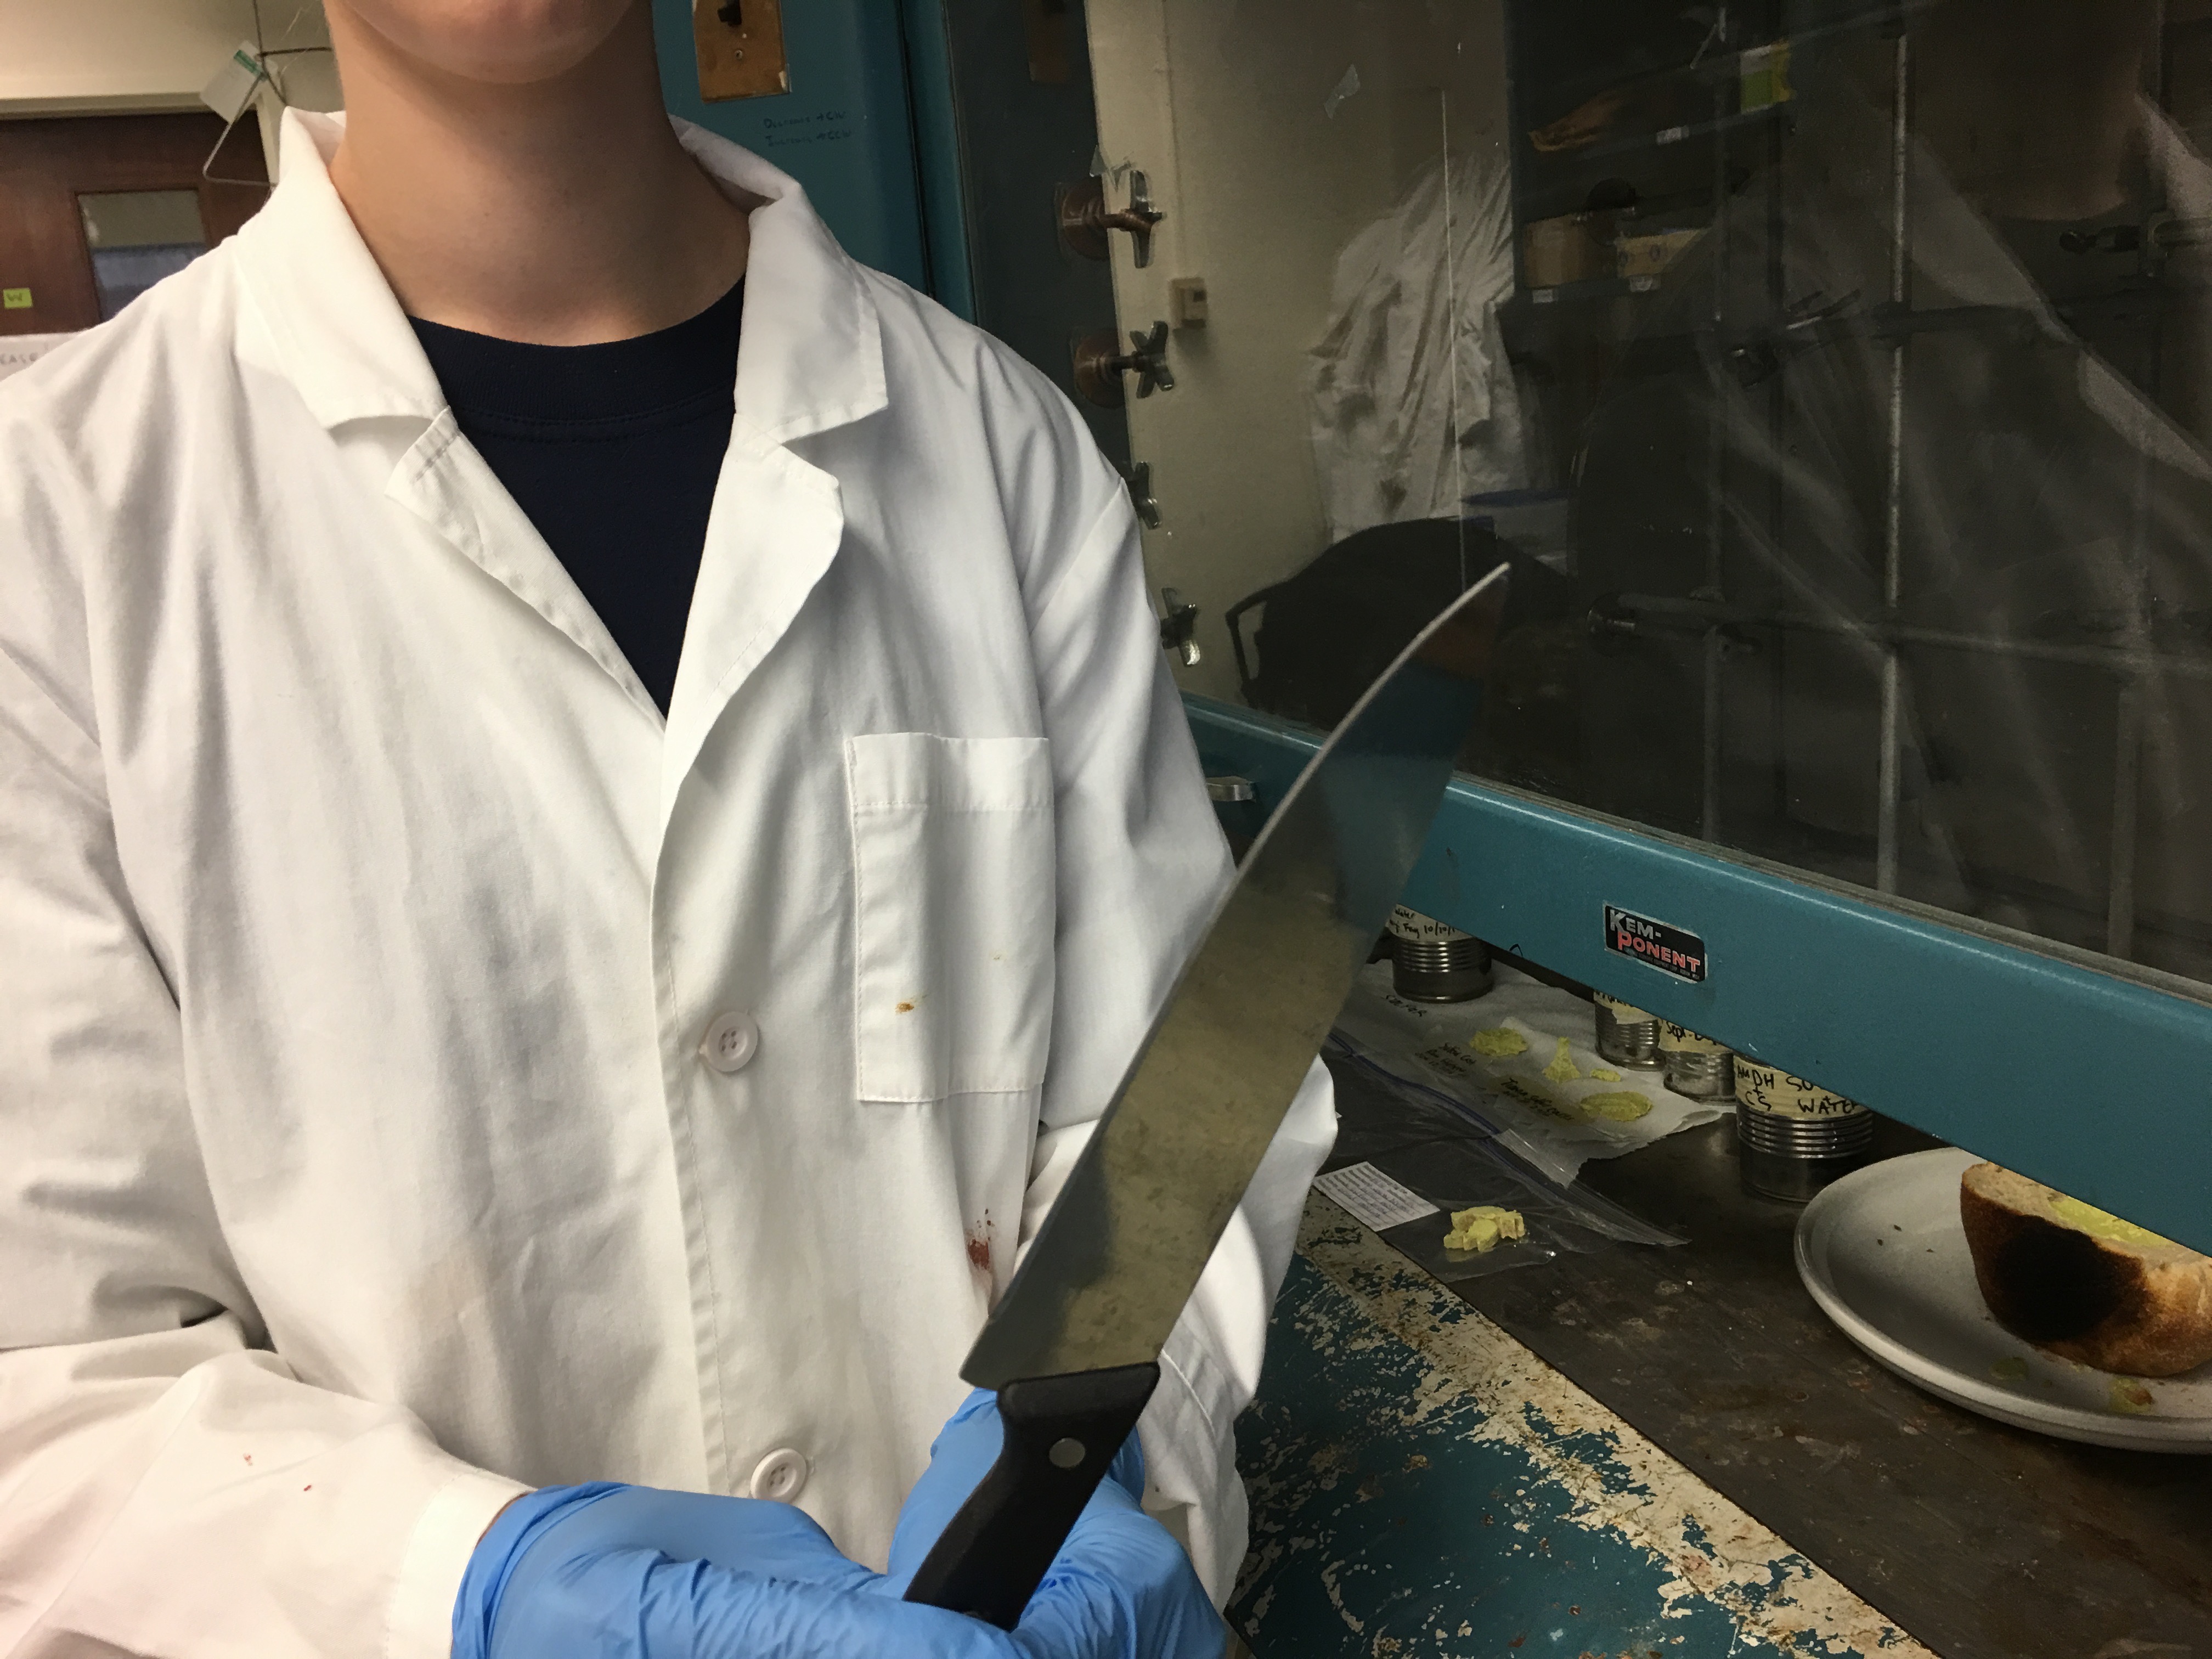
We waited approximately two weeks from the pouring of the sulfur and wax into the bread molds to remove them. In that time, the bread became rather stale and the loaf with the wax became moldy because it was left in the open air. We had kept our molds “encased” with both the top and the bottom half of the loaves, so we took away the top half with no wax/sulfur mold and worked with only the bottom halves. We planned to take the molds out of the loaves in the morning before class, and clean them to reveal the detail on the surface of the molds (of a glass skull). In thinking about this, we set up two glass jars to put the molds into in order to clean them of bread crumbs; we also got an oil paint brush, a pick, and a small knife to cut the bread with.
Materials/Ingredients
Bread with molds
Small knife
Serrated knife
Oil brush
Pick/carving tool
Water (tap water from lab)
Glass jars
Procedure
Wax:
- Our first step was to figure out how to make it easier to take the mold out of the bread itself; we ultimately settled on cutting the bread loaf to make it a more manageable size. We cut off three sides with the small knife, being careful not to cut into the mold itself. We noted that the bread was very hard, especially the crust. We ended up pulling parts of the crust off of the bread.
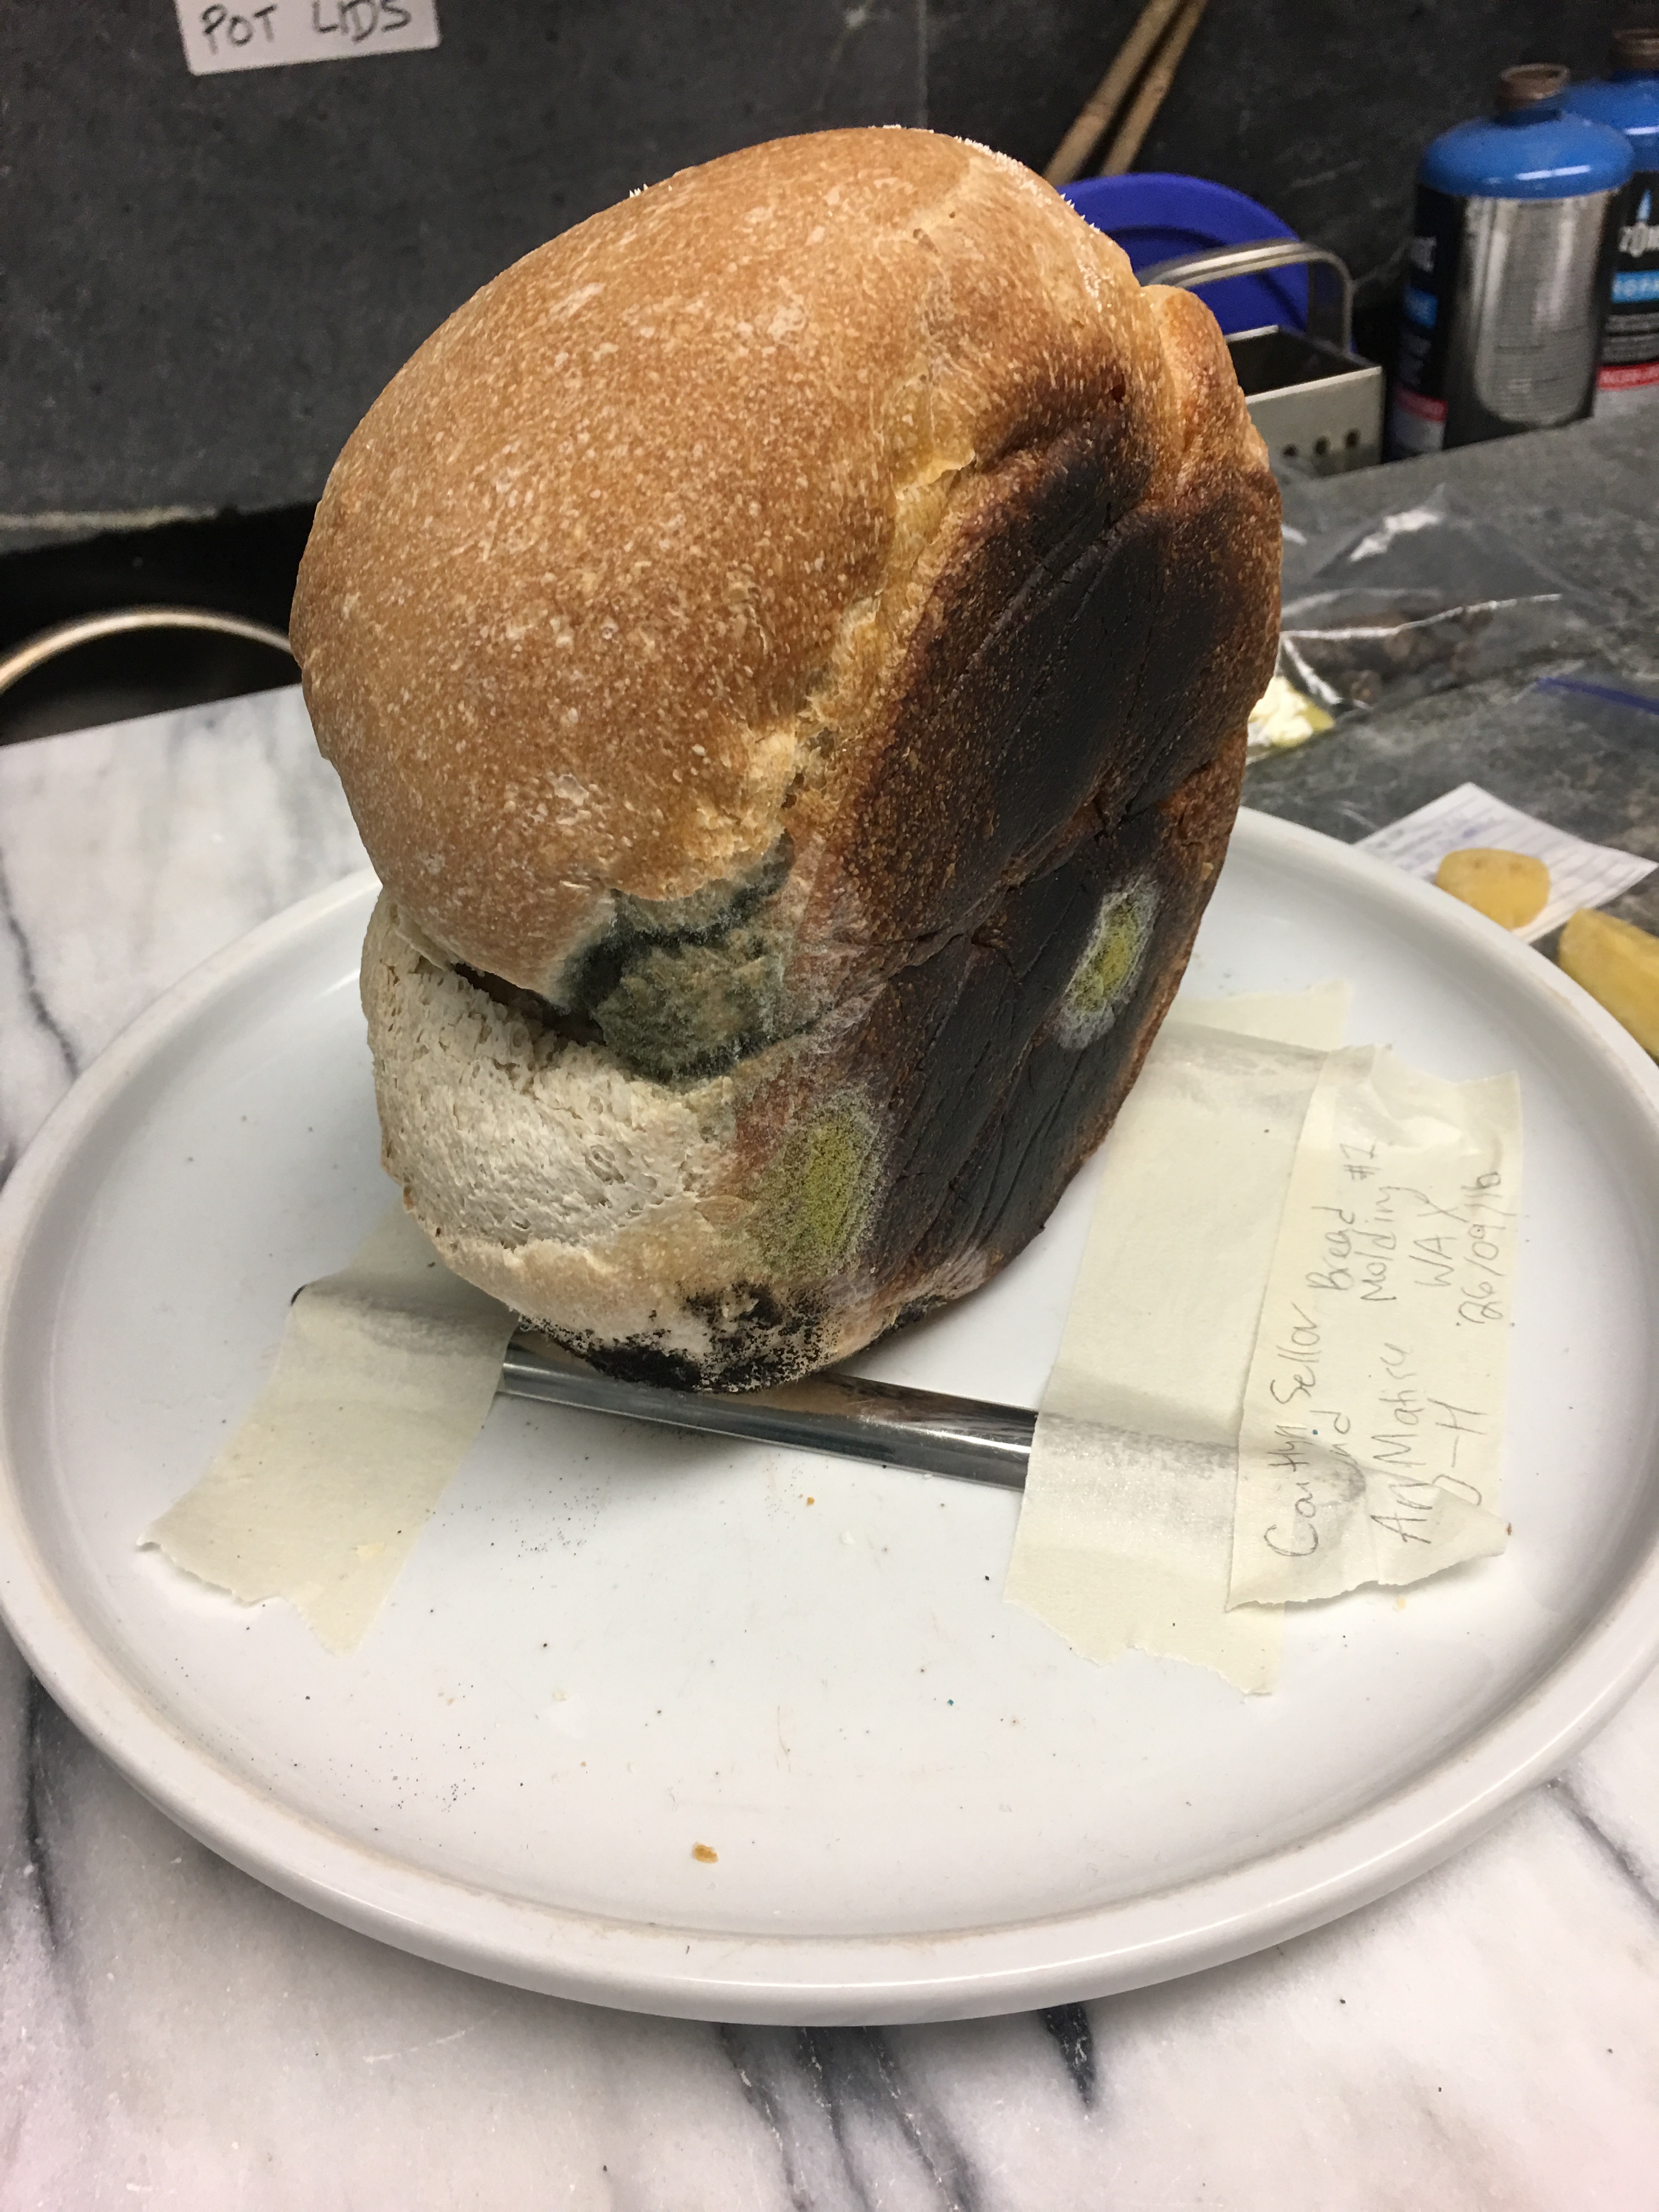
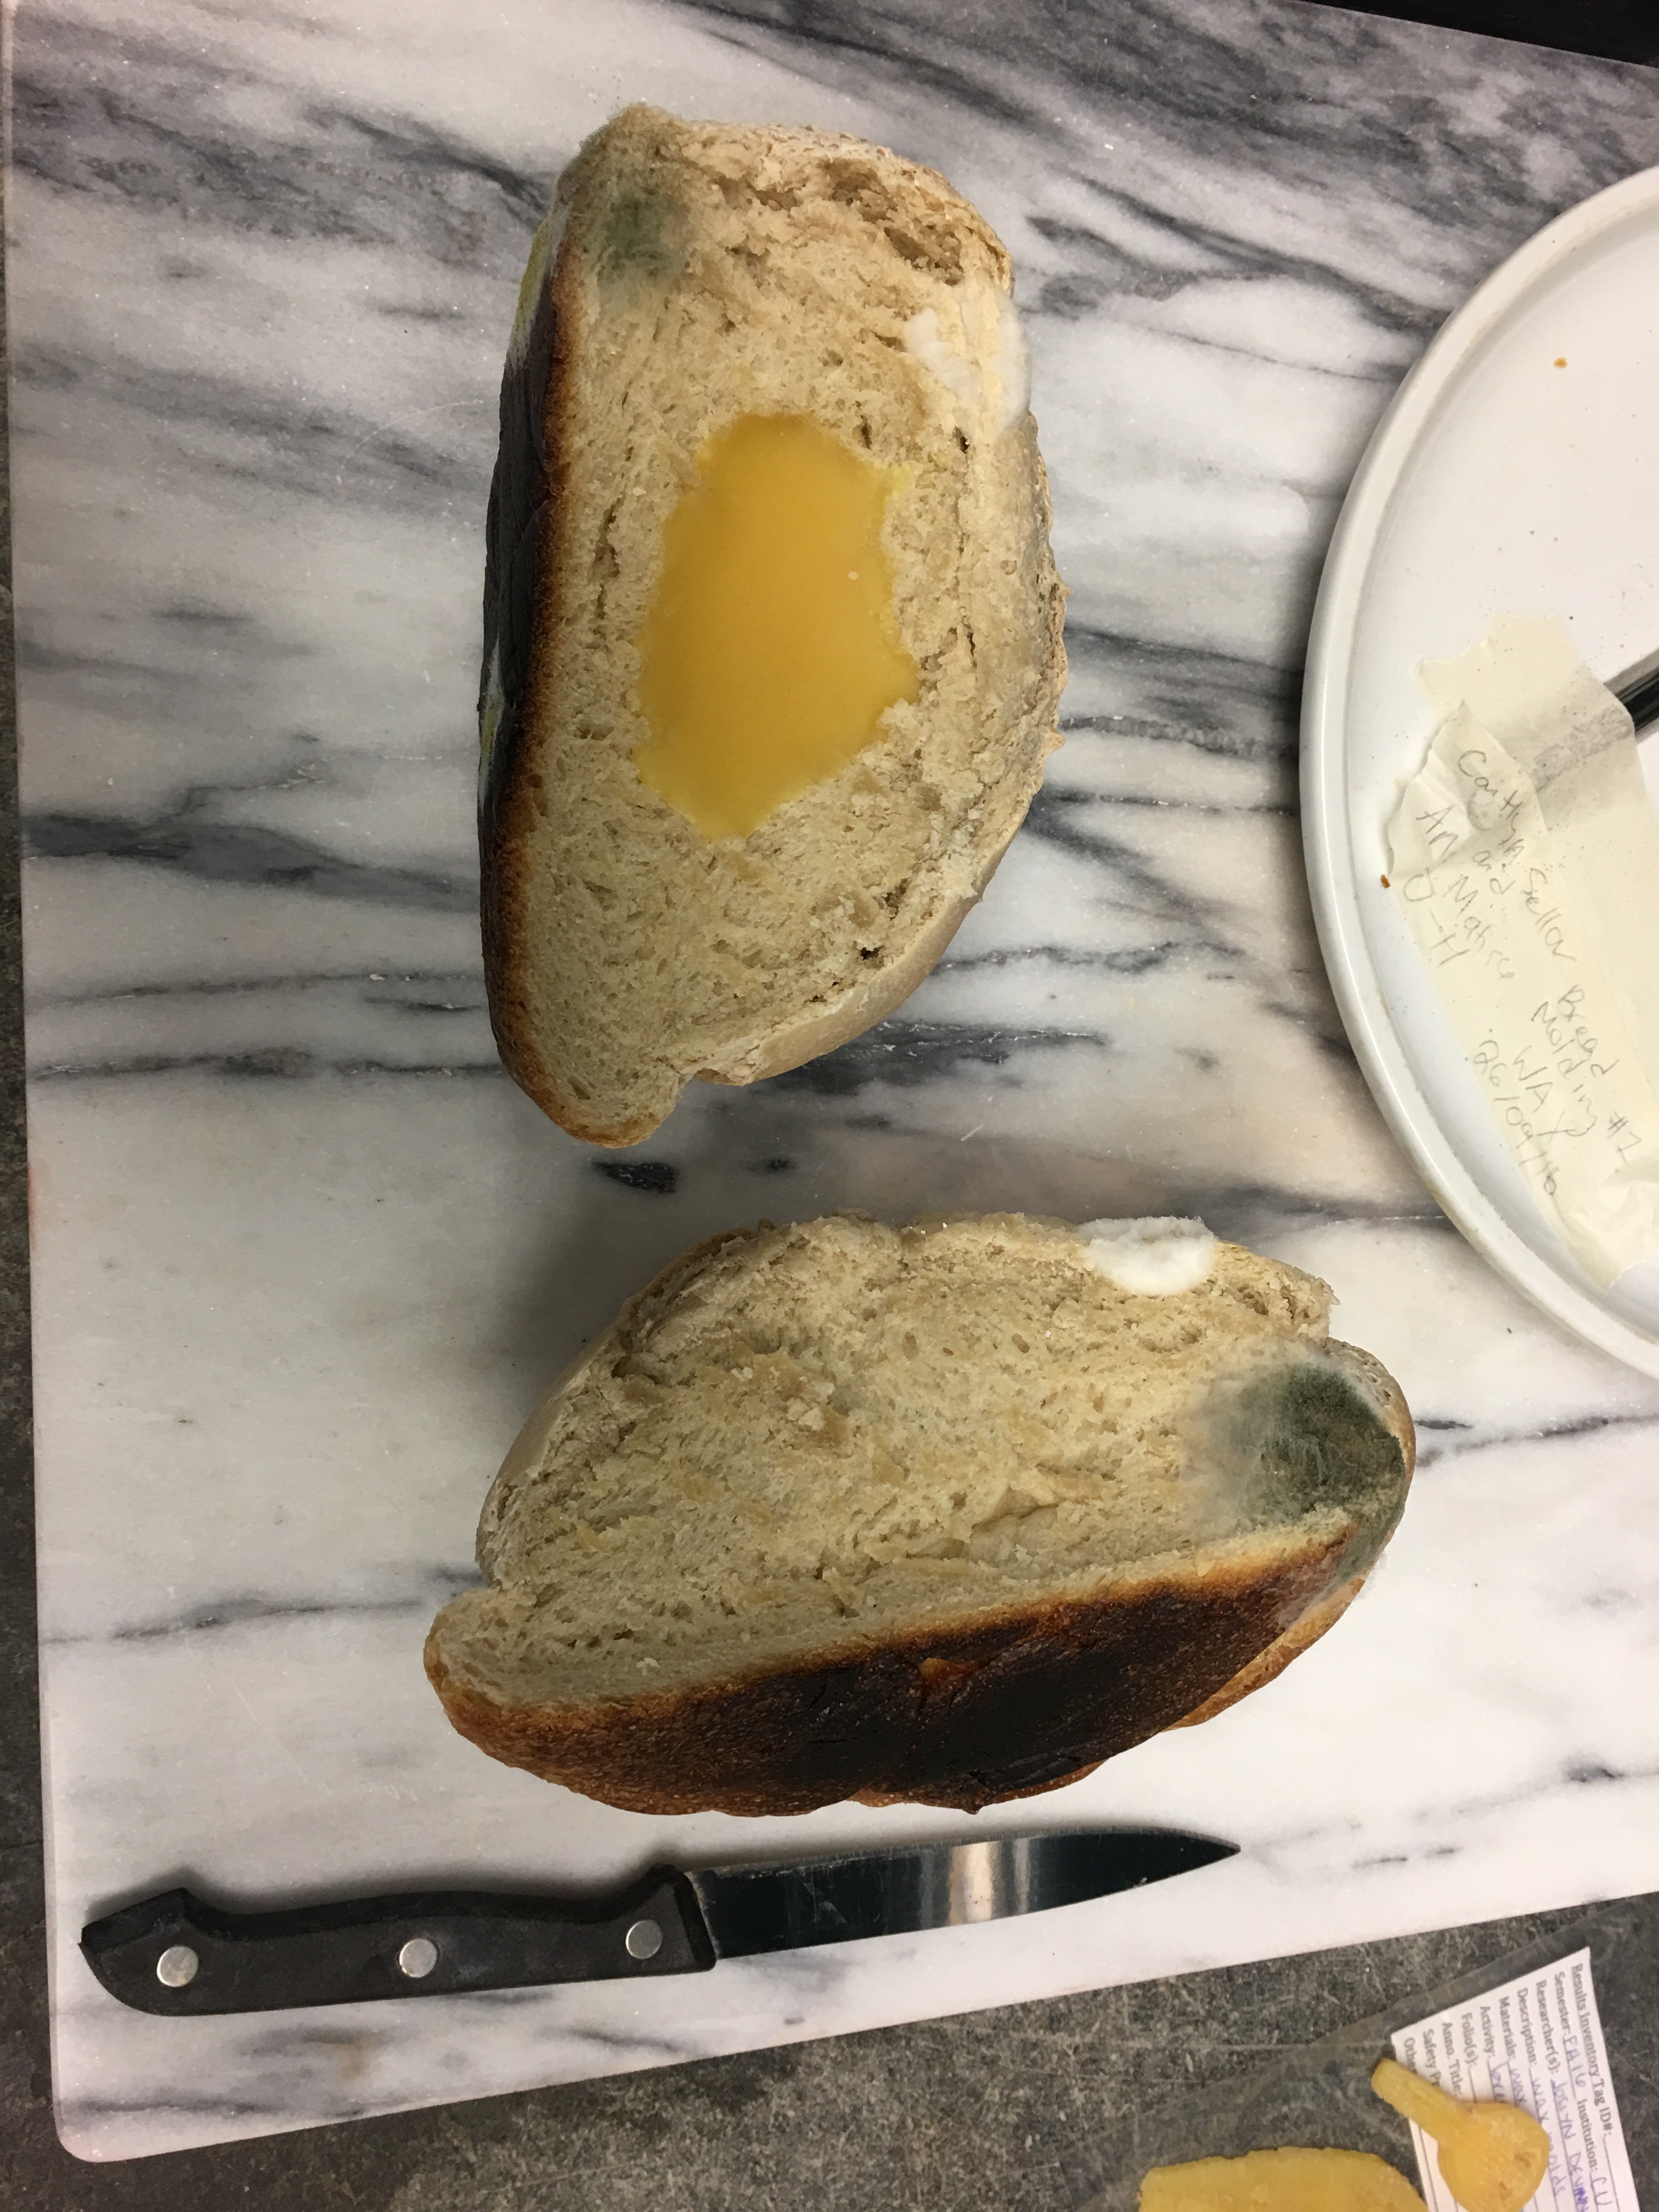
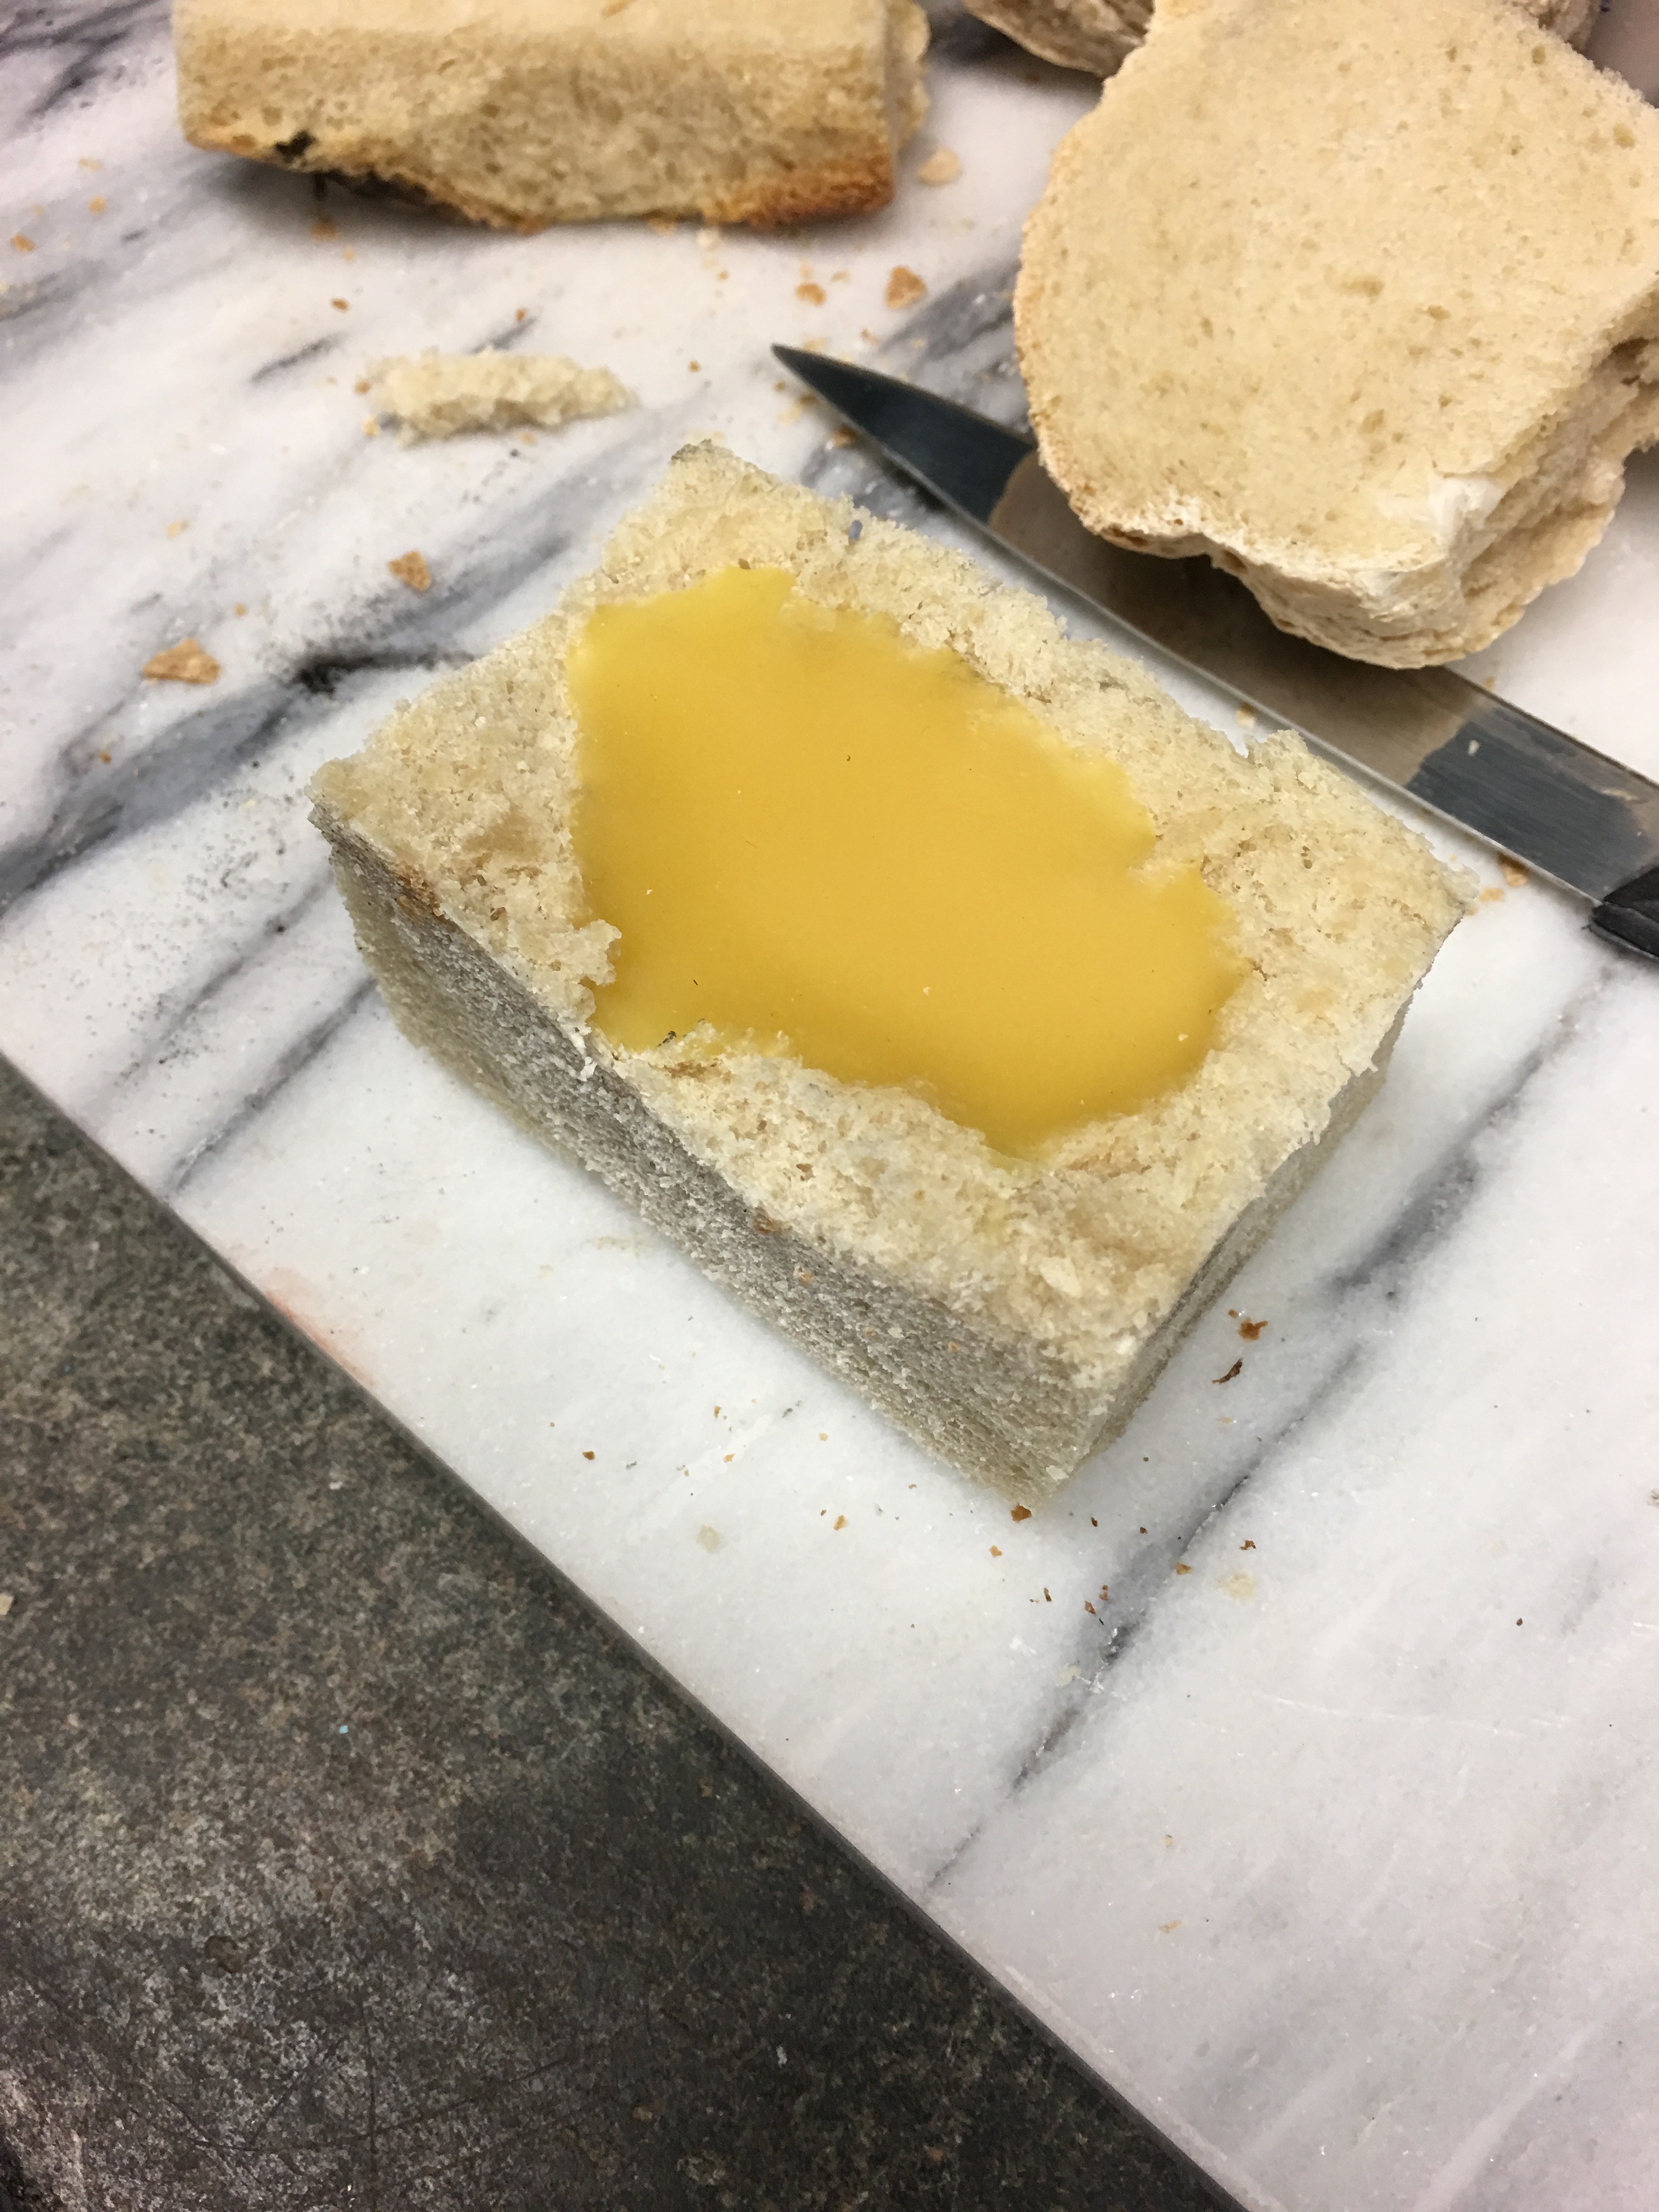
- Once the bread was down to the pith, we began to peel the bread away from the mold. We noted that the bread itself came off fairly easily to reveal the mold within
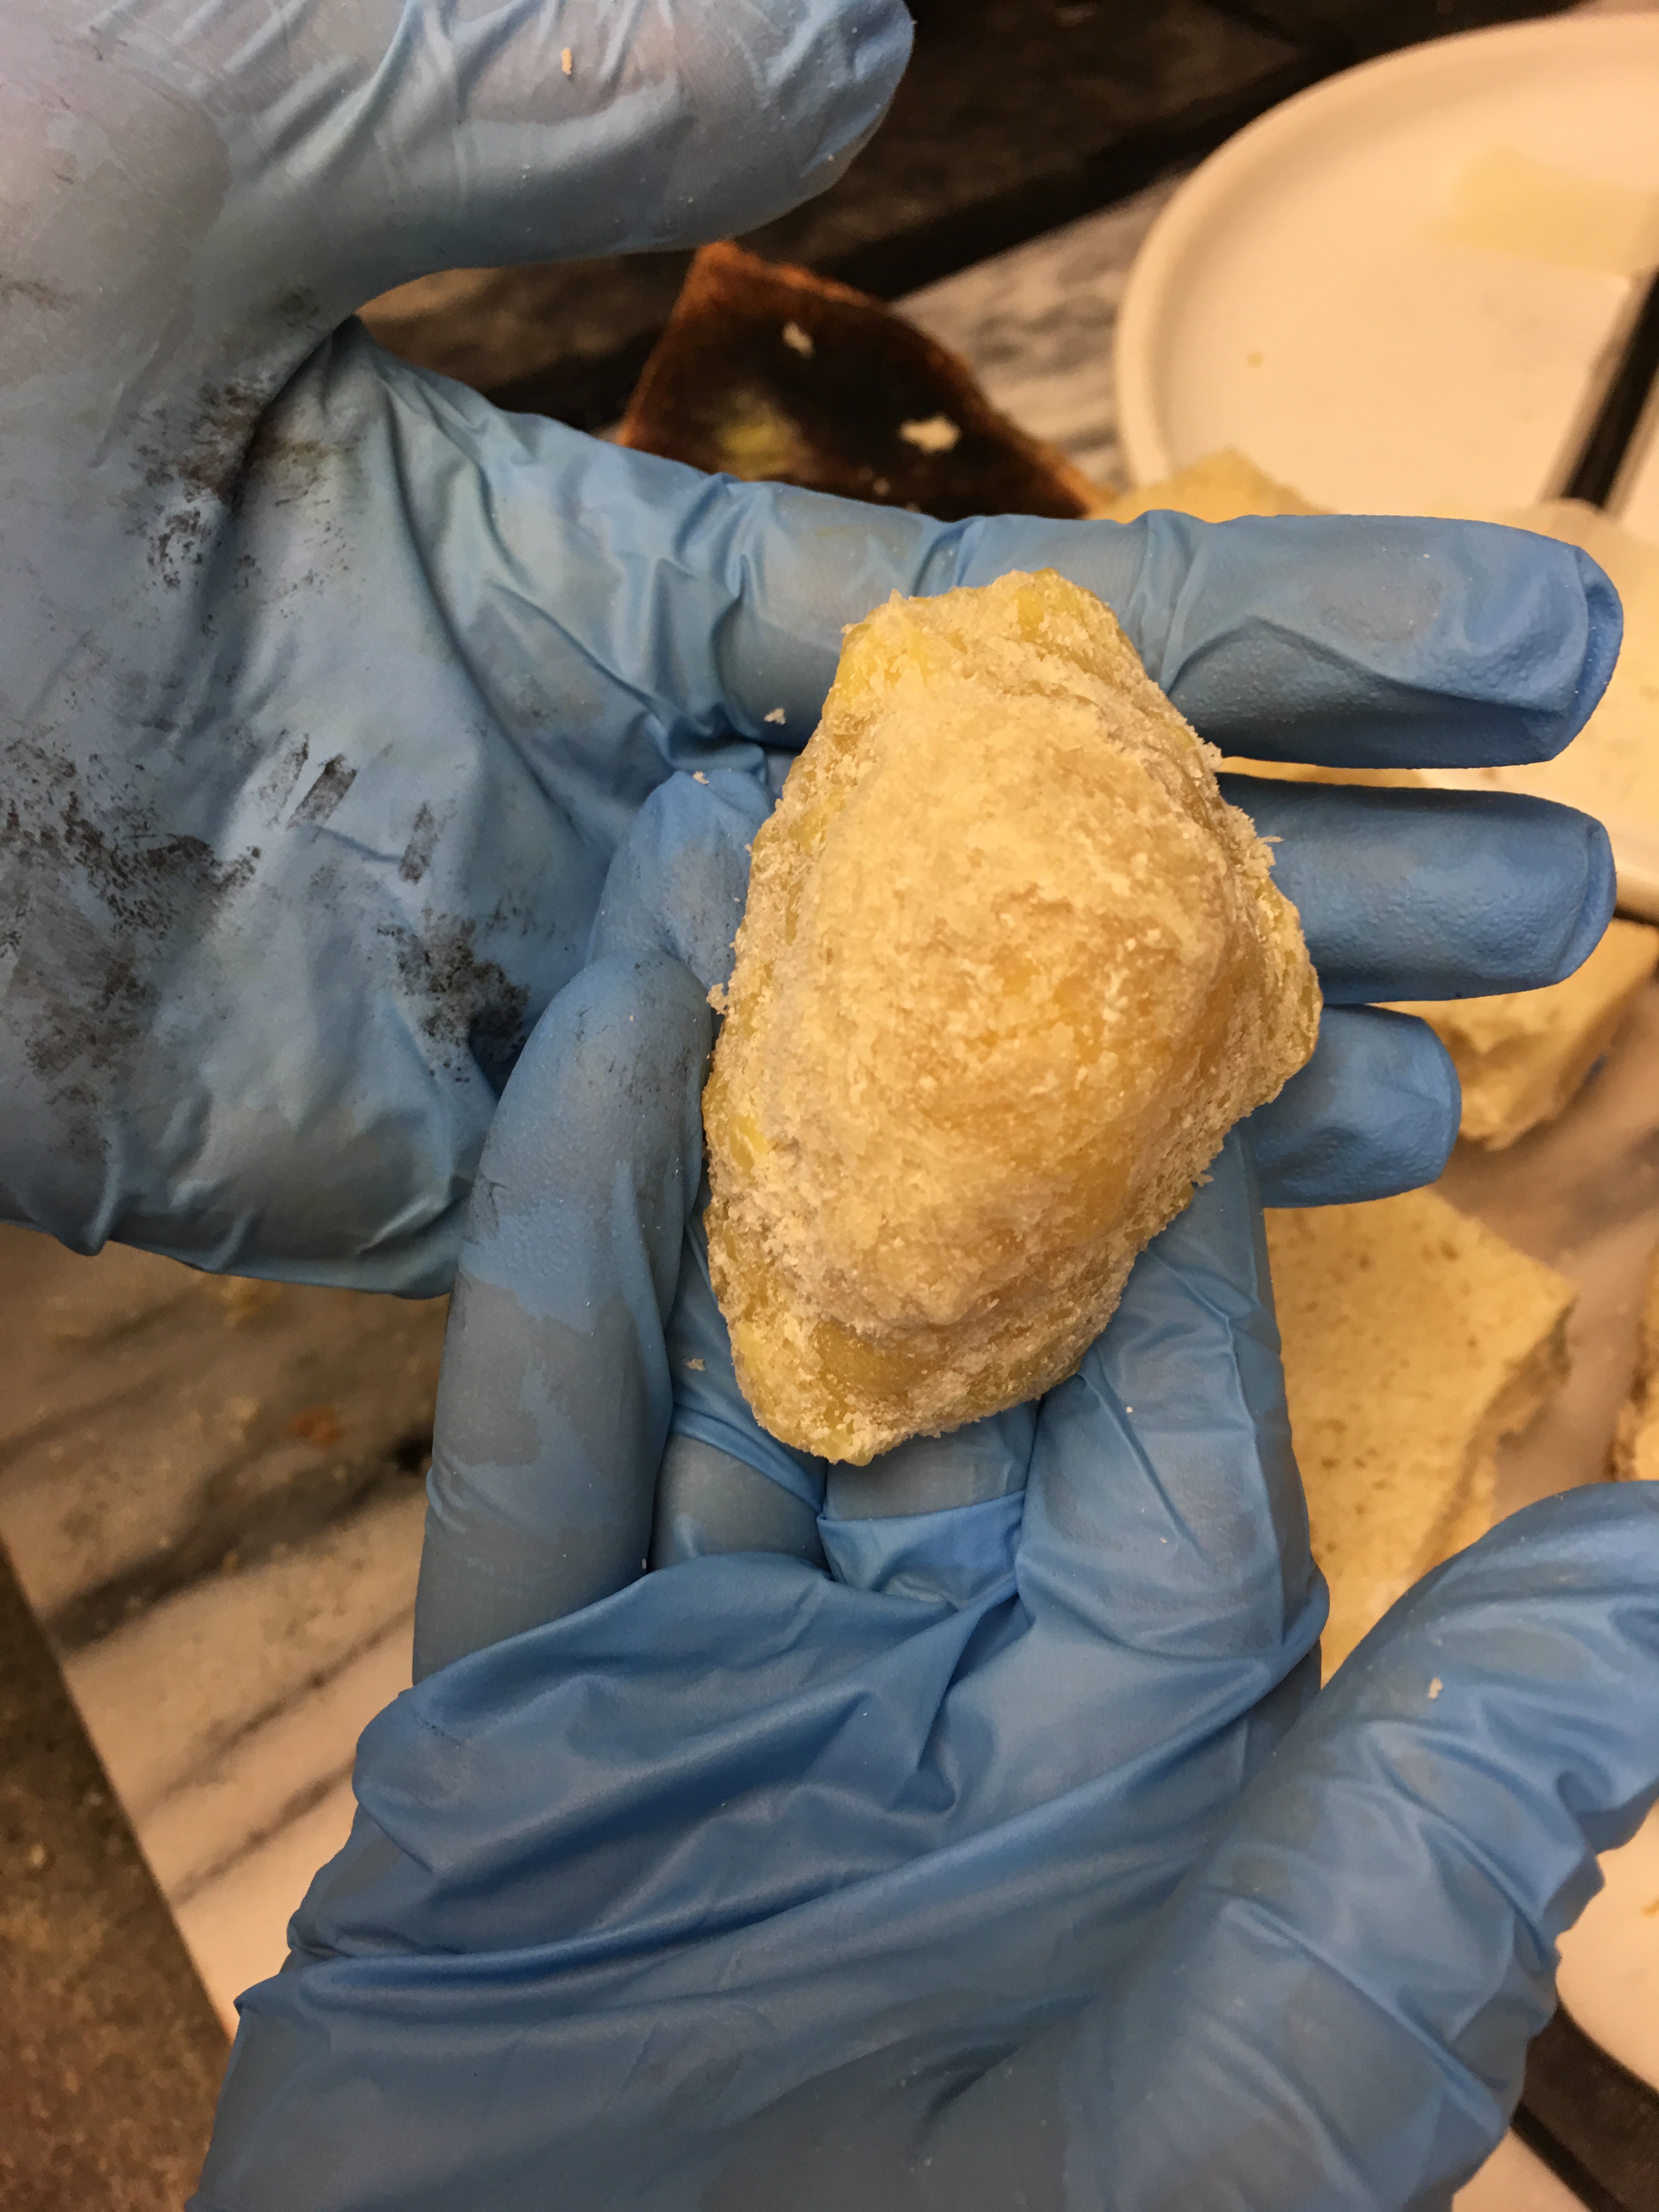
- Next, we used the pick/carving tool first, and then the brush, to remove some of the smaller breadcrumbs that stuck to the wax mold. We were nervous about how soft the wax was, and therefore tried not to brush it too hard with the oil brush, which had stiff bristles.
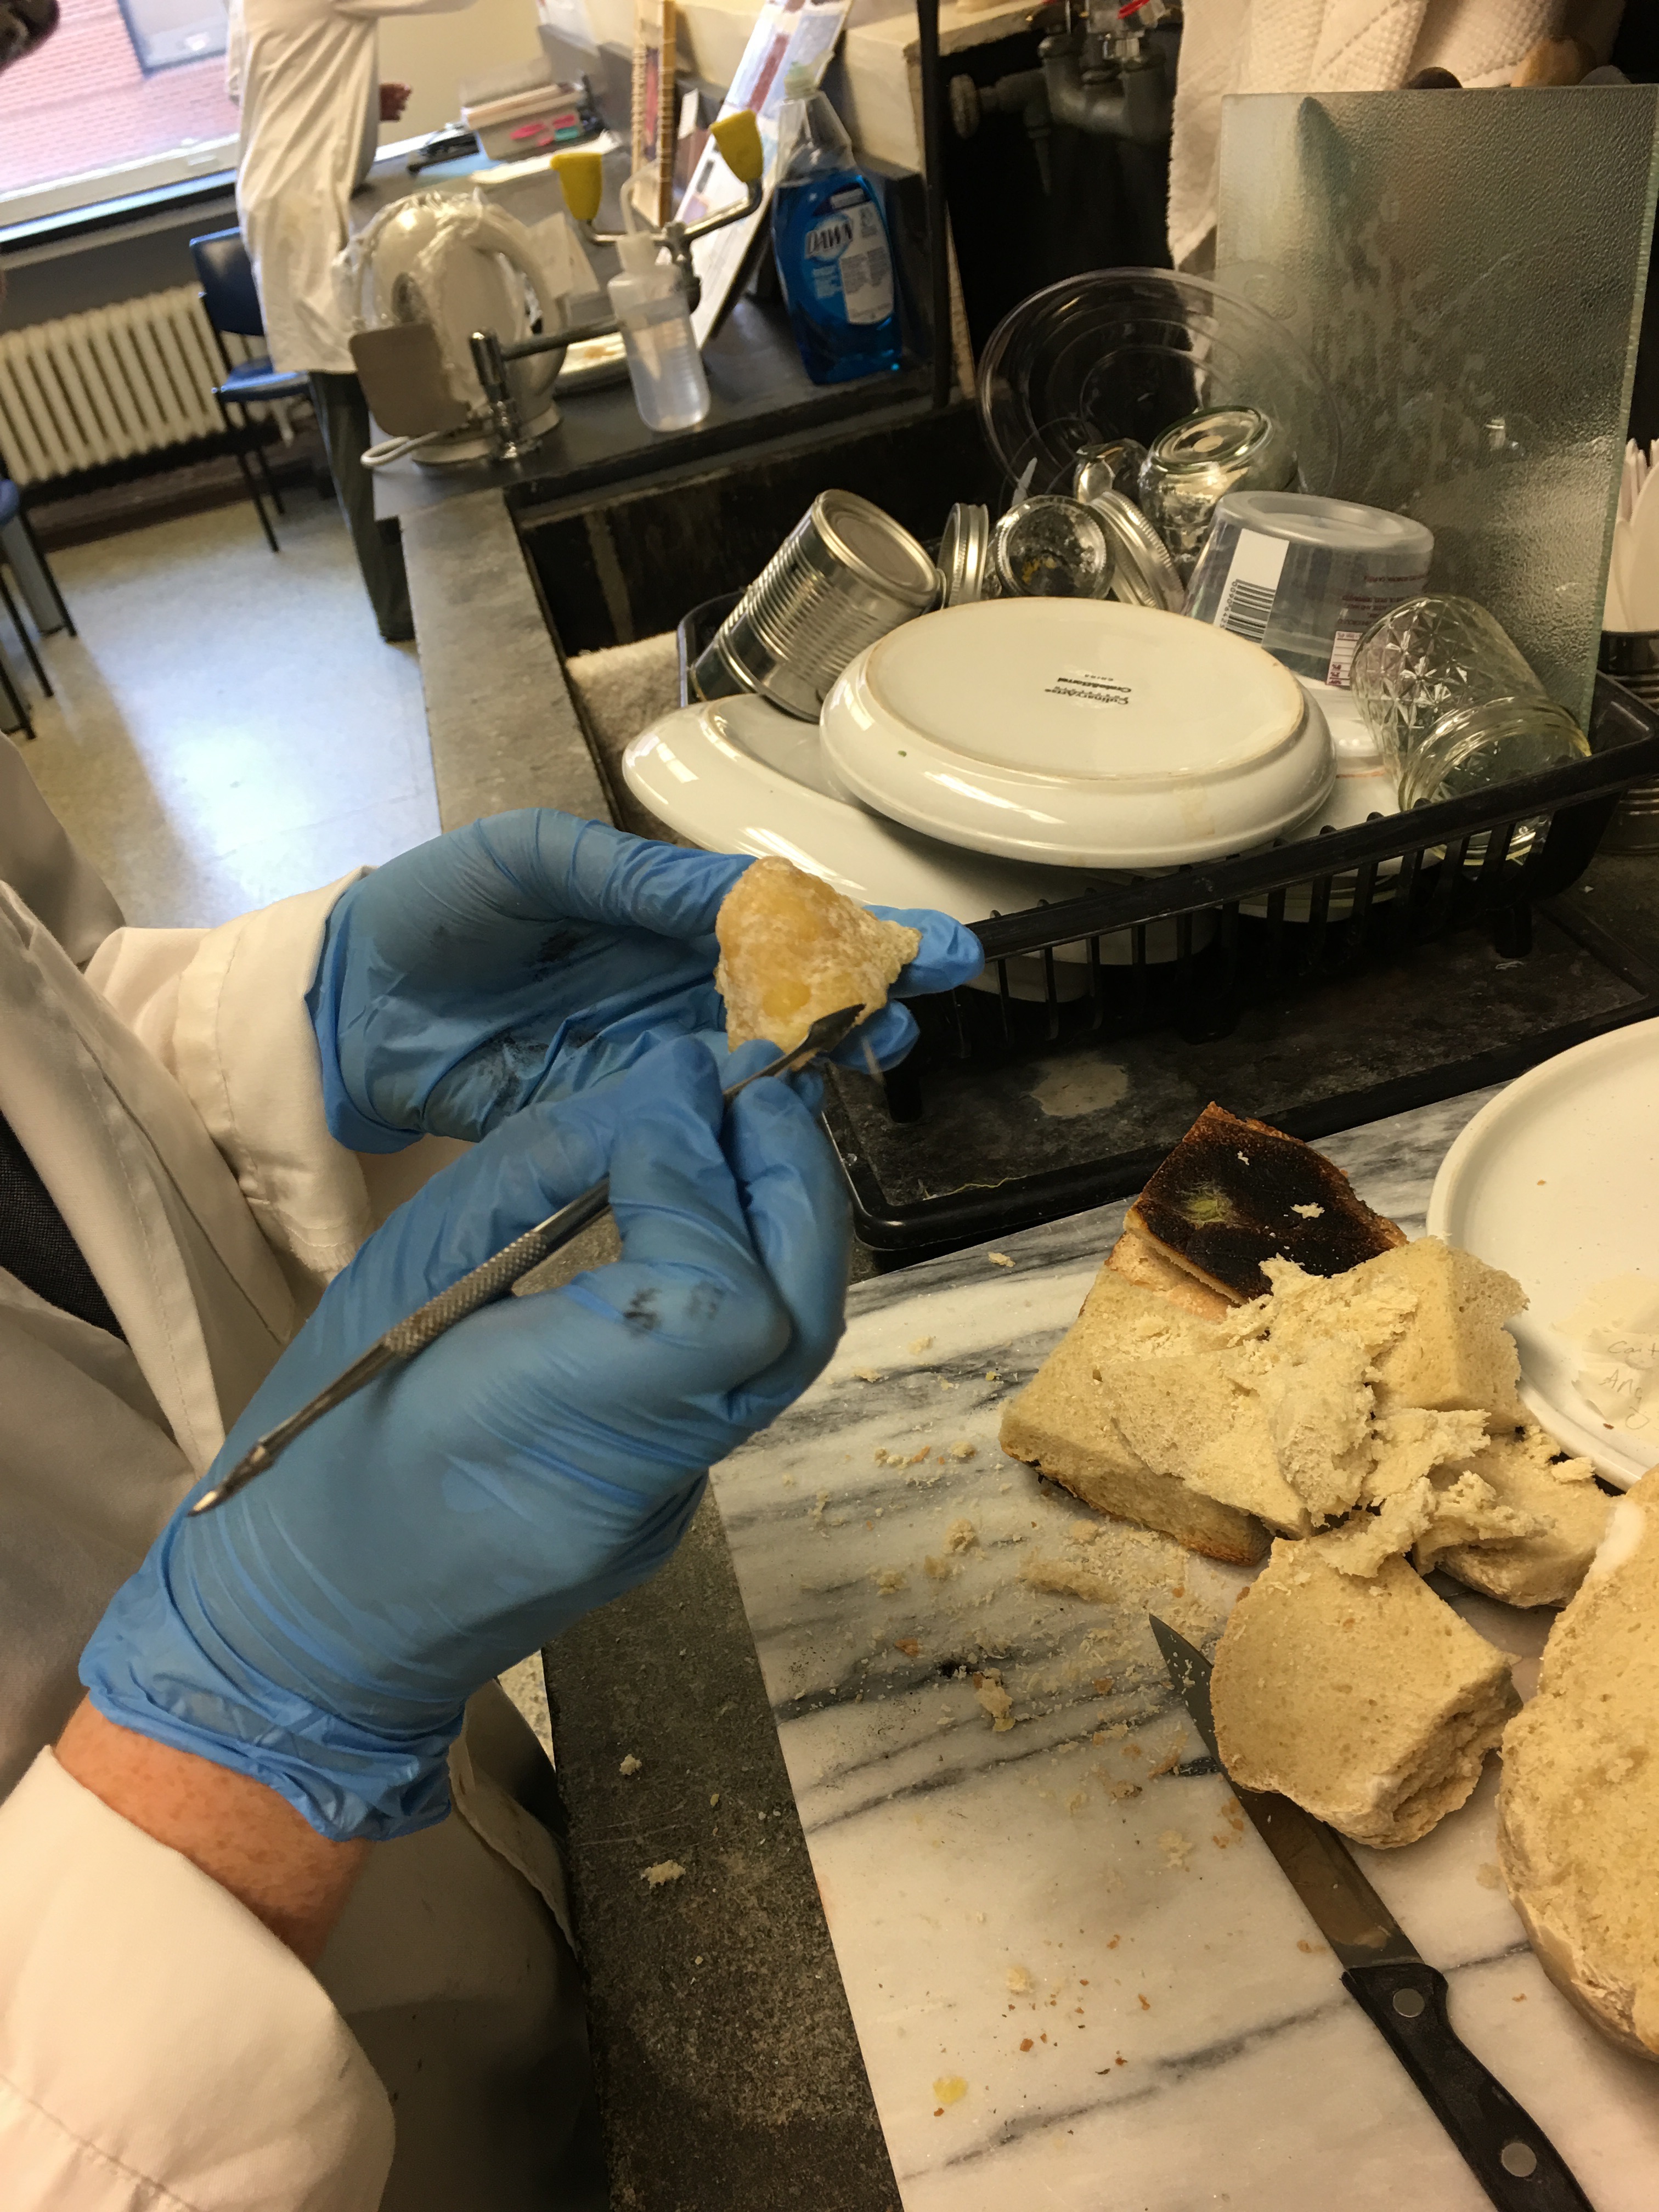
- Once a good amount of the bread was removed by hand, we placed the wax mold into a glass jar filled with water to loosen the rest of it.
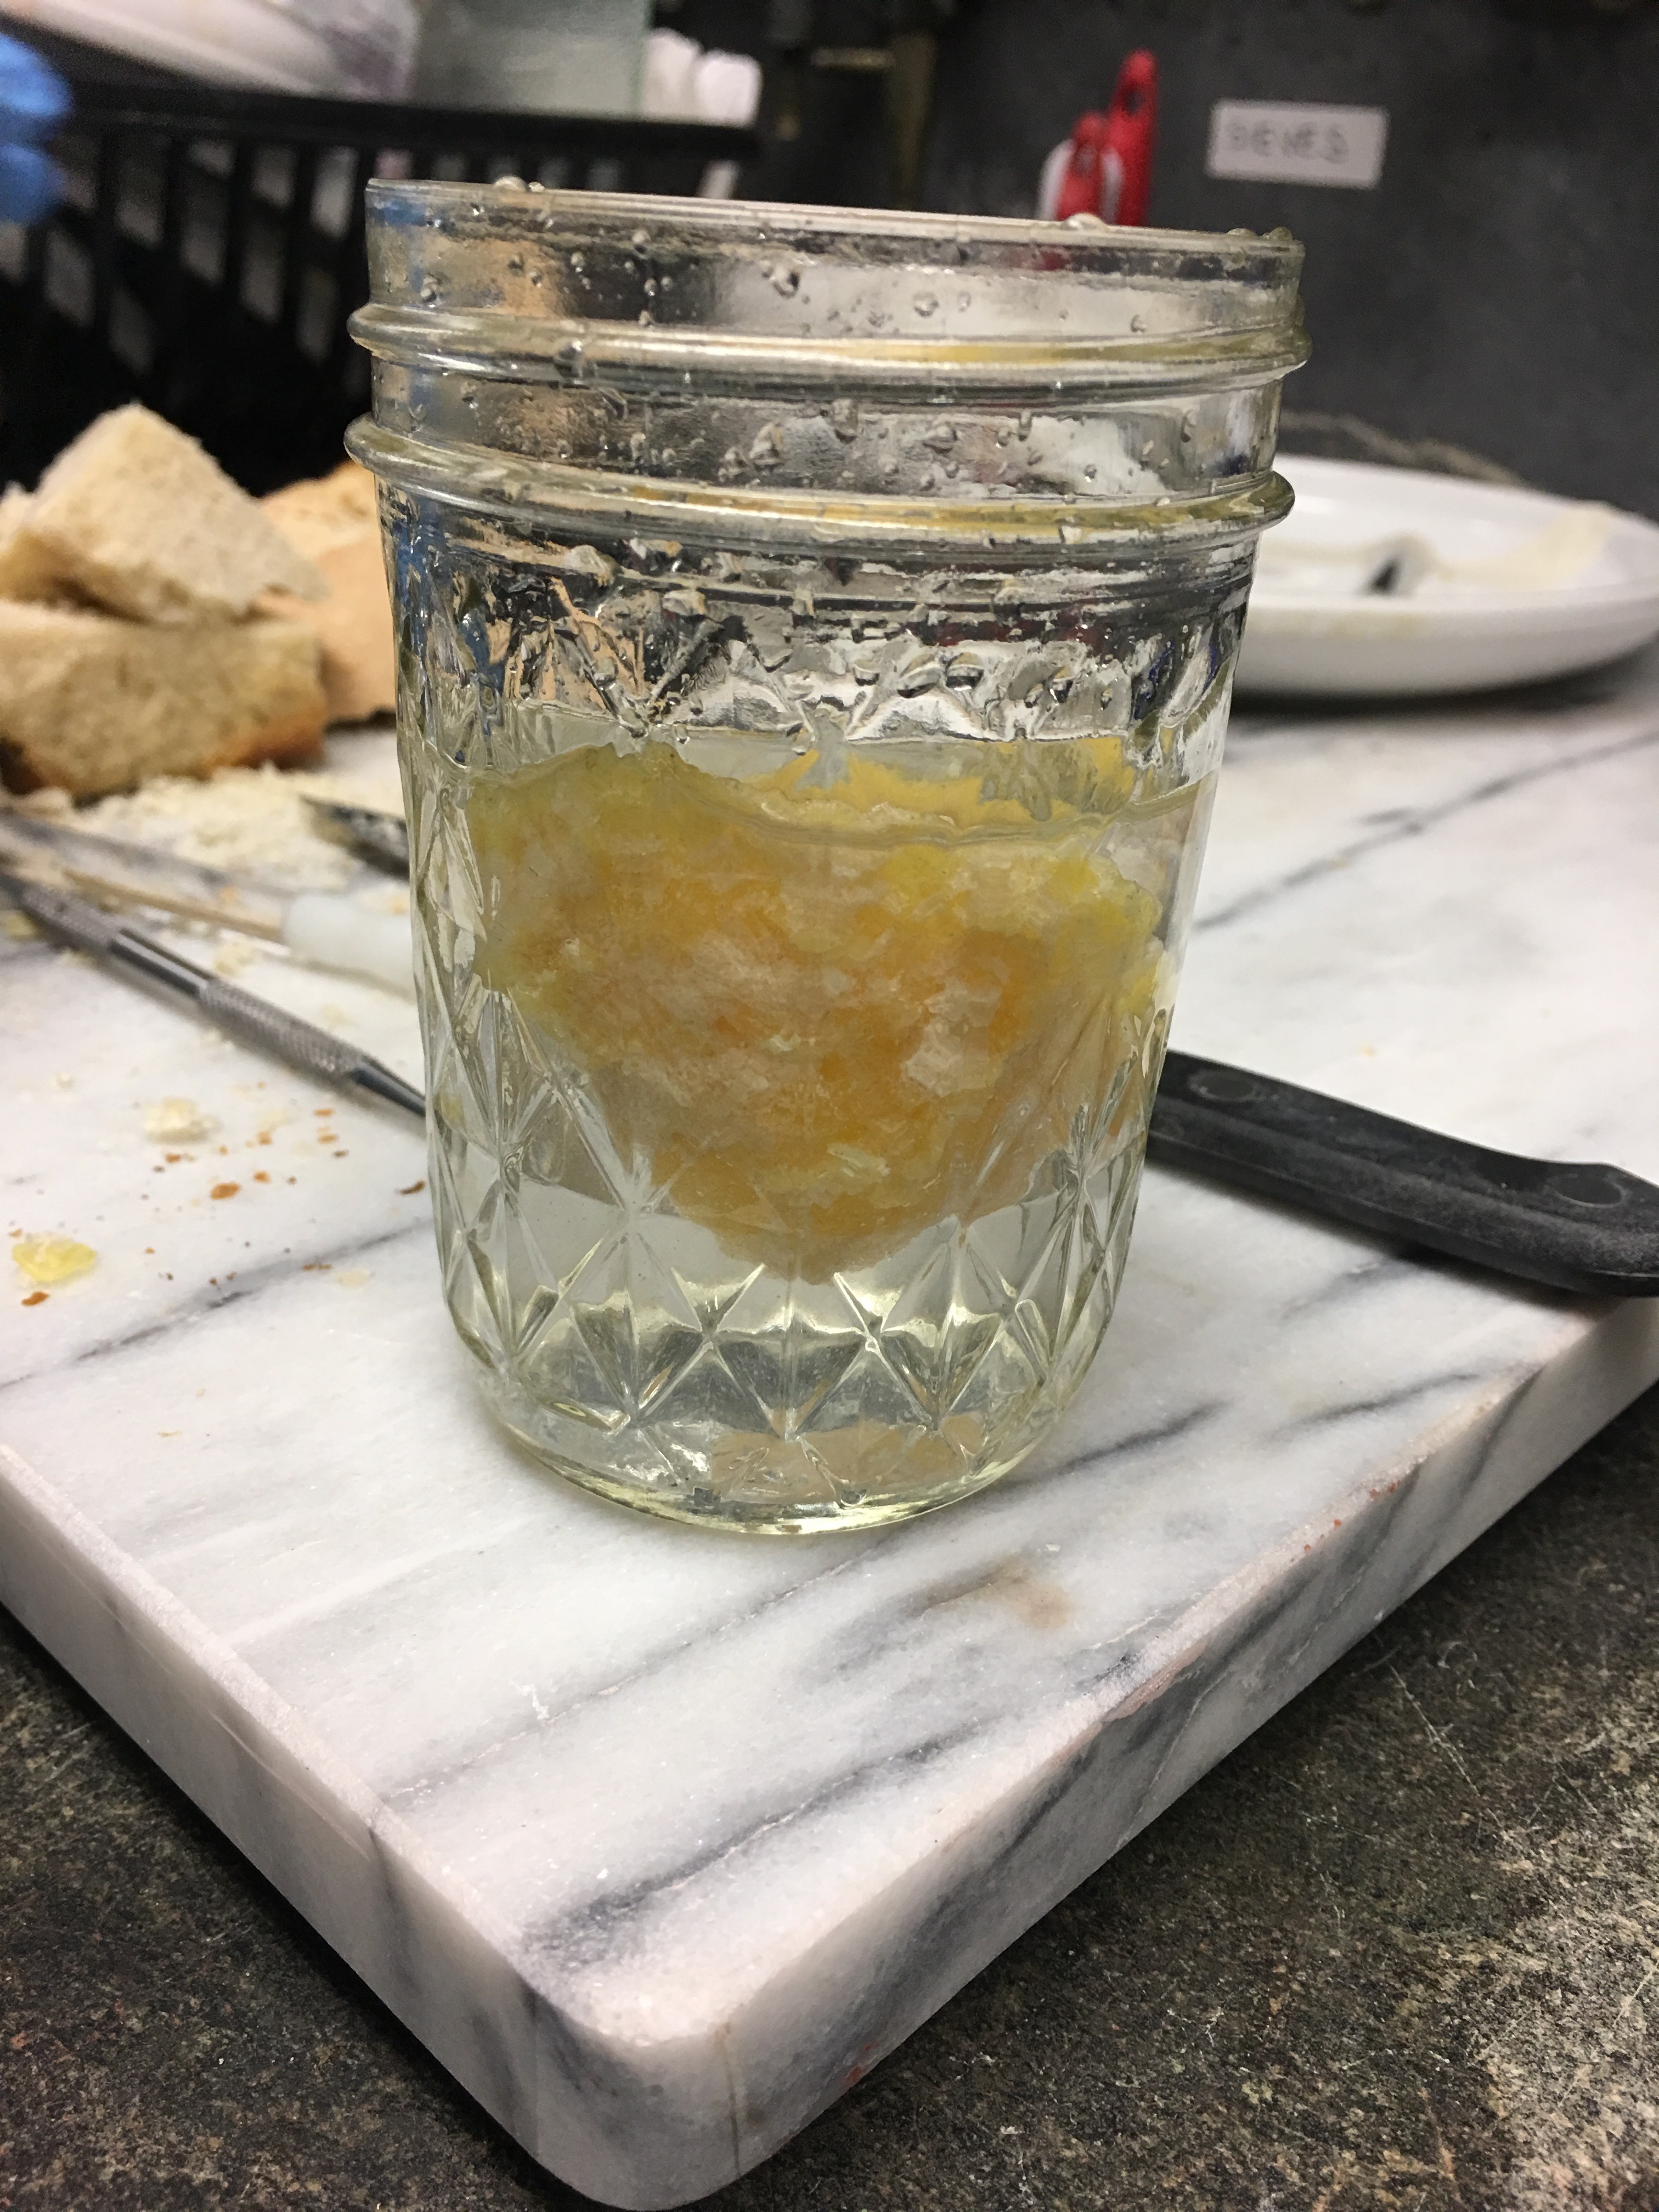
- After 10 minutes, we came back to the jar and removed the wax mold. The water in the jar was murky with the bread crumbs. Most of the bread had ‘dissolved’ off of the wax and we were left with a fairly detailed wax skull
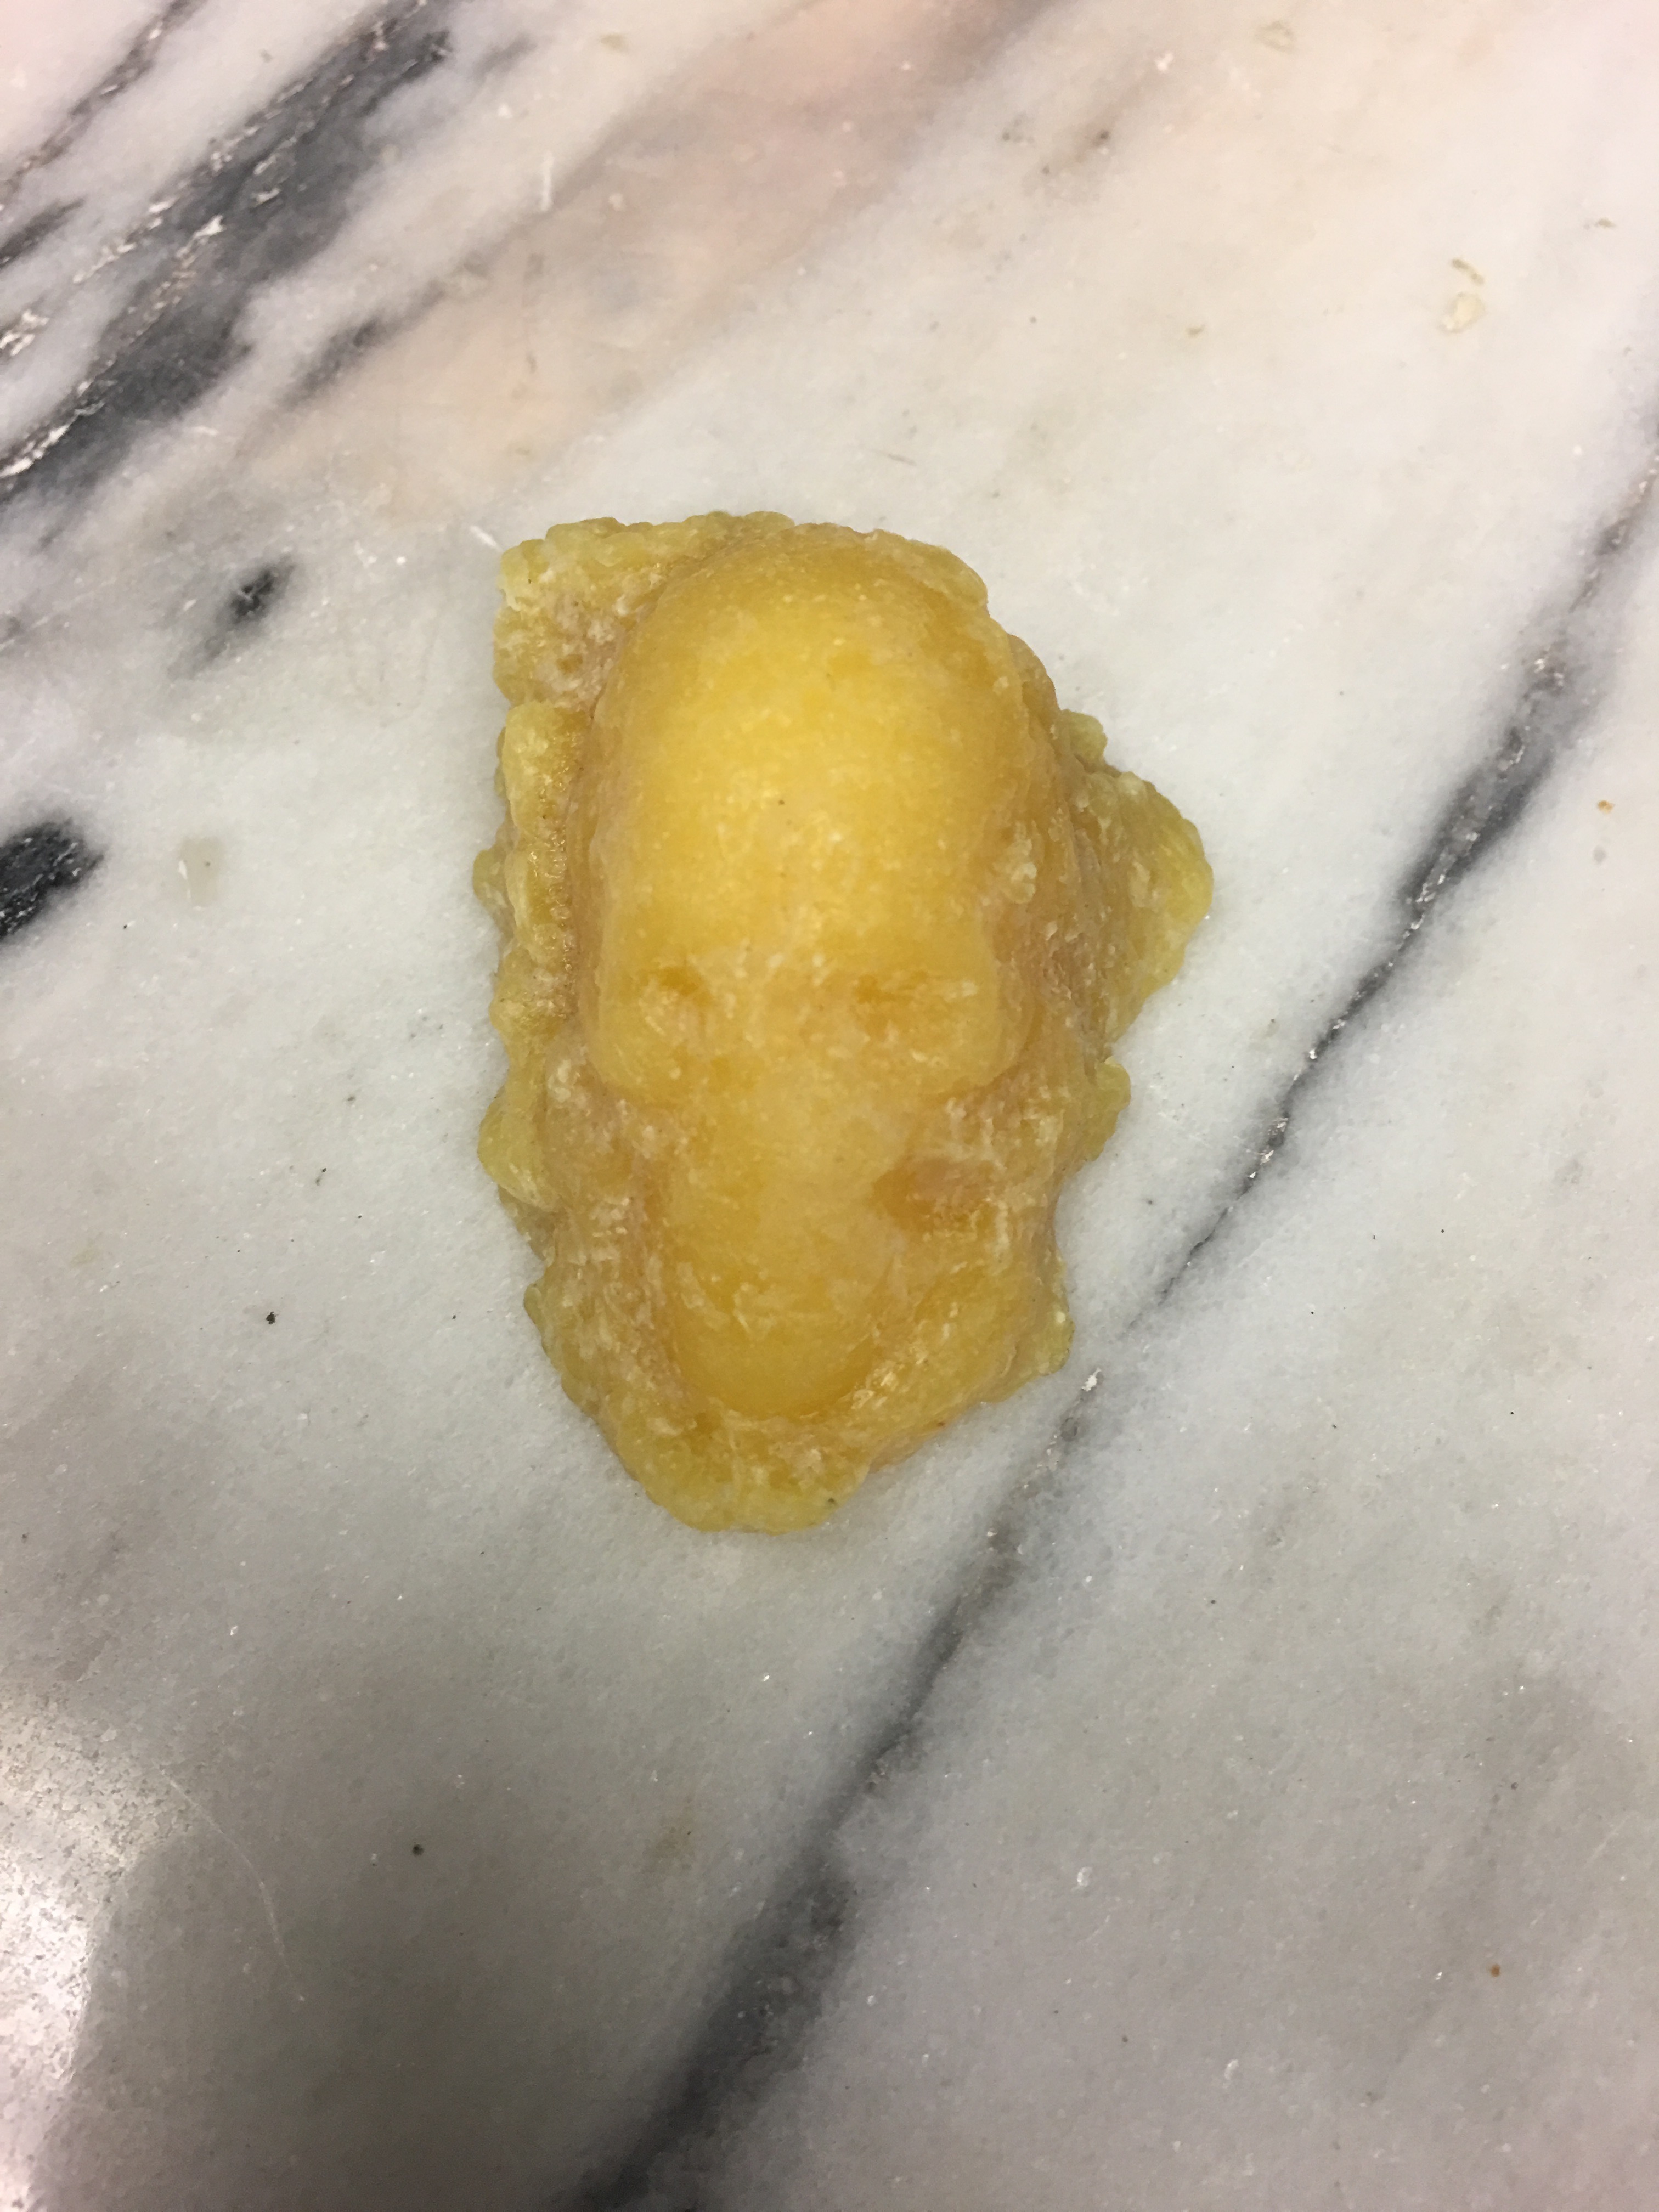
Sulfur:
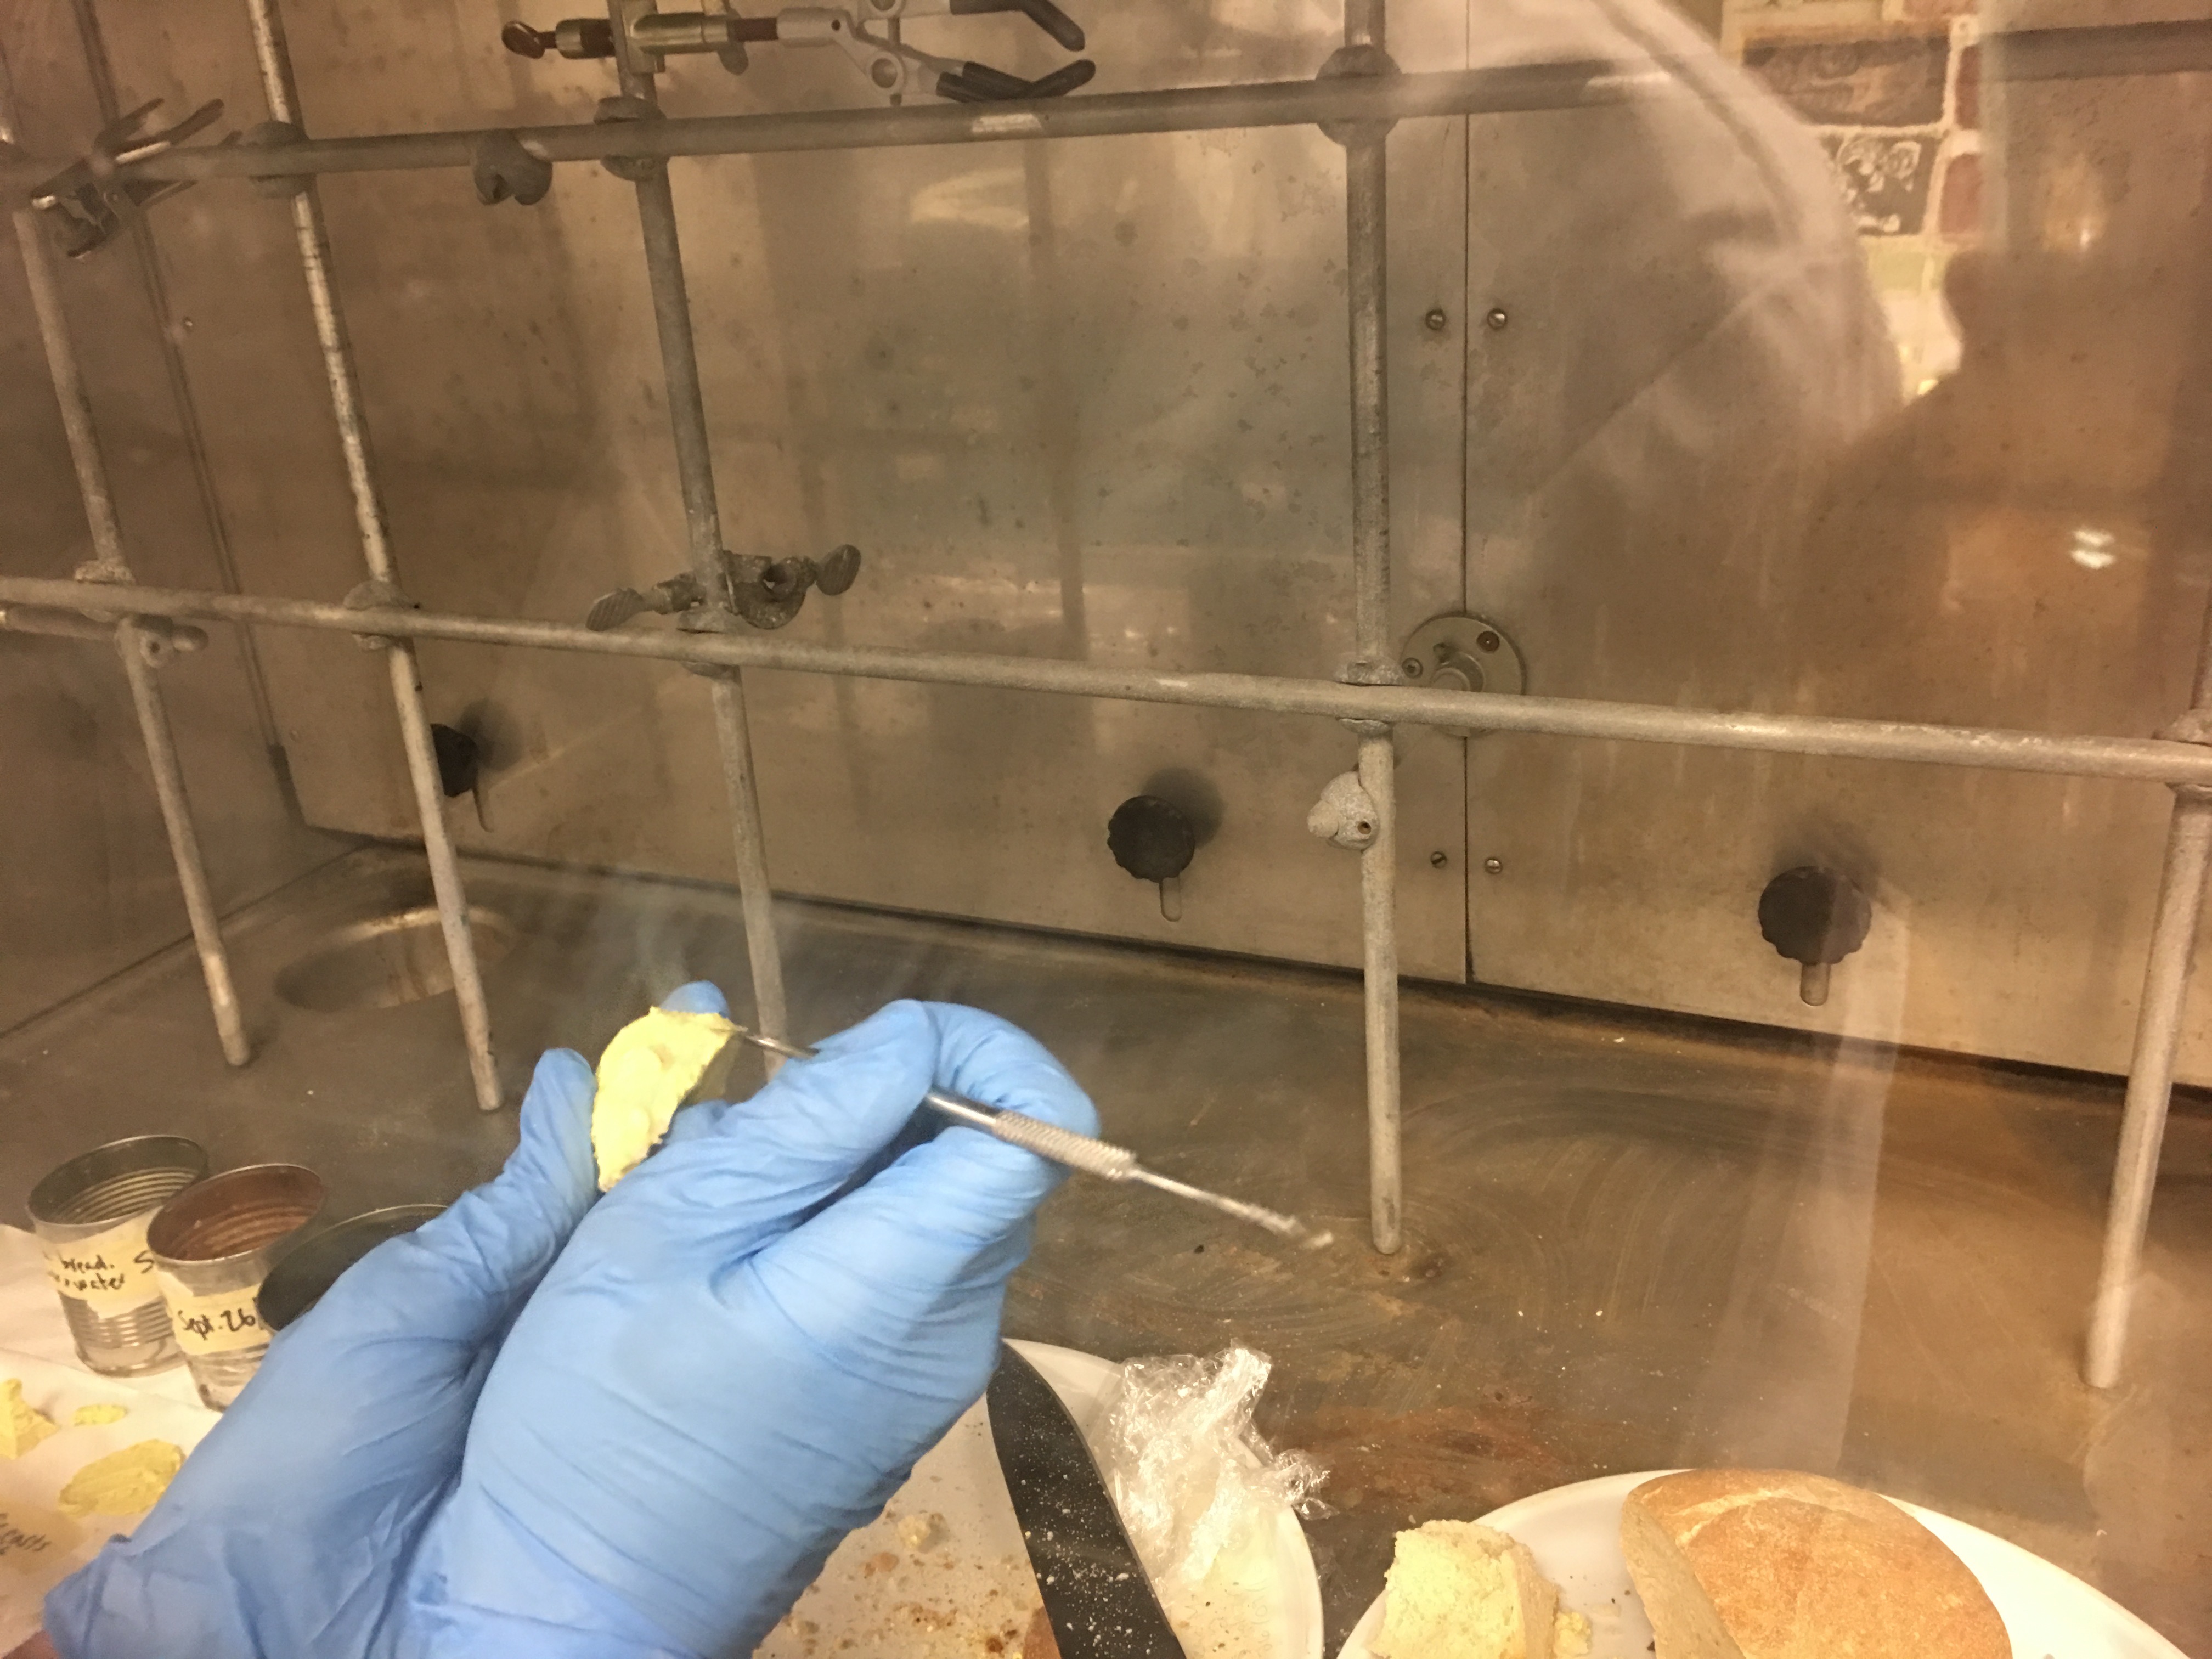
- We began again by removing three sides of the bread crust. This loaf had been left in the fume hood for the last couple of weeks, and it therefore had less mold but was much more stale. We began by using the small knife to cut the bread, but this produced almost no noticeable dent in the bread, so a serrated knife was brought and we tried to cut the crust off using this second knife. This was a bit better, and it removed one side of the bread crust but not the others. We quickly discovered that we could, in fact, just pull the crust and the rest of the pith away from the mold with our bare hands.
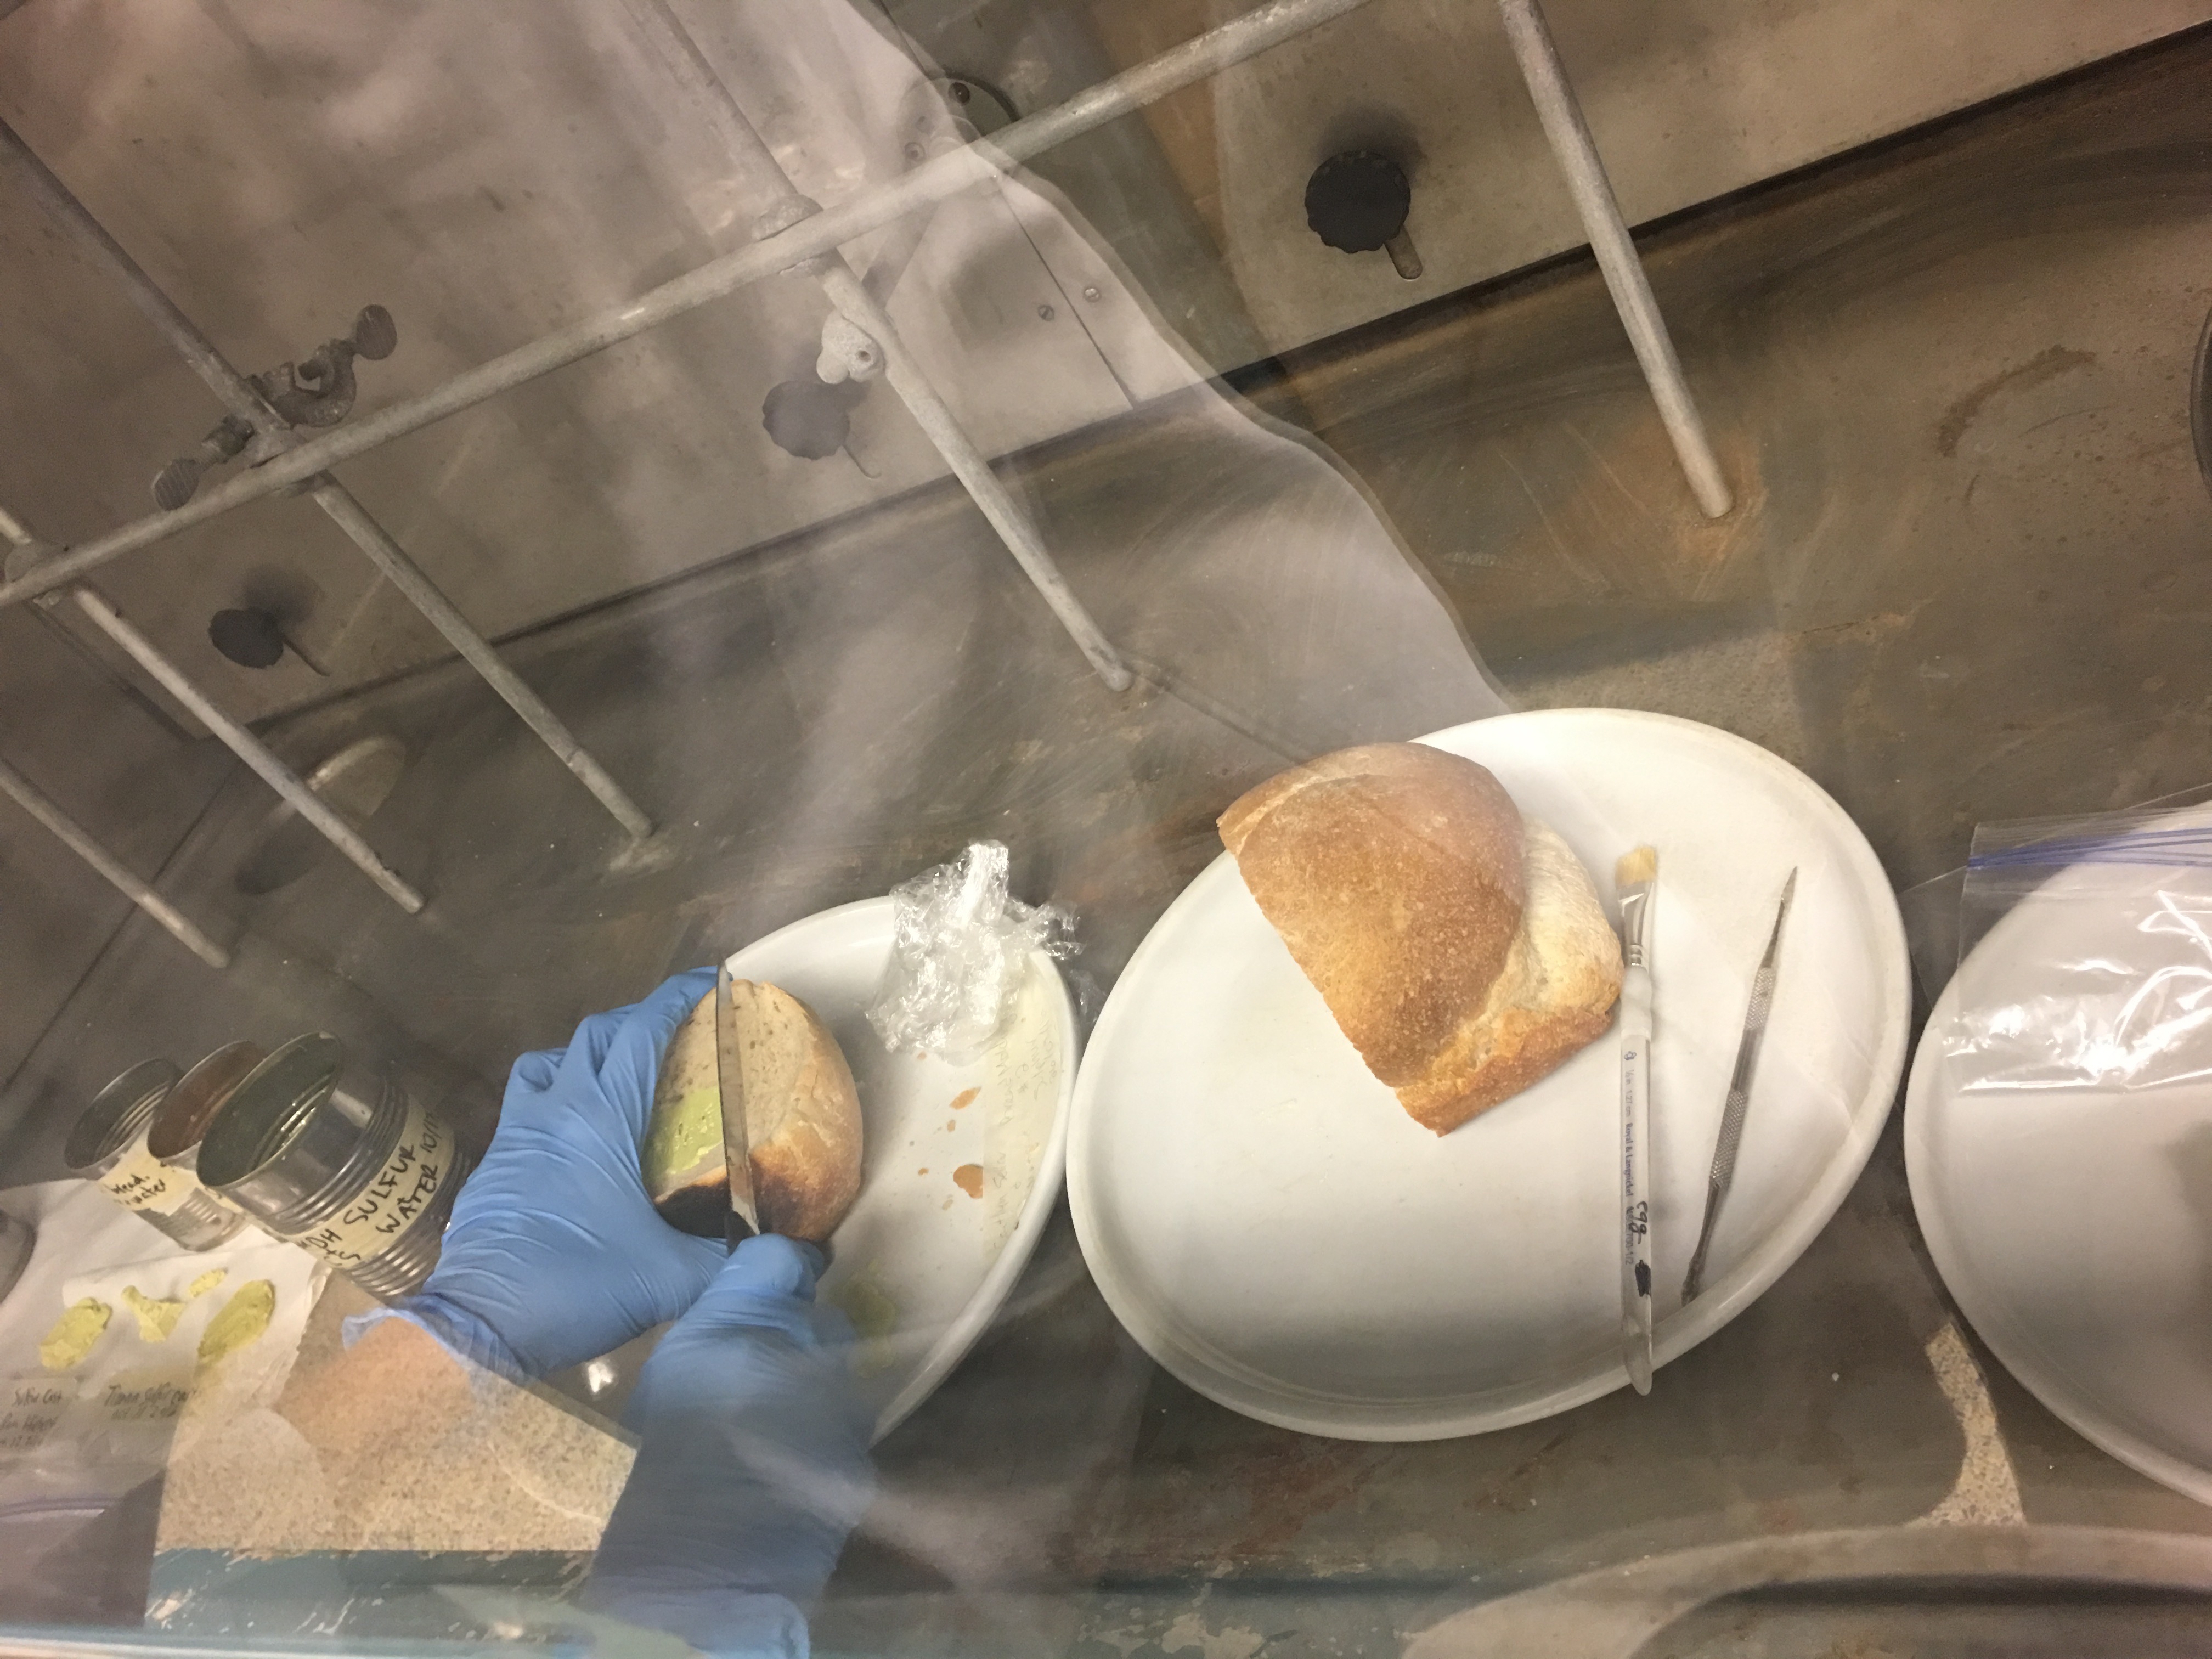
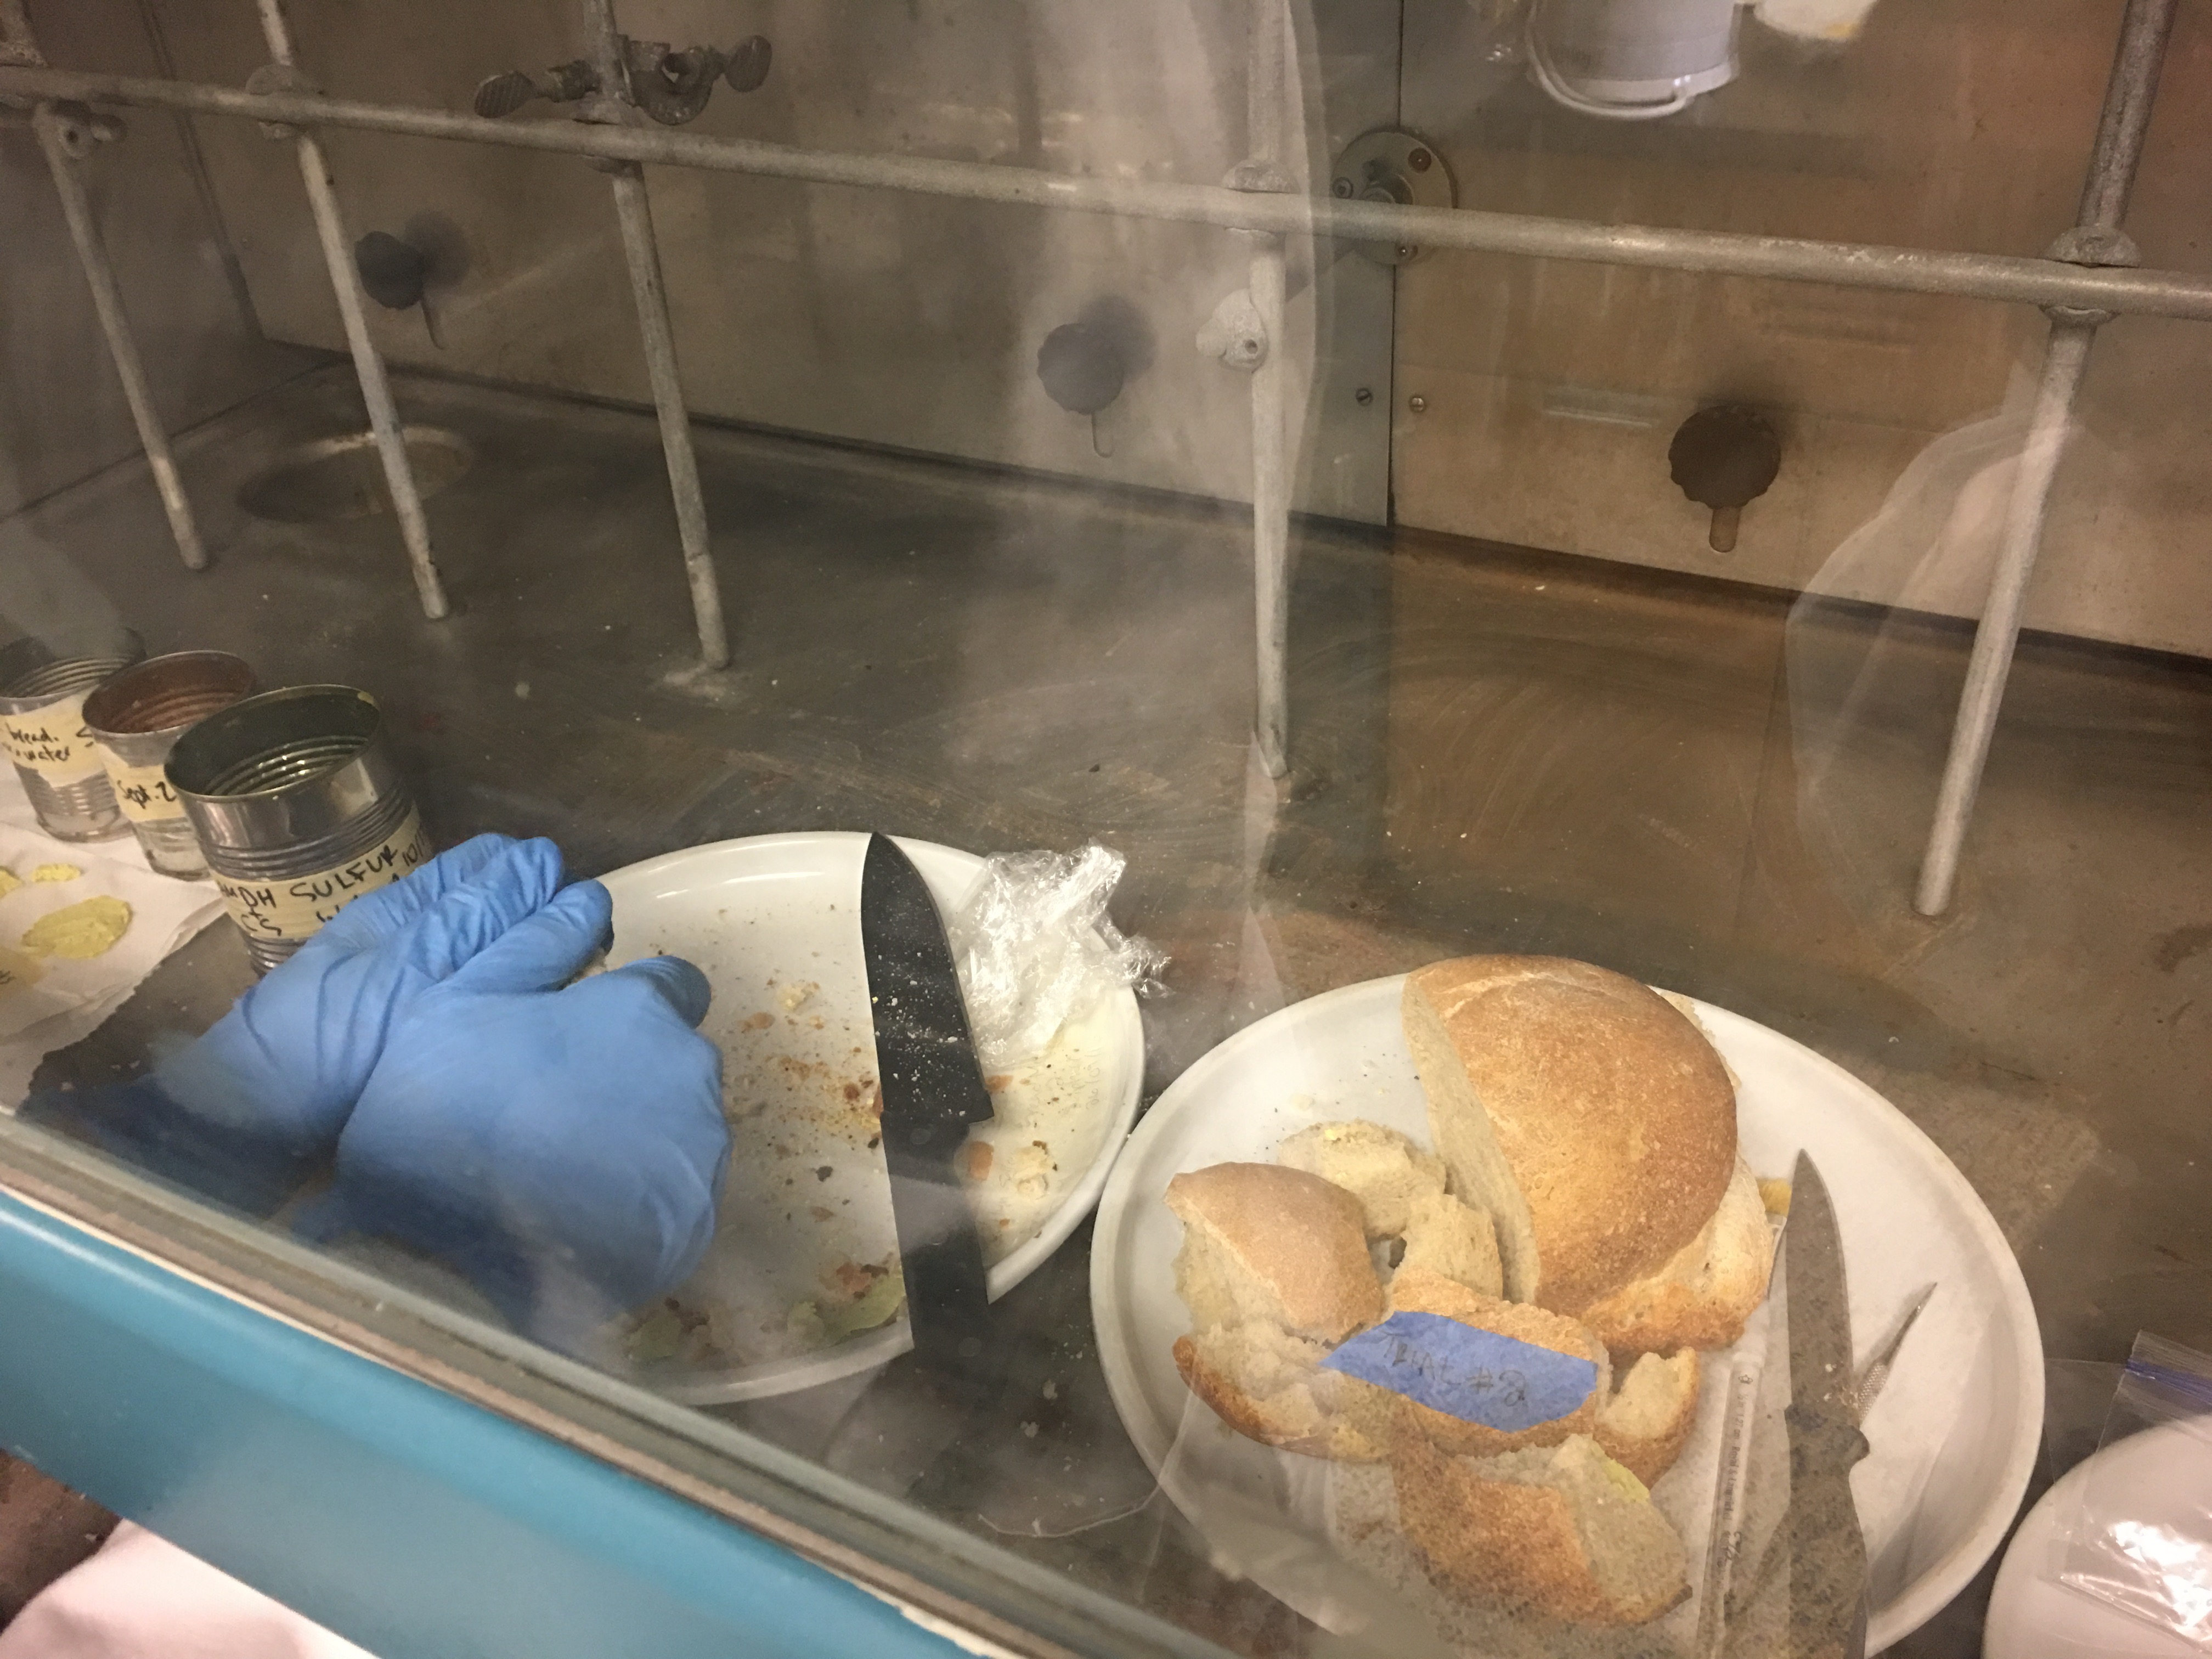
- In the process of pulling the bread away from the mold, some of the sulfur flakes off with the bread, but not much.
- Once most of the large bread pieces have been pulled off of the mold, we, in the same way as above, alternated using the pick/carving tool and the oil brush (dipped in water) to take off the bread bits left behind. The sulfur is very soft, and when we used the hard tools to get the bread off, the sulfur sometimes flaked off (although this was minimal).
- Next, we let the skull soak in a glass jar filled with tap water for 10 minutes.
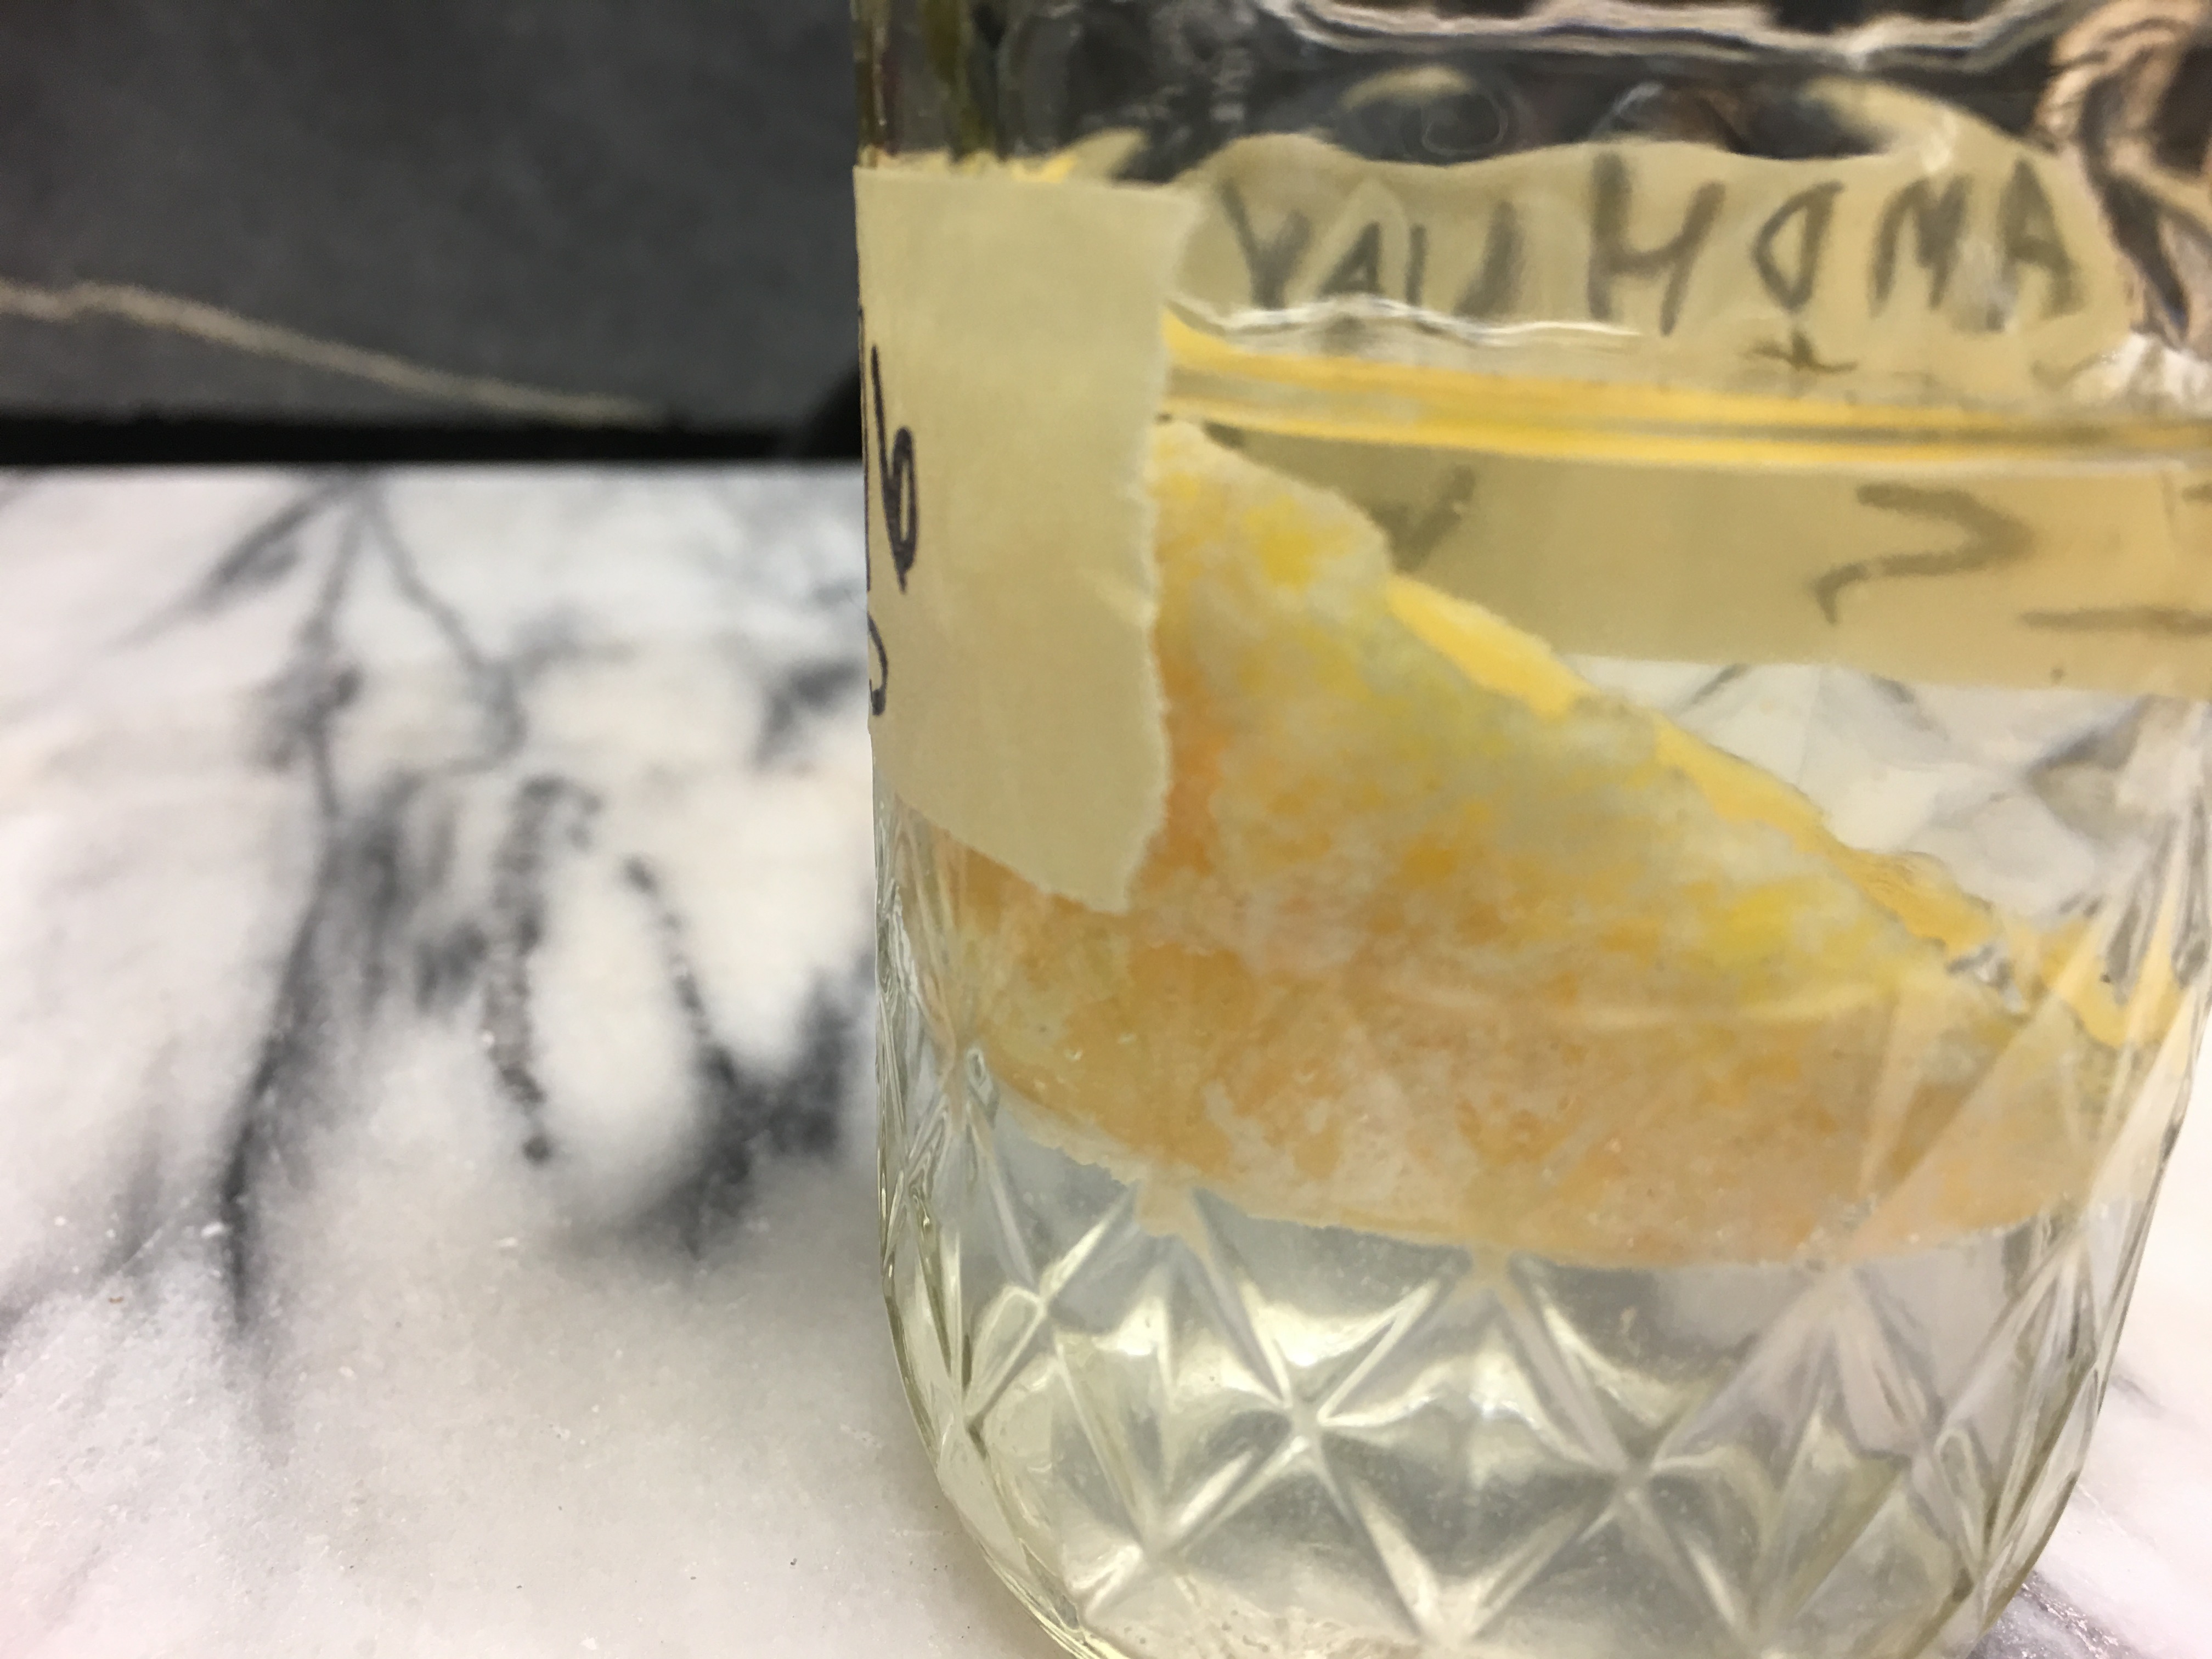
- When we removed the skull, there are still some pieces of bread in the fine details, so we again use the pick/carving tool and oil brush to take the last of it away.
- The sulfur skull was then laid to rest on a paper towel.

Conclusion/Reflections
We agreed that the length of time in between during the molds and getting them out of the bread was probably too long— the bread became moldy and stiff and it was not easy to work with. Since we did not remove the molds with the rest of the class, we would like to learn more about other groups’ experiences who took their molds out sooner to see if the removal of their moods was any different. Also, Dr. Smith remarked that sometimes less translucent wax can show the fine details of the mold better than the wax that we used for this process. We noted that the sulfur skull was fairly bumpy and not quite as detailed as the wax one, but it was harder to see the details on the wax mold from a regular distance (due to its less opaque material).